
Are you looking for an efficient and easy way to join wood pieces together?
With a Dewalt biscuit joiner, you can create joints that are strong, precise, and aesthetically pleasing.
In this step-by-step guide, we'll show you how to use a Dewalt biscuit joiner to achieve perfect joints every time.
So, let's get started and learn how to use this amazing tool!
What Is A Biscuit Joiner?
Before diving into the nitty-gritty, let's briefly examine what a biscuit joiner is.
Essentially, a biscuit joiner is a power tool that cuts a crescent-shaped hole into two pieces of wood that will be joined together.
A wooden "biscuit" is inserted into the hole, and the two pieces of wood are glued together.
The result is a robust and seamless joint that is perfect for a variety of woodworking projects.
Understanding The Components Of ADewalt Biscuit Joiner
The Dewalt Biscuit Joiner comprises several components that work together to create a precise and accurate join. These components include:
- Motor: The motor is the heart of the biscuit joiner. It powers the blade and allows you to cut slots in the wood.
- Blade: The blade is the part of the biscuit joiner that cuts the slots in the wood.
- ON/OFF-switch: Provides a quick and easy way to power up and down the tool, ensuring safety and control during use.
- Lock-on button: This feature allows for continuous operation without needing to press the switch, offering convenience for extended use.
- Top handle: Ergonomically designed for a comfortable grip, it ensures the user has optimal control while operating the joiner.
- Fence height adjuster: This enables users to modify the fence's height, allowing for precise placements and cuts.
- Dust extraction outlet: A vital feature for maintaining a clean workspace, it efficiently removes sawdust and debris during operation.
- Adjustable fence: Allows for flexible alignment and ensures the workpiece is held securely during the joining process.
- Anti-slipping pins: Enhance safety by preventing the workpiece from moving unexpectedly during operation.
- Plunge depth adjusting knob: This lets users set the precise depth at which the joiner will cut, ensuring accuracy for different joint types.
- Locking knob: Secures adjustments made on the tool, ensuring consistent and accurate cuts.
- Spindle lock: Provides stability when changing the blade or making adjustments, ensuring user safety.
- Star knob: Facilitates various adjustments on the tool, making it adaptable to diverse woodworking tasks.
You can learn more about these components by following the user manual.
How To Use A Dewalt Biscuit Joiner?
The Dewalt Biscuit Joiner is popular for woodworkers and DIY enthusiasts.
Here's a step-by-step guide on how to use a Dewalt Biscuit Joiner.
Step 1: Understand The ON/OFF Function
Before using the Dewalt Biscuit Joiner, learn to turn it on and off safely.
Press the ON/OFF switch to start the tool. If you're aiming for continuous operation, press the lock-on button and then release the main switch.
When you need to stop, release the switch, or in continuous mode, briefly tap and release the switch.
Always turn off and unplug after use, and never switch it on or off when the blade touches a workpiece or other materials.
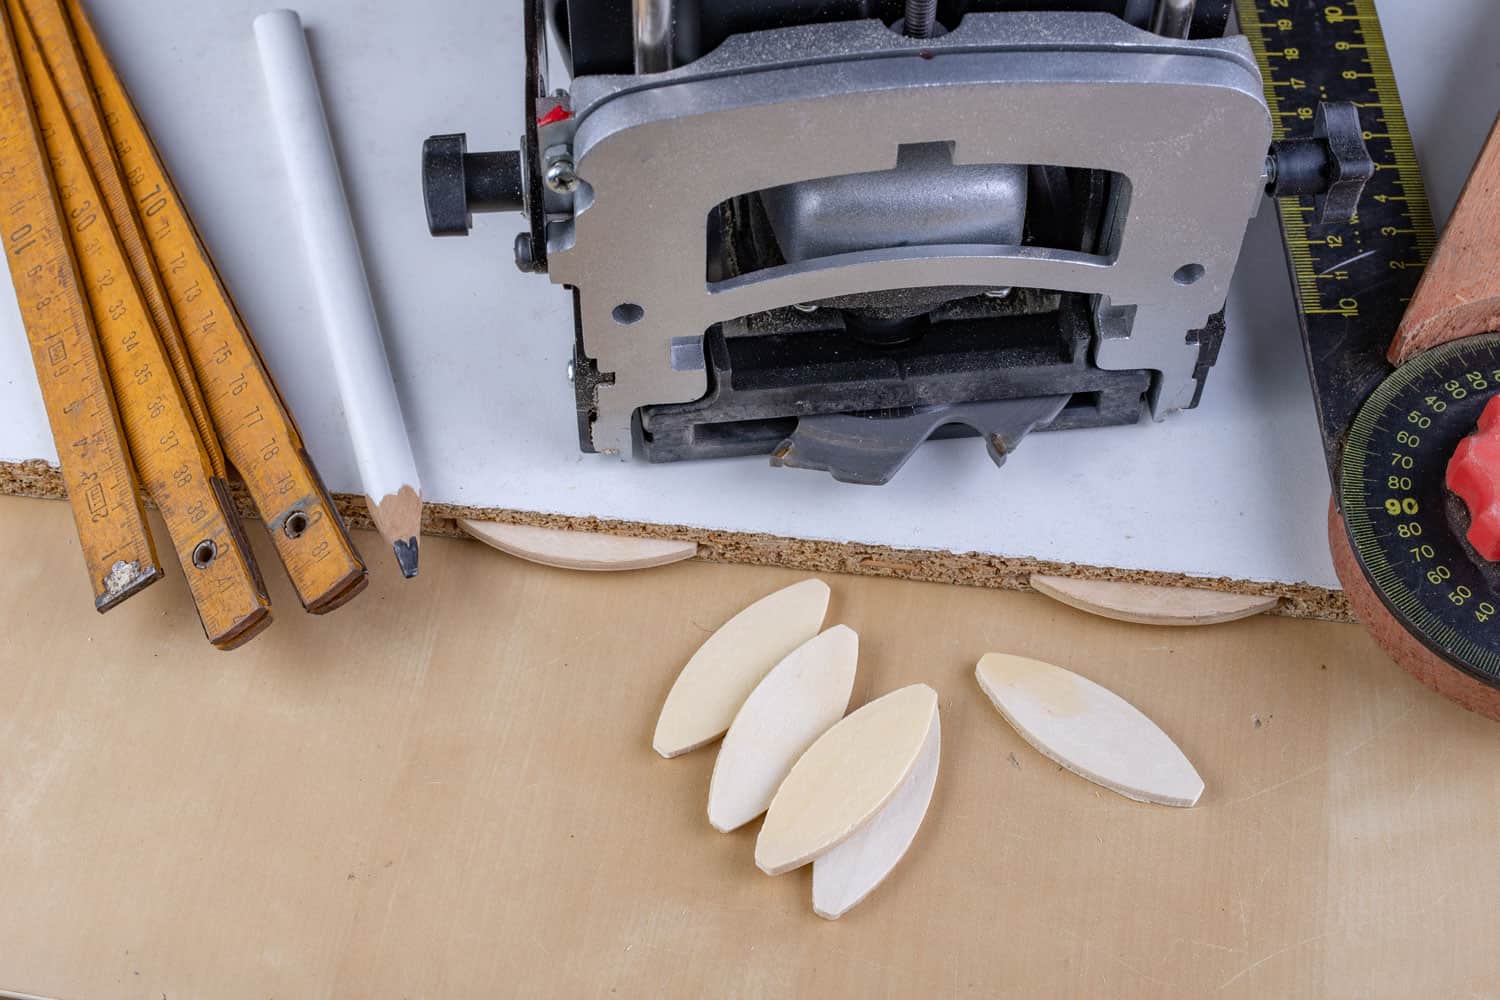
Step 2: Select The Biscuit Size
Biscuits are available in three standard sizes: #0, #10, and #20. Typically, opt for the largest size that your workpiece can handle.
Once you've picked your biscuit size, adjust the plunge depth of the joiner accordingly.
It's a good practice to make a test cut on a scrap piece to check the set plunge depth, adjusting finer if needed.
Step 3: Locate The Biscuits
Biscuits are usually spaced between 15 to 25 cm intervals when crafting edge joints.
Ensuring the outer biscuits are situated 5 to 7.5 cm from the workpiece ends is essential.
For smaller items like picture frames, you may need to trim the exposed biscuit tip after gluing, as even the smallest biscuit might be too large.
Consider using pairs of biscuits to add more strength for thicker workpieces, around 2.5 cm or more.
To efficiently mark where the biscuits will be placed, arrange the pieces as they'll be joined, and use a set square to draw across them.
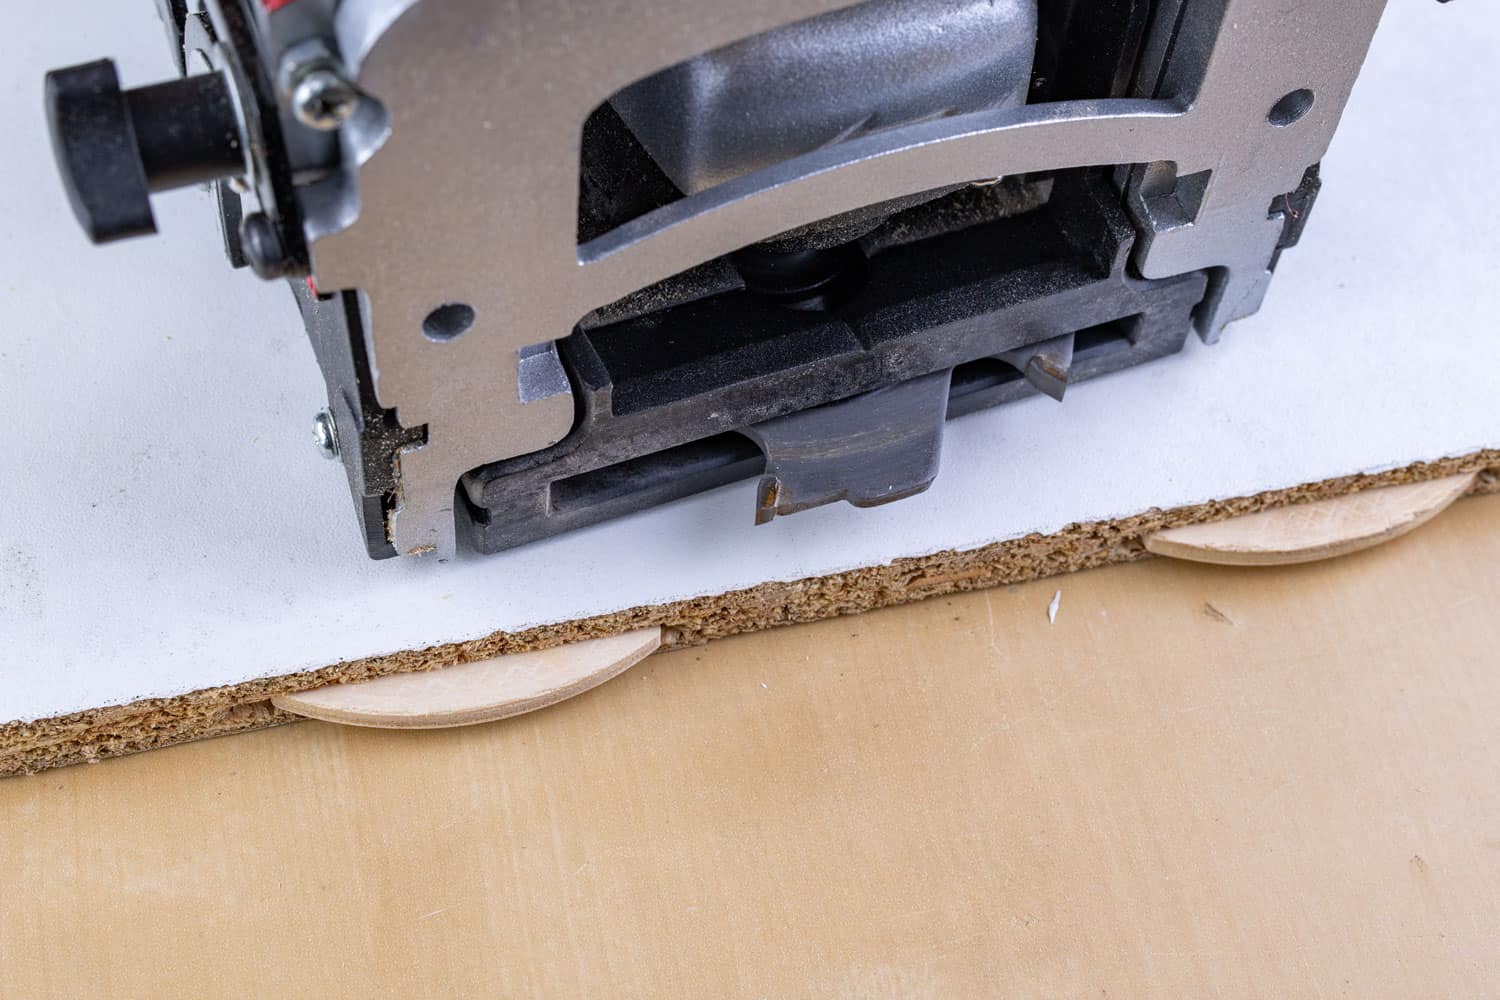
Step 4: Cutt The Biscuit Slots
Adjust the tool settings once you've marked the biscuit locations. Align the tool's center marking with your drawn line.
Turn on the tool, giving it a second to reach full speed, and firmly hold the fence against the workpiece.
Plunge the cutter until the designated stop. After cutting, let the blade retract and then turn off the tool.
Step 5: Join The Pieces
Always dry-fit the pieces before gluing to ensure a snug joint.
When ready, spread your chosen glue evenly in the biscuit slots and the joint's mating surfaces.
Insert biscuits, ensuring they are entirely in contact with the glue, then assemble and clamp the pieces until the adhesive sets.
Watch this short video for a helpful guide.
Specific Join Types You Can Make With Dewalt Biscuit Joiner
The Dewalt Biscuit Joiner is a versatile tool that enables the creation of various joint types.
Below is a concise guide on how to craft some of these joints:
Edge-To-Edge Joints
Lay the workpieces flat, marking biscuit centers at 15 to 25 cm intervals, ensuring the outermost biscuits are 5 to 7.5 cm from the ends.
Set the joiner's fence to 90° and adjust other settings before cutting.
Corner Joints
Organize the pieces into their assembly position. For face cuts, Mark centers clamp the workpiece and align the joiner appropriately before cutting.
Frame Joints
Place the pieces as joined, selecting the biscuit size accordingly. Mark centers, adjust the tool and proceed to cut.
Edge Mitre Joints
Align workpieces, marking the biscuit centers outside or inside based on your design.
Adjust the fence angle and placement to cater to the workpiece thickness, then cut.
Offset Joints
For joining pieces of varying thicknesses, determine which piece will be set back.
Mark centers, adjust the joiner to position the biscuit in the thicker piece's center and cut. For the offset, adjust the fence and cut again.
T-Joints
Lay pieces in an upside-down T arrangement. Mark centers on the shelf, lightly marking its top on the side panel.
Clamp the fence on the side panel aligned with the shelf's end, adjust tool settings, and make both vertical and horizontal cuts at biscuit marks.
Also worth the read: How To Load A Dewalt Nail Gun?
Safety Measures When Using Dewalt Biscuit Joiner
When using a Dewalt Biscuit Joiner, it is important to take safety precautions to avoid accidents or injuries.
Here are some safety measures to keep in mind when using a Dewalt Biscuit Joiner:
- Always wear safety glasses or goggles when using the tool to protect your eyes from flying debris.
- Use earplugs or earmuffs to protect your ears from the loud noise produced by the tool.
- Keep your hands away from the blade and biscuit slot at all times to avoid accidental cuts.
- Never touch the blade or biscuit slot while the tool is still running or immediately after turning it off.
- Keep the tool unplugged when not in use and store it in a safe place out of reach of children.
- Make sure the workpiece is properly secured and supported before using the tool to prevent it from moving or falling.
- Use the tool only for its intended purpose and follow the manufacturer's instructions carefully.
- Do not use the tool if it is damaged or has any missing parts.
Dewalt Biscuit Joiner Maintenance
Proper maintenance is key to keeping your Dewalt Biscuit Joiner in top working condition.
Regular maintenance can help prevent problems and prolong the life of your tool. Here are some tips on how to maintain your Dewalt Biscuit Joiner:
Keep The Tool Clean
After every use, wipe down the tool with a clean cloth to remove any dust or debris. This will help prevent buildup and keep the agency running smoothly.
Lubricate Moving Parts
Regularly lubricate the tool's moving parts, such as the blade and fence, with a lubricating oil or spray.
Doing so will help prevent rust and keep the tool moving smoothly.
Check For Wear and Tear
Regularly inspect the tool for any signs of wear and tear, such as cracks or chips in the blade or fence.
If you notice any damage, replace the part immediately to prevent further damage to the tool.
Related article: How To Use A Dewalt Circular Saw?
How Do I Change The Blade On My Dewalt Biscuit Joiner?
Changing the blade on your Dewalt Biscuit Joiner is a straightforward process. Follow these steps to do it safely and correctly.
- First, ensure your biscuit joiner is unplugged, and the blade stops moving.
- Take out the four Torx screws that hold the base plate. Remove the cover plate once the screws are out to expose the blade area.
- Press the spindle lock button to secure the spindle, then turn the flange counterclockwise to remove it.
- Now that the flange is off, you can easily swap out the old blade for a new one.
- Press the spindle lock again and put the flange back in its place. Turn it clockwise to tighten it securely.
- Put the cover plate back on the base. Use the Torx screws to tighten it back into place.
- Before you finish, make sure the teeth of the new blade point in a counterclockwise direction, as shown in your user manual.
- Lastly, it's a good idea to check and adjust the cutting depth of your new blade. Make any needed changes to ensure it's set correctly.
Why Should I Use Clamps When Working With A Biscuit Joiner?
When working with a biscuit joiner, it's important to use clamps to ensure your wood pieces stay in place while you make your cuts.
Clamping your workpieces will prevent them from moving or shifting during the cutting process, which can cause your biscuits to be misaligned.
Using clamps will also help you maintain consistent pressure on your workpieces, ensuring that your biscuits fit snugly into their slots.
If your workpieces are not clamped down tightly, you may have gaps between your biscuits and your wood, leading to a weak joint.
You might also like: How To Read A Dewalt Serial Number?
Final Thoughts
You've successfully learned how to use a Dewalt biscuit joiner.
With this tool, you can create strong, precise, professional-looking joints in your woodworking projects.
Always prioritize safety and follow the manufacturer's instructions when using the tool.
Use the appropriate blade, biscuit size, and depth settings for the wood you're working with.
Once you've mastered the basic techniques, you can experiment with different types of joints to take your woodworking skills to the next level.
You can create beautiful and functional pieces that will last a lifetime with practice and patience.