
You might be looking to improve garage storage capacity or hang a bike rack from the ceiling. Whatever your end goal is, you need to find the ceiling joists in your garage. But exactly how do you go about finding the ceiling joists in a garage? We've put together some of the best methods for doing so.
To find the ceiling joists in your garage, try the following methods. For many projects, a combination of multiple methods will produce the most accurate results:
- Tap Test
- Stud Finder
- Thin Nail Test
- Tape Measure Technique
- Attic Investigation
Keep reading the rest of this post to get step by step instructions on each method. The method that is most appropriate for you will depend on the construction of your garage ceiling, the specifics of your task, and your experience with carpentry. We'll also provide answers to several related questions that might help you with your garage project.
![Well-organized clean car residential garage, How To Find Ceiling Joists In A Garage? [5 Ways]](https://uooz.com/wp-content/uploads/2020/12/How-To-Find-Ceiling-Joists-In-A-Garage.png)
How To Find Garage Ceiling Joists
Finding ceiling joists accurately can be critical for safely installing garage additions. It is important that you locate the center of the joist if the project will bear any weight. If you attach your shelves or bike rack to just the edge of the joist, it may fail.
1. Tap Test
The tap test is the tried and true method most handymen and carpenters will recommend first. Simply tap the ceiling with a hammer or other hard, heavy object - and listen. When you tap between a joist, the sound should be hollow like a drum. When you tap a joist, the sound will be more like a dull thump.

Click here for this hammer on Amazon.
With experience, this technique can reliably identify your joist centers. However, even those who have worked in the industry for years sometimes find it difficult to discern audible differences between taps. This difficulty can be compounded by the construction above your ceiling.
For a cavernous garage attic, the hollow sounds can be very distinct. However, for a well-insulated or small space, the hollow sound can be much more difficult to identify. Also, sometimes joists bend away or are slightly lifted from your ceiling cladding.
But do not worry, if you find yourself up on a ladder tapping away at your ceiling and no closer to knowing where your joists are, there are several other techniques that will help you out.
2. Stud Finder
No, these tools are not for pointing at yourself and saying, "Well, found one," but instead are handy ways to locate construction studs and joists. Studs and joists are both framing materials. Studs run vertically while joists run horizontally. There are a few different types of stud finders but the most common use the dielectric constant or permeability/density of a location to detect the framing.
Simply run the stud finder across the ceiling and it will light up when you are over a joist. To verify that the device is working properly, continue across the ceiling to find the next joist. These two joists should be about 16 inches or 24 inches apart. Also, it is smart to make a mark with a pencil when you have found a stud and then reuse the stud finder to ensure it provides a consistent location.
A handy part of stud finders is that they will begin to light up as soon as the device is over a joist and will stop lighting up when you pass that joist. In this way, you can get an exact understanding of where the joist starts and ends. This is critical information if you are trying to install shelves or other projects that might be weight-bearing.

Click here for a stud finder on Amazon.
3. Thin Nail Test
This test is a great way to verify the tap test or the stud finder. Once you think you have located a joist, take a thin smooth finish nail and lightly drive it through your drywall. If you have correctly located the joist, you will feel the resistance of the framing wood. If you are incorrect, your nail will move very freely after it passes the drywall.
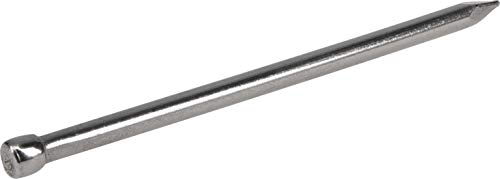
Click here for smooth finish nails on Amazon.
This test is great because if you are going to attach a heavy item to your garage ceiling joists, you will likely use a much more heavy-duty fastener than a thin finish nail. So, once you have verified your stud location, you can reuse the hole for your end goal. Also, finish nails make very small holes which are generally unnoticeable in a garage ceiling if you do miss the joist a few times.
4. Tape Measure Technique
Most garage joists are installed in a particular schedule. This means they are all a consistent distance apart. Usually, the schedule is every 16 inches or 24 inches. With this knowledge, you can measure out from the wall to get a good starting point for finding your joist.

Click here to see this tape measure on Amazon.
Also, once you have verified the location of two consecutive joists, to get the schedule, you can use your tape measure and a pencil to lay out all the joists across the entire ceiling. Large scale joist layout is handy information if you need to locate many joists over a wide area.
Be careful, however, as there are a variety of reasons why some joists may be slightly off the schedule. These include framing around openings, the last joist in the run is next to one of the walls, a construction error, an addition, and more. So for critical weight-bearing joists, always verify their location with one of the above tests.
5. Attic Investigation
If you have access to your garage attic, it can save time to take a peek up there first. Taking a look will give you a general idea of the direction and location of the joists. You can even take a small nail and hammer up there so you can poke a hole right next to a joist. Then once you are in your garage you'll know right where to start.
On the topic of attics, check out our post, "Is The Attic Considered A Story?"
What If You Can’t Find The Ceiling Joist?
In some cases, all of the above techniques will fail you. The tap test sounds the same, the stud finder isn't working, and there is no attic to access. At this point, you can always try using the thin nail test with a guess-and-check approach. The downside of this is that you will leave many unsightly little holes in your garage ceiling. Here is a post that will help you fix those holes.
If you still cannot find your ceiling joists, you can try cutting a hole into your drywall. You can always start small and get progressively larger. Be careful because this might drop down insulation, and there are electric wires up there.
Also, cutting a hole in your ceiling will require some drywall repair later. While invasive, cutting a large enough hole to stick your head or upper body into should give you a pretty good idea of where the joists are and/or why you can't find them.
Remember, sometimes garages do not have joists but instead have a false ceiling that separates the ceiling you see from the actual structural framing. This could mean you will have to abandon your project or find another way to support ceiling area weight.
What Are Ceiling Joists Made Of?
Ceiling joists are almost always made of some type of framing wood, usually pine. For garage ceilings, the wood size is usually 2 x 4, 2 x 6, or 2 x 8. This type of wood combines affordability with strength and just the right of flexibility to be easy to work with. Sometimes, joists can be made of metal but this is very rare for residential construction.
How Much Weight Can A Ceiling Joist Hold?
Generally speaking, a ceiling joist can support about 50 pounds per square foot. You can improve the weight that shelves or a hook hold by spreading the load out over many joists and across a larger area. This number is a general rule and can vary higher and lower, depending on your garage size and construction.
Keep an eye on your ceiling as you load it with weight. Usually, it will start to sag before it fails. If you see sagging, back the weight off immediately. A failed garage ceiling can end up requiring a lot of work (and money).
Can You Move Ceiling Joists?
It is possible to move ceiling joists. This requires a relatively complicated process, can easily damage drywall, and will compromise the strength of your ceiling. Moving joists is therefore not recommended unless necessary. And be sure to do your research first.
Rather, you can add blocking or scab a long piece of framing material alongside existing joists. This uses the existing strength of the framing to add more locations to attach shelves or hooks to.
In Closing
This post covers everything that you need to know to find the ceiling joists in your garage. Whether you are hanging a new set of shelves, a bike rack, or making a climbing wall, you should now be good to go. Good luck!