
Mudding or drywall finishing is a process to smooth out the surface to prepare it for painting. You may have a freshly drywalled ceiling that you are preparing to paint and need to know how to prepare it. We have completed the research and will talk about the best ways to prepare your surfaces for painting or wallpapering.
Here are the necessary steps for how to mud a ceiling:
- Gather tools and set up a workspace.
- Follow the manufacturer's instructions when combining the compound.
- Apply the mud in the indentations and seams.
- Bed the mud by applying paper tape over the mud and working out the bubbles. Remove the excess as you go.
- Tape the inside corners.
- Mud the butt joints.
- Let each coat dry for 24-hours, unless the manufacture says otherwise.
- Apply the next coat over the top of the first coat for seams and nails. For butt joints, apply next to the original coat on both sides. Feather out the edges as you go. Do not apply any more tape. Wipe away excess.
- Allow to dry completely and then sand smooth.
- You are ready to paint.
For more information on each step, please keep reading. We'll also explain how to fix an uneven seam, sand, speed up drying time, and repair if the mud cracks.
![Man mudding and taping sheetrock on a home addition job, How To Mud A Ceiling? [10 Steps]](https://uooz.com/wp-content/uploads/2020/10/How-To-Mud-A-Ceiling.jpg)
Gathering Tools and Setting-Up
It always helps to prepare before starting your project. So, gather your tools and materials. Below are the items you will need for a successful project:
- Goggles
- Respirator (to use while sanding)
- Old clothes
- Canvas drop cloth
- Ladder
- Drywall knives
- Tape
- Joint compound
- Drill with a paddle bit
- Bucket or pan
Preparing To Mud The Ceiling
Mudding is messy. Cover exposed surfaces (the floor and furniture) with a canvas drop cloth for protection. Please do not use a plastic covering as it will become very slippery. Don't forget to dress in work clothes that you won't mind getting dirty. Wear personal protective equipment, goggles for your eyes, as you will be working above your head.
Click here to see this drop cloth on Amazon.
Mix the powdered setting mud using a heavy-duty drill fitted with a paddle bit to stir until the mixture is smooth. Alternatively, you can purchase a premixed compound and simply open the lid when ready to get started.
Click here to see this compound on Amazon.
Applying Mud To The Ceiling
Smooth The Wall
Apply the first coat of mud, beginning with any indentations and joints. Where the drywall connects, there is a small indentation that is usually about 2-inches wide. Use a 6-inch taping knife to work the mud evenly into the joint. Fill the entire indentation and wipe away any excess mud. The purpose of this step is the glue to hold down the tape that connects the sheets of drywall and smooths over blemishes.
This 6-inch joint knife is flexible and will help get into those corners and grooves.
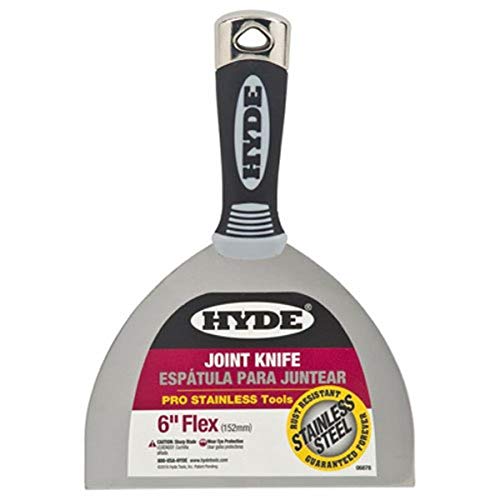
Click here to view this knife on Amazon.
Bedding process
Cover the still wet mud with a cut piece of paper tape. Work out the bubbles by smoothing the paper onto the wet mud, wipe off excess mud as you go.
Tape Inside Corners
Apply a coat of mud to both sides of inner corners and work the mud to the corner's center. Precrease the paper tape by folding it, then cut, fold, and fit it in the wet compound corner. With light stroking movements, bed the tape. Do not dislodge the tape from the center. Wipe away excess mud.
You can use a 6-inch taping knife like the one below or an inside-corner taping tool with a preformed 90-shape for effortless bedding.

Click here to see this taping tool on Amazon.
Mud Butt Joints
Butt joints are created when the ends of the drywall panels are fitted together. Use only enough mud to fill the gap and bed the tape. Check out the video below for a tutorial:
Drying
Allow 24-hours for drying before moving on to each additional coat.
Second Coat
Once the mud dries, apply another thin layer of compound to the same places and work in the same order as the first mudding application. Do not add more tape and wipe away any excess.
When you get to the butt joints, use extra care. Instead of going over the original application, you will need to apply an 8-inch wide swath of mud with a 10-inch knife to smooth out the seam. Use feathery motions to smooth out the edges of the swaths.
Third And Final Coat
After 24-hours, when the second coat has dried, apply a light coat of mud using a 10-inch knife for all indentations, seams, and corners. On butt joints, apply a thin coat of mud over the original mud joint and the prior swaths. The mud swath on the butt joint can end up being up to 2-feet or wider.
Make sure to feather out the edges to create a smoother surface. Let the mud dry.
Smooth it all out
Wear your respirator mask and goggles before sanding.

Click here to see this Respirator on Amazon.
Sand until the joints and indentations are perfectly smooth. You are now ready to paint or apply wallpaper. The best tool to use is a drywall pole sander.

Click here to view this sander on Amazon.
Here's a video tutorial for you to learn how to use a drywall pole sander:
Sanding Between Coats
Do your best to minimize any bumps as you apply mud. If you find lumps, sand enough to remove them. Don't worry about getting the ceiling perfectly smooth at this time as there will be a final sanding after all the taping and mudding is finished.
How To Mud An Uneven Ceiling
Add a thicker third layer of compound to the uneven joint after the first two coats have dried. Spread from the high side to the uneven joint's low side, apply more compound to the lower side to blend it in with the high side.
How Long Does It Take To Mud A Ceiling?
The application doesn't take long. Depending on the number of seams and joints, you can mud and tape within a few hours. Waiting for each coat to dry is up to 24-hours per coat, which means that mudding the ceiling can take about three to four days. There can be shortcuts to this time based on thickness and temperature. Make sure to review the product instructions to see their recommendations.
Hasten the Drying Time
The first coat will take the longest as it's filling crevices and is the thickest. Once this coat is dry, go thin on the remaining coats to reduce time. You can also raise the temperature in the room and use a dehumidifier.
Increase air circulation. If it's not humid outside, open up the windows and let the airflow. Do not open the windows if the outside air is humid.
Hot mud is a compound that you can use for time-sensitive projects. It is a light powdery substance that is mixed with water and sets like plaster. It dries in between 20- and 60-minutes. This drying time does not allow time to fix errors.
What Is Taping And Mudding?
In the building trade, taping and mudding is another term for finishing drywall before painting, texturing, or wallpapering. This process uses mud to even out blemishes and joints, add tape, and then more mud to smooth out the surface.
What Is The Difference Between Joint Compound And Spackle?
Joint compound is used to cover seams and small blemishes such as screw holes or corners. Spackle is normally used to cover bigger holes.
How Many Coats Of Drywall Mud Do I need?
You will need one coat to fill the seams, and apply two to three more coats that will be needed after taping. If you have cracks or textured areas, you may need more coats of drywall mud.
Why Does Drywall Mud Crack?
When drywall mud dries too quickly or is too thick, it can crack. Don't try to remove the compound and start over. Once it has dried, it can be patched.
Fix a Compound Crack
- After the mud has dried completely, sand the area with fine-grit sandpaper and remove as much loose mud as you can. Wipe the area with a dry cloth.
- Fill the crack with mud, then put a light coat over the area.
- Cut the drywall tape a bit longer than the freshly mudded area on both sides. Push the tape into the mud, smooth away bubbles, and smooth the tape flat against the wall.
- After the mud and tape have dried, apply a second coat of mud over the tape.
- Smooth the mud, feathering it outwards from the patch until smooth with the wall.
- Let the mud dry.
- Sand the patched spots smooth with the surface.
A Quick Run-Through
We talked about applying joint compound or mud to the ceiling and how to use tape to create a seamless finish so that paint or wallpaper can be applied without any lumps. We hope you enjoyed the extra steps on how to smooth out an uneven ceiling along with how to fix any cracks that may appear.
If you would like to learn more, read these following posts on our blog:
How to Not Get Paint on the Ceiling
Why is the Ceiling Bubbling when I paint it?