Carpeting doesn’t always line up with your baseboards, resulting in unappealing gaps that need to be filled. Since these features run throughout the home, they can seriously affect your airflow and interior design. So, we have carefully researched how to fill a gap between your carpet and baseboards correctly.
There are three popular methods for filling the gaps between your baseboards and the carpet. You will have to consider your budget, home improvement skills, and design priority to find the ideal approach for you:
- Silicone Caulk
- Shoe Molding and Quarter Rounds
- Expanding Foam
Gaps that run along the base of all your walls can look very off-putting, and it may even allow unwelcome drafts to sneak inside. Keep reading to learn how to apply the best methods for covering this gap and how to install and paint your baseboards properly.

Silicone Caulk
Click here to see this silicone caulk on Amazon.
Caulk is a common sealant for joints that need to be waterproofed. And since caulk can also be airtight, it is an ideal solution for small gaps. Silicone caulk is a more flexible version of this joint sealer and is often considered to be more durable. However, it will usually take longer to fully cure.
There are a few simple steps if you decide to use silicone caulk for the gap between your carpet and baseboards.

Step One - Measure Your Gap
It is always important to remember that caulk can only be used to cover gaps that measure a quarter of an inch wide. If your gap measures wider or deeper than that, you may have to add a foam backer rod underneath.
Foam backer rods are long foam tubes that will help fill in excess space. This way, you won’t have to fill up all of your gaps with gallons of caulk. The backer rod will also make sure the caulk will connect with either side of the opening more effectively. This will ensure the bond is sturdy and lasting.
Step Two - Prepare the Caulking Gun
Click here to find this caulking gun on Amazon.
If you plan on caulking all of the baseboards in your home, you should purchase a caulking gun to save a lot of time and effort. But you can read our post “What Can I Use Instead Of A Caulking Gun? [4 Alternatives Explored]” for other great options.
Caulk is usually sold in squeeze tubes. These typically have a nozzle that must be cut open at a forty-five-degree angle before use. Others require you to puncture the center of the nozzle.
Fortunately, some caulk guns are designed to chop off the nozzle for you. Most of the time, you can insert the caulk tube into the handle of the caulk gun and squeeze the trigger.
This will cut the caulk tube at the proper angle. Other caulk guns have a needle built-in, which can help you puncture the center of the nozzle.
Next, you can attach the prepared caulk tube directly onto the caulk gun. The tool will then allow you to pull a large trigger. This pushes a pump onto the tube and evenly distributes the caulk in a tidy bead. You will have more control over the caulk, and it will take less work to apply.
Step Three - Apply the Caulk
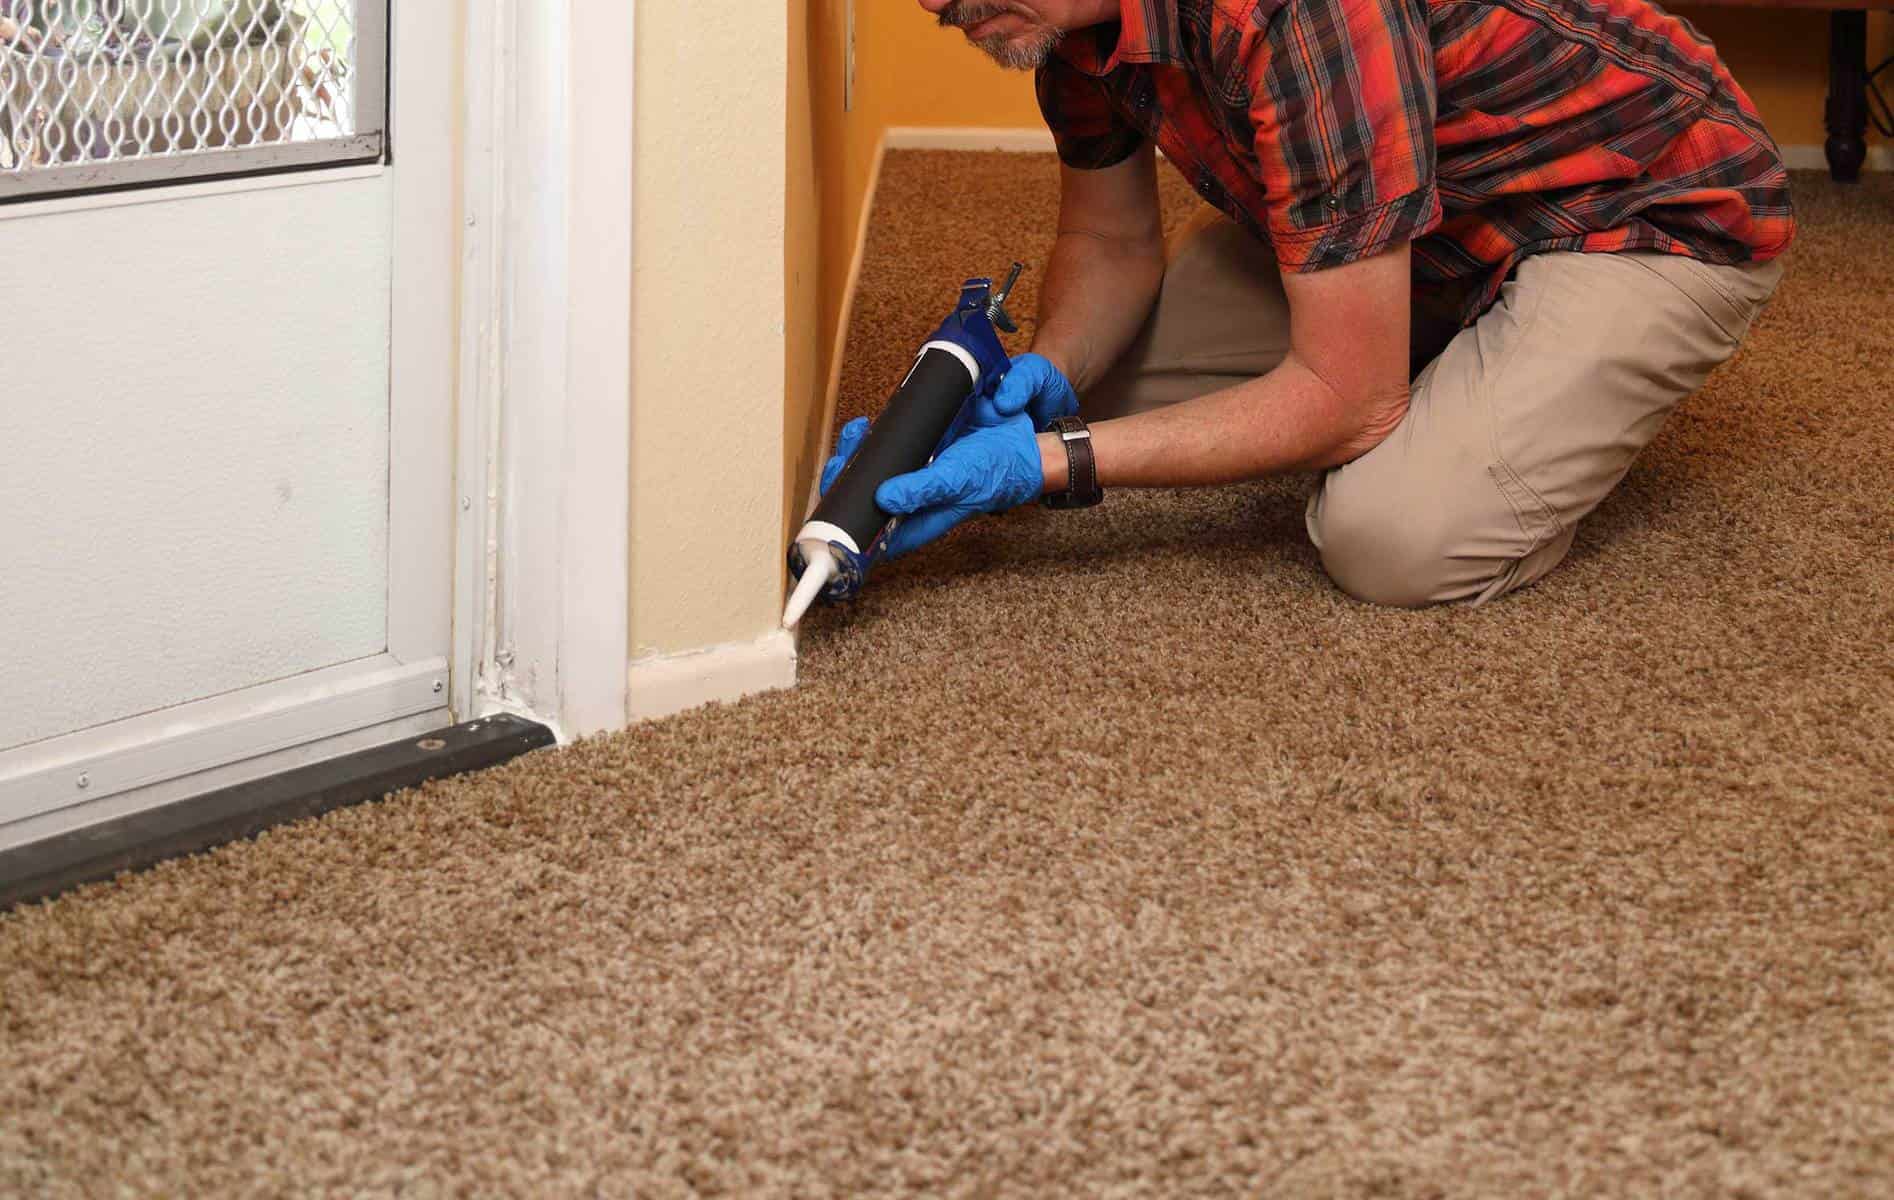
Slowly squeeze the caulking gun trigger at a forty-five-degree angle. Run a single line of caulk across the gap between your carpet and baseboards. Do not stop distributing caulk until the entire gap is completed. This will result in an uneven look.
If you reach the end of the caulk tube, you may have to squeeze harder to make sure you are applying the same amount of caulk as you go.
Step Four - Tool the Caulk
Click here to find this silicone finishing tool on Amazon.
After the line of caulk is finished, you will have to smooth out the line. You can simply dip your finger in some water and soap, then slide it across the silicone. However, there are also finishing tools that can create a more professional look.
Is all silicone clear?
Although silicone caulk is usually sold with a clear look, it can also be found in neutral “colors” such as white or black. You may also find it in the near-neutral brown.
However, you cannot paint directly onto silicone without a special primer. So keep that in mind if the silicone would conflict with the look of your baseboards.
Shoe Molding and Quarter Rounds

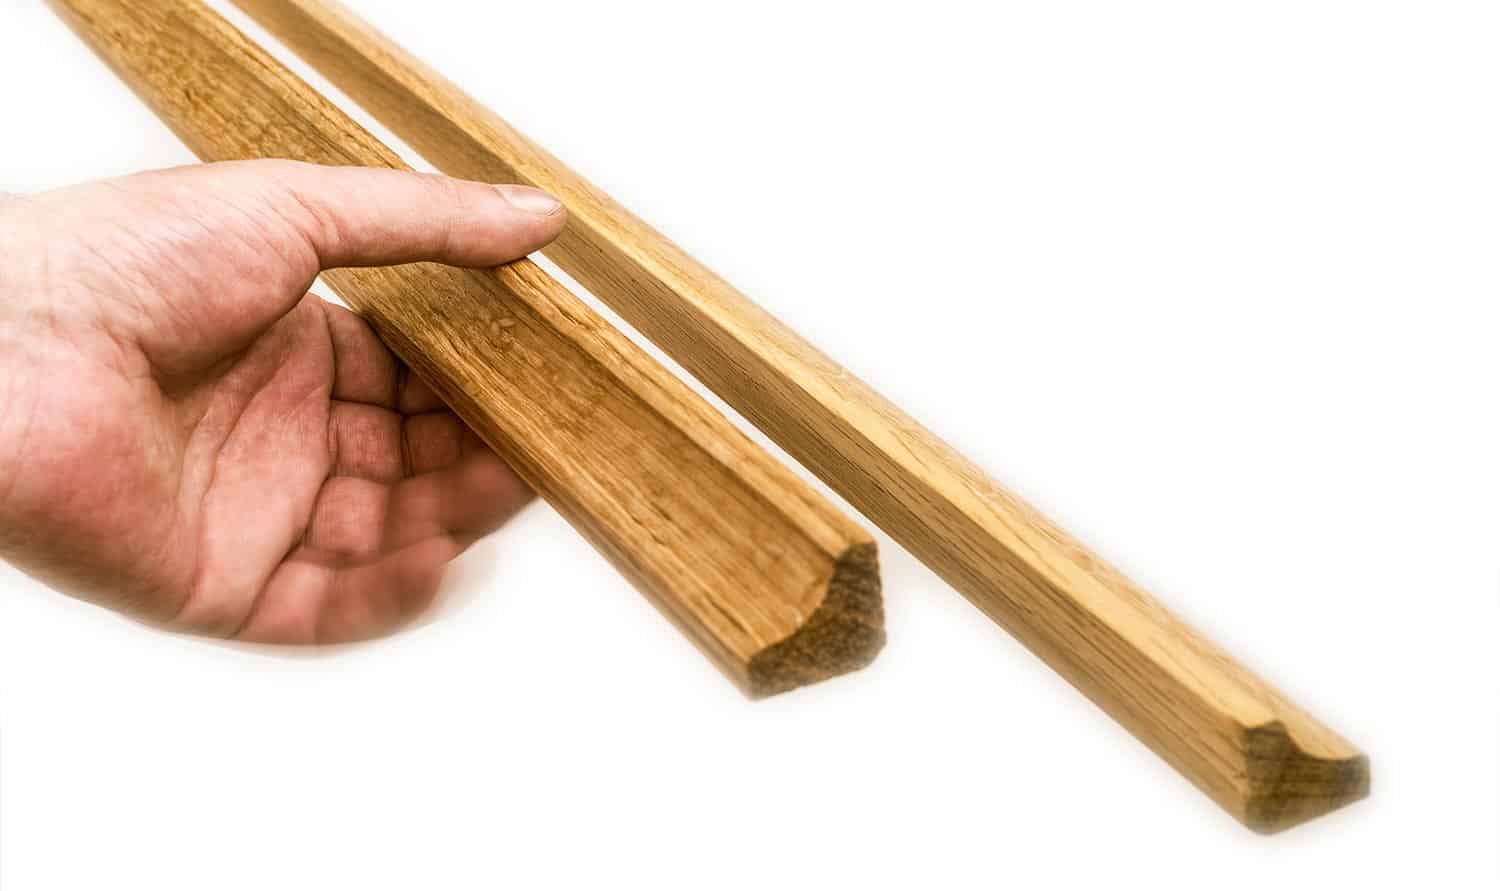
Baseboards aren’t the only trim you can use along the feet of your walls. Shoe moldings and quarter rounds are both additional wooden strips that can be attached to baseboards. Home Depot agrees they are often considered part of the baseboards.
This will add more width to your baseboards, so they can each cover up a gap between your carpet and baseboards. But it will also be more expensive and time-consuming than using a sealant.
Shoe moldings are sometimes known as base shoes because they can be shaped to complement the feet of any baseboard.
Quarter rounds are smaller than shoe moldings so that they can fit right on top of them. Also, quarter rounds are only found in the shape of a quarter circle.
Click here to see this brad nailer on Amazon.
You will need to use a brad nailer to install shoe moldings or quarter rounds. That’s because brad nails are much smaller and thinner.
This will help prevent splitting the wood because shoe moldings and quarter rounds can be much thinner than baseboards. Also, brad nails are more likely to go unnoticed.
Do not nail your new trim to the floor. Instead, use the brad nailer to attach your new trim directly into the baseboard. You should keep around twelve inches between each nail.
You can check out our post “Can You Use A Brad Nailer For Baseboards?” for more details on the benefits of a brad nailer and how to use it correctly.
Expanding Foam
Click here to find this expanding foam on Amazon.
Also known as spray foam, this filler is more ideal for utility. It is highly effective at blocking airflow and can fill much larger gaps. Some expanding foam can even fill three-inch gaps.
Spray foam is usually sold in a can with a nozzle. You should wear gloves and eye protection before application. First, you need to gently twist the nozzle into the can, taking care not to twist too far.
Then, shake the can as long as the manufacturer suggests. You will be able to insert the nozzle midway into your gap and smoothly distribute the foam.
The foam will expand and harden, so do not apply the foam near the surface of your gap. Once the foam is set, you will need to trim off any excess that hardened above the surface. A serrated blade will make the job much easier and safer for the surroundings.
What goes first, baseboard or carpet?

Either one can be installed first, and whichever one goes second will face difficulties. Carpeting will often go first to establish how high the baseboards will need to be installed.
Most of the time, baseboards are specifically used to hide the edges of your carpet. It also secures them, preventing the carpet from getting pulled out. Also, you may not want your brand new baseboards to be damaged by the carpet installation.
It’s less common for baseboards to be installed before a new carpet. But they need to be nailed directly into the wall instead of the floor.
It can be challenging to get the correct angle for that, with a carpet and its tack strips in the way. You can always leave enough space beneath the baseboards for your carpet if you install the baseboards first.
How far should the baseboard be off the floor for carpet?
Different carpets have various types of thickness and “pile,” which is the style and shape of the fibers. You can use this measurement to decide how high your particular baseboard should be. However, a safe bet is usually between three-eighths of an inch and a full inch.
Should the baseboard match flooring or walls?

The baseboard is secured directly into the walls, so it should match the walls instead of the floor. Baseboards are not just décor. They are also designed to protect the walls from damage.
This may include scrapes from moving furniture or missteps. As such, you should be able to distinguish the baseboards from the floor clearly.
Otherwise, you won’t notice where the wall begins, resulting in damage. This would directly compromise the point of installing baseboards.
Summary
Carpeting and baseboards are both essential throughout the home. And since both can be challenging to install, it can be important to cover up any unwanted gaps that could ruin your hard work. You know how to correctly fill gaps between the carpet and baseboards using caulk, additional trim, or expanding foam.


