
If you’re considering renovations to an older home, you’re probably wondering how to cover popcorn ceilings. We have researched this extensively to discover all of the options for dealing with the ubiquitous textured ceilings that were so popular in houses built from the 1950s to the early 2000s.
There are several options for covering a popcorn ceiling, and the right choice for you depends on your budget and skills. Skim coating is one of the cheapest and best ways to cover a popcorn ceiling. To skim coat over a popcorn ceiling, follow these steps:
- Prepare the area and mix the joint compound.
- Apply the first layer of joint compound.
- Scrape down any high marks with a putty knife.
- Apply the second layer of joint compound.
- Paint the ceiling or apply a new texture.
While it may seem complicated to cover a popcorn ceiling, we’ve broken it down into simple steps for you. Read on for more details as well as to find out other methods of covering your ceiling.
![Mature Adult Female Painting Popcorn Ceiling White With Paint Roller;How to Cover Popcorn Ceiling? [5 Steps]](https://uooz.com/wp-content/uploads/2020/10/How-to-Cover-Popcorn-Ceiling-5-Steps.jpg)
How to Cover Popcorn Ceiling
https://www.istockphoto.com/photo/new-house-interior-renovation-gm613755814-105996451
Before getting started, there are several materials you should gather to be prepared for this DIY project. Have a look at the materials list, and don't worry if you need something because we've got great recommendations for you as we cover each step in-depth.
Materials Needed
- Ladder
- Dropcloths
- Painter’s tape
- Drill with paddle mixer attachment
- All-purpose premixed joint compound
- Extra bucket
- Mud pan
- Drywall taping knife
- Putty knife
1. Prepare the Area and Mix the Joint Compound
Skim coating can be a messy process, so remove all the furniture from the room and cover the floors with a dropcloth. Though you will use a premixed joint compound, you’ll still need to thin it out a little and mix it up. To mix the compound, transfer about ¼ of the joint compound to an extra bucket and add a small amount of water, about ½ cup, to start. Mix it with the paint mixer until it’s the consistency of thick yogurt, adding more water if needed.
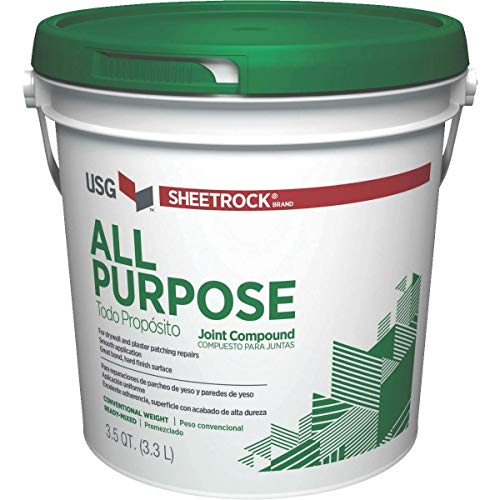
Click here to see this joint compound on Amazon.
2. Apply the First Layer of Joint Compound
Put the joint compound into a mud pan and use your 14-inch drywall taping knife to scoop up the joint compound. Place the mud on the ceiling and scrape across with the taping knife. If you’ve never done any skim coating, it’s worth taking the time to practice on a scrap board to get the technique right before you do it on your ceiling.

Click here to see this taping knife on Amazon.
Here’s a great YouTube tutorial explaining the technique:
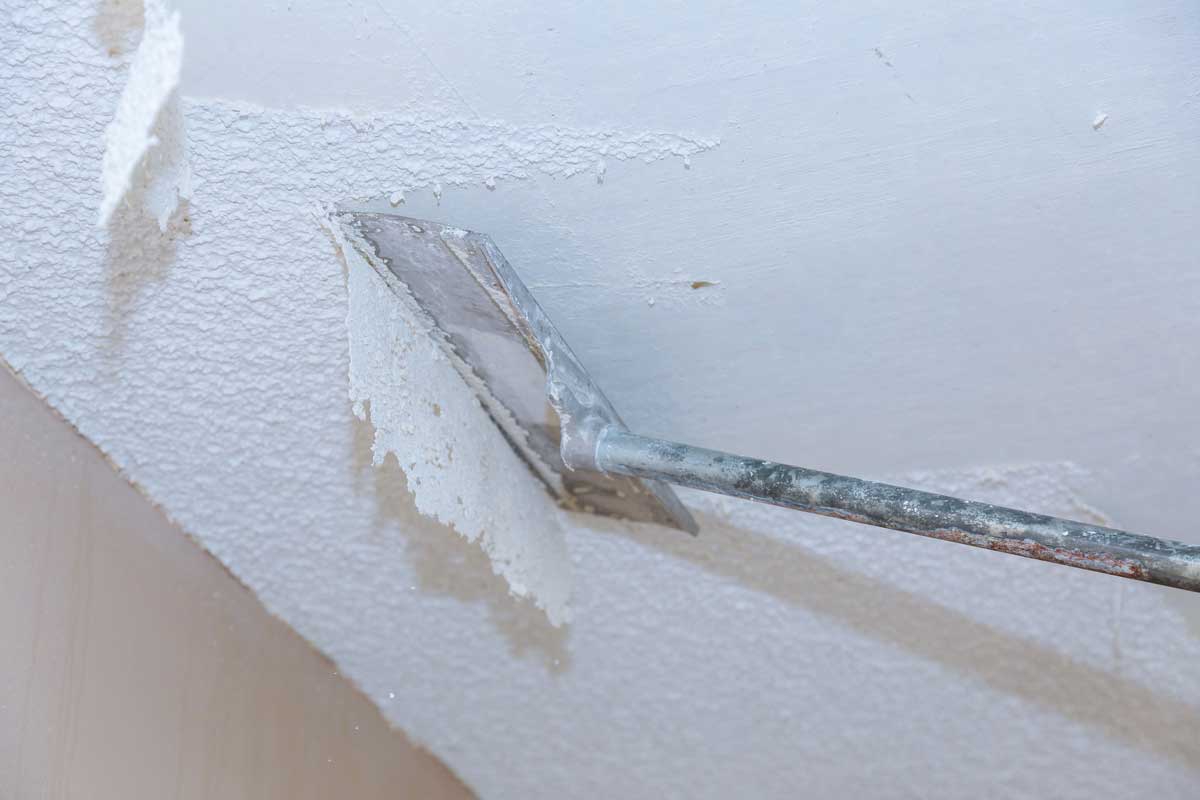
3. Scrape Down Any High Marks With a Putty Knife
After the first coat has dried for 24 hours, use a 6-inch putty knife to scrape down any high marks. This will save you from having to sand and deal with joint compound dust all over your house. It won’t be perfect, but the next coat will help smooth things out even more.

Click here to see this putty knife on Amazon.
4. Apply the Second Layer of Joint Compound
Following the same steps as when you applied the first coat, apply a second coat of joint compound. Make sure to keep the mud to one side of the knife to avoid thick spots where it overlaps your previous strokes.
5. Paint the Ceiling or Apply a New Texture
Once your second mud layer has dried, the ceiling should be pretty smooth. You can lightly sand or scrape any rough spots. At this point, you have several options. If the ceiling isn’t smooth enough to suit you, either because you haven’t mastered the technique or your texture was extremely heavy, you can apply another coat of joint compound with a roller and a squeegee trowel.

Click here to check out this squeegee trowel on Amazon.
If your ceiling is smooth enough, you can simply paint it and be done. If you’d like another texture, such as a skip trowel or stomp texture, you can apply it now.

Click here to see this ceiling paint on Amazon.
Can I Paint Over a Popcorn Ceiling?
If the texture doesn’t bother you, but you want a new look for your ceiling, painting is a great option. You’ll need to use a segmented foam roller designed for this purpose. These rollers won’t crush the texture but will paint in all of the little nooks and crannies.

Click here to see this roller on Amazon.
Is it Better to Remove a Popcorn Ceiling?
Besides being time-consuming and messy, removing a popcorn ceiling can be dangerous if it has asbestos in it. Many popcorn ceiling textures installed before 1980 contain asbestos, causing lung cancer if you inhale the dust during the removal process.
Some popcorn ceilings that have been painted over may simply be impossible to remove, so the best option is to cover or demolish. In most cases, it’s better to cover a popcorn ceiling than to try to remove it.
How Much Does it Cost to Cover a Popcorn Ceiling?
The cost to cover a popcorn ceiling will vary dramatically depending on whether you do it yourself or hire professionals. If you’re an experienced DIY-er who already has the tools, a ceiling can be covered for little more than the cost of fresh joint compound, usually around $25 per gallon bucket.
If you want to hire a professional, expect to pay around $1.00 per square foot for a skim coat. You’ll pay more to have it painted or have another texture applied.
Why Was Popcorn Ceiling Ever a Thing?
Like all trends that have past their time, popcorn ceilings get a lot of distaste these days. However, they would never have been so popular if they didn’t serve a purpose. Popcorn ceilings hide imperfections in drywall. They are easier to apply, cutting the cost of labor when building a house. They also help deaden the noise in a room.
Other Ways to Cover a Popcorn Ceiling
If skim coating sounds too time-consuming and complicated or you don’t care for smooth ceilings, there are several other options for covering popcorn ceilings.
Ceiling Tiles
Ceiling tiles are a great option for covering popcorn ceilings if you’re worried about mastering the skim coat technique. Though you’ll have to carefully plan the layout, including light fixtures and room transitions, installing them is a fairly simple process.
First, you clean your ceiling and wipe down the back of the tile with alcohol. Then apply an adhesive and fit them to the ceiling. You may need thicker tiles to cover heavy popcorn ceilings. Most ceiling tiles, although expensive, can be cut with a utility knife or scissors so that you won't need special tools or skills.

Click here to check out ceiling tiles on Amazon.
Wooden Planks
For homes with a cottage or farmhouse aesthetic, wooden planks may be the best option. These are more costly than skim coating and more work than ceiling tiles, but the result is beautiful.
The easiest way to plank a ceiling is to apply your finish to your planks before installing them. It takes much less effort to paint or stain planks on a workbench than on a ceiling. Once you’ve finished them, start in one corner of the room and adhere the planks in the direction that goes across your ceiling joists.
Apply an adhesive to the back of the plank and then nail it onto the ceiling joist. Continue doing this until you reach the end of the row. Start the next row with a plank that is several inches shorter or longer than your first so that the joints will be staggered. If you’re using tongue and groove planks, make sure to slide them together.
New Drywall
If your ceilings are high enough and you want a perfectly smooth option, you can have them covered in another layer of drywall. This will obviously lower the ceiling by the thickness of the new drywall, so it’s not a great option in homes with a low ceiling. However, you will end up with a brand new ceiling, and you can apply whatever texture you wish.
In Conclusion
![Mature Adult Female Painting Popcorn Ceiling White With Paint Roller;How to Cover Popcorn Ceiling? [5 Steps]](https://uooz.com/wp-content/uploads/2020/10/Mature-Adult-Female-Painting-Ceiling-White-With-Paint-Roller.jpg)
There are many different ways to cover popcorn ceilings. How you decide to go will depend on your budget, skills, and decorating style. Hiring someone to do it is the easiest and most expensive option and might be the way to go if you’re short on time but not money. Picking up a mud pan and learning to skim coat is the most labor-intensive method but definitely cheap. No matter your budget or skill level, there is an option for covering those ugly but all-too-common popcorn ceilings.