
A tape measure is a simple tool with a significant purpose—to measure things. However, if you check it, more markings are typically disregarded, one being the triangle marking. Want to know what it means? To assist you, we did some research on this matter, and here’s what we found.
You can use the triangular marks on the tape measures to help you space the wall studs. It is added every 16” on many tape measures, which is the normal spacing for studs in home framing.
We shall go into great detail about tape measure marks in this article. Also, we will share with you how to read this tool using imperial and metric units. More information is ahead, so keep on reading.
Tape Measure Markings

There are markings in the tape measure that are frequently ignored by many. However, if you are aware of their function or the reason they were placed, then those markers may really help you or make your work much more productive. So let's examine the markings on the tape measure in more detail.
Triangle/Arrow
It is one of the frequently disregarded tape measure marks. If you check on the 16" mark, it is graphically distinguishable by size, color, or both.
Similarly, when it comes to the 32” and 48” marks. The reason for this is that studs that support a wall must be placed 16” apart from one another in accordance with the standard building codes.
These markers make it simple for a builder to install studs when creating a wall. Seven studs fit within an 8’ span at this spacing (8’ being the standard length of wood sheets like plywood and drywall).
Black Diamond
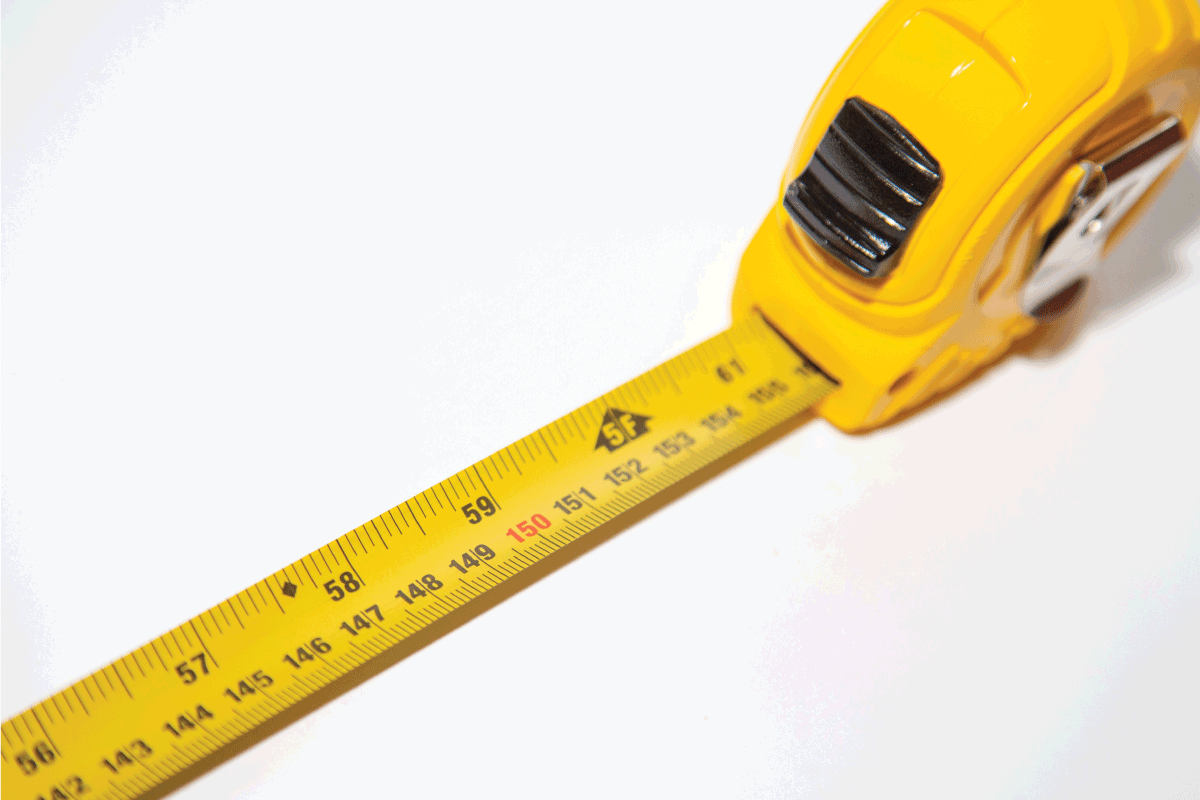
The black diamond patterns on the tape measure are also one of the intriguing markings. If someone does notice them, which is highly doubtful, they won't appear to have any pattern or rationale for being at 19.2”, 38.4”, 57.6”, and so forth.
These black diamonds or black truss diamonds are noteworthy since they act as black truss or floor joist indicators.
It may sound like very odd measurements, but there’s a reason for it. The most commonly found boards in the US are 8’ long timbers. So, if you divide 8’ which is 144” by 5, you get 19.2”.
Temperature & Tension
Near the tip of the blade, the markings "20°C" and "50N" are common on tape measures. This has to do with the tape measure's claimed degree of accuracy.
The accuracy of the tape measure cannot be guaranteed if it is used at temperatures higher or lower than 20 °C or with a pulling force more than or equal to 50 Newtons.
The user will need to test this for themselves and might need to manually compensate for the temperature and/or force, even though this does not necessarily suggest that the tape's accuracy has been compromised.
CE
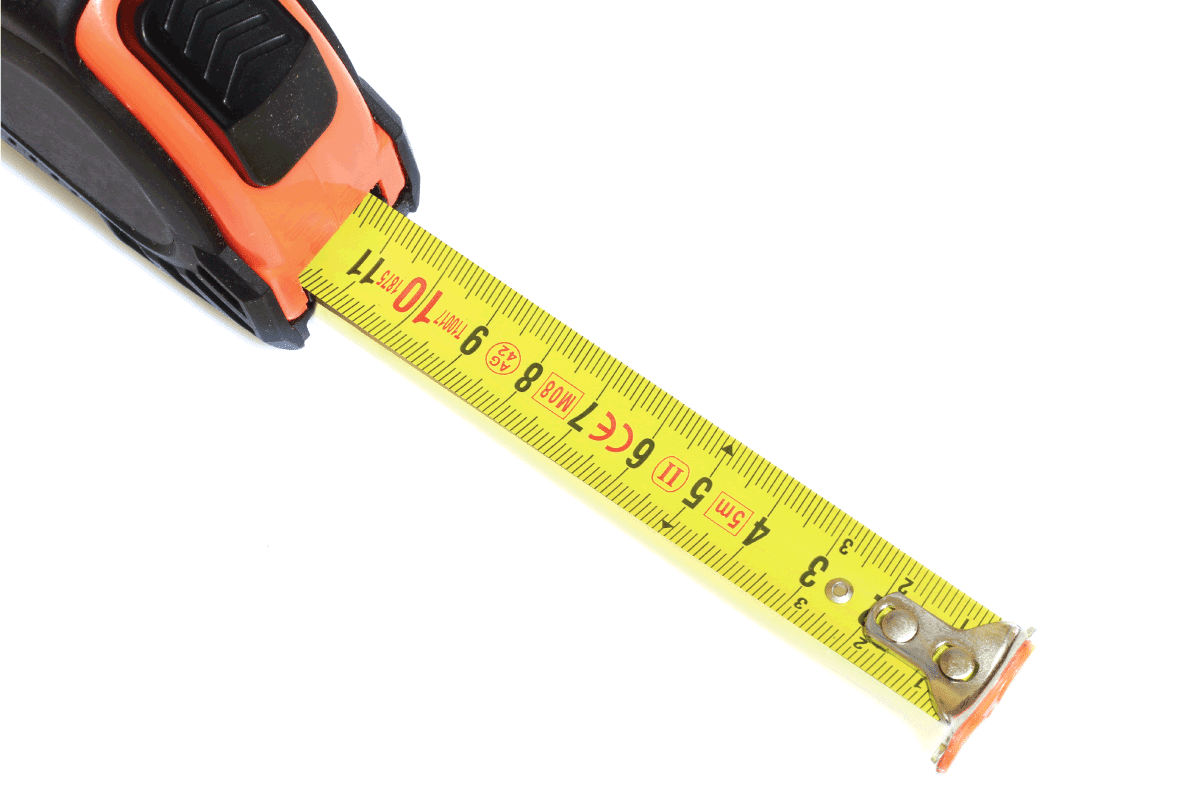
The CE mark validates that the tape measure conforms with all rules of the European Measuring Instruments Directive (MID). But it doesn't always signify that it was made in the EU. This is only a sign of quality.
The lack of a CE certification will not diminish the quality of a tape measure. The blade's age may just indicate that it is of an older design, which has no influence on the blade's accuracy or caliber.
Roman Numerals (I, II, III & IV)
The red or black Roman numeral contained in a rectangle or circle is another indication of the tape measure's accuracy, which has four categories.
Roman numeral "I," used to designate Class 1, is the level of accuracy with the highest level, followed by “II” (Class 2), “III” (Class 3), and “IV” (Class 4).
An unclassified tape will not have any marks on its blade. Untested and not guaranteed to conform to a certain standard of accuracy is what we mean by "unclassified.” Class 1 tapes are growing in popularity, particularly among those who require the utmost precision in their job.
However, the majority of commercially available tape measures, like Irwin, Stanley, Bahco, Draper, and other manufacturers, are Class 2 accurate and suitable for both home and commercial use. Class 2 is more than reliable enough for the vast majority of users when used properly.

Get a Stanley tape measure on Amazon.
A Red Rectangle With A Letter 'M' & Numbers Inside It
You can find it on many tapes, but not all. The number only serves to identify the year in which the blade's MID compliance stamp was applied. Generally speaking, this will also be the year when the tape was made or the year of manufacture.
"M09" typically denotes a tape measure that was produced in 2009, whereas "M13" indicates a tape that was probably created in 2013.
A Red Rectangle With Four Digit Numbers Inside It
It is associated with the organization in charge of granting the certification. It is frequently "0126" in tape measures and designated for the Middlesex-based National Weights & Measures Laboratory.
What Are the Different Components of a Tape Measure?
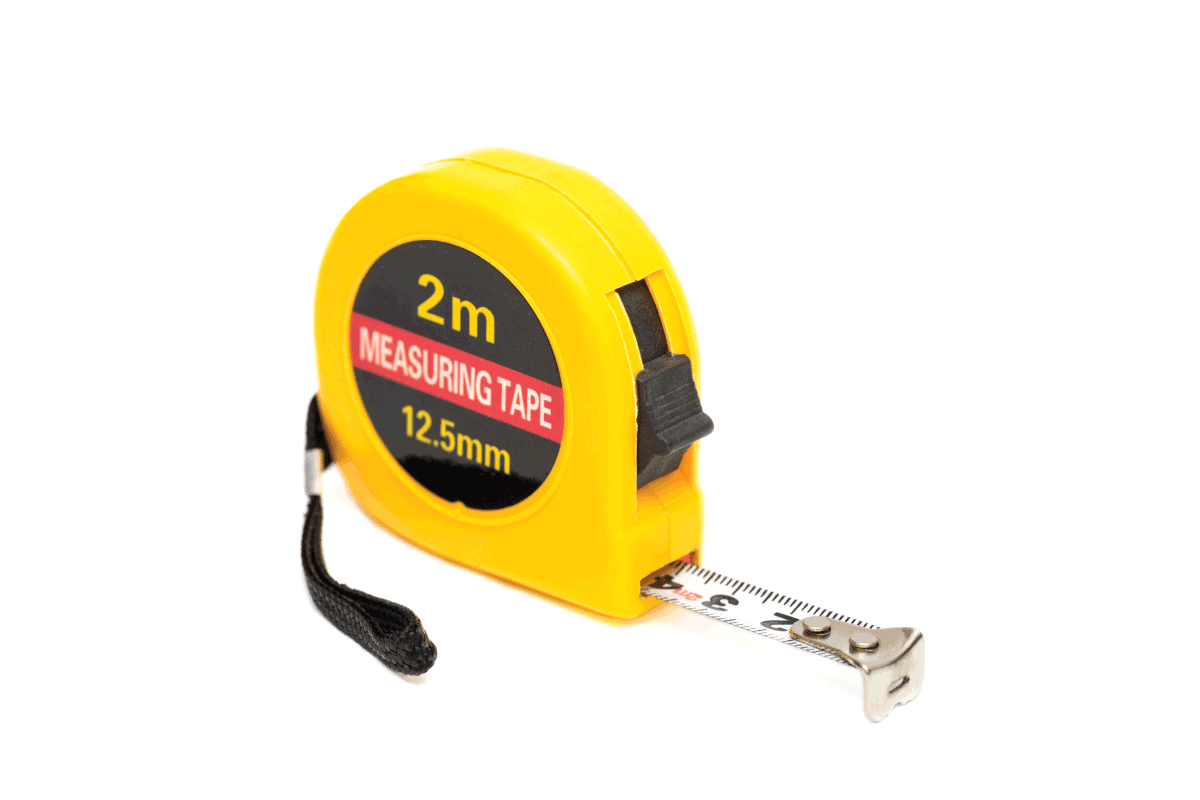
As important as knowing or comprehending the marks, there are the various components or parts that make up the tape measure. These parts, which come in plastic or metal, include:
- Case: It serves as the tape's housing. Metal is the most durable material, whereas plastic is more cost-effective.
- Blade/tape: It is where the measurement takes place. The top row of most tapes is made up of imperial measurements, and the bottom row is made up of metric units.
- Thumb lock: By depressing it, you may prevent your tape measure from retracting on its own. When you're ready to put that tape measure away, push it back.
- Hook: This metal piece is intentionally left loose because the first inch is off by 1/16th of an inch, necessitating tightening to achieve precision.
- Hook slot: It is made to hook onto a nail or screw.
- Belt clip: It is used to fit in your pocket or on your tool belt.
How To Read The Tape Measure?
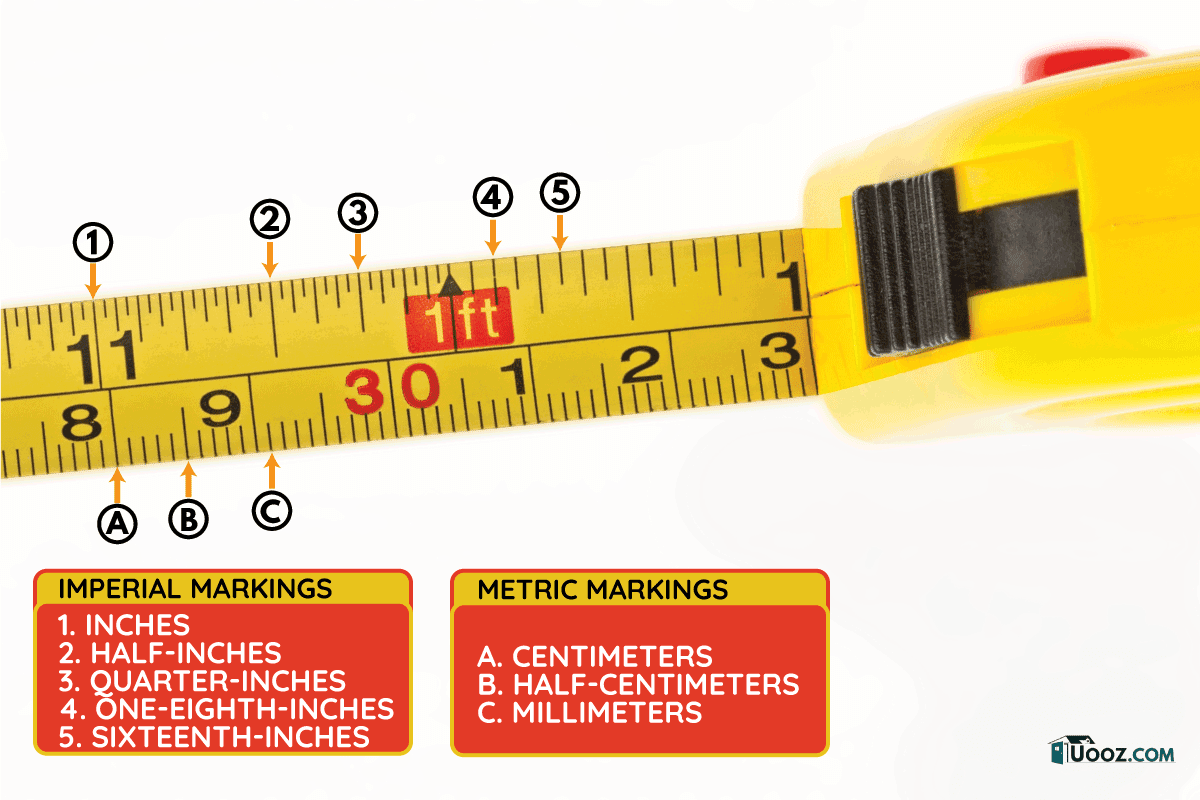
Some tape measures include both imperial (in. and ft.) and metric (cm and mm) markings, often one on top and one on the bottom. In particular, if you're working on a project, tape measures with both measurement types might be very helpful. To guide you properly on reading this tool, below are the steps:
For Imperial Units
1. Use The Longest Numbered Line Markings For Inches
The most noticeable marks on a tape measure marked with imperial units are typically the inch marks. These are usually identified by lengthy, thin lines and sizable digits.
Sometimes, a foot marking will be placed every 12”. This is frequently marked in a color other than the other markings—often red as opposed to the typical black markings.
The numbers next to each inch mark will either continue to count after each foot marking or will repeat 1 through 11 again. This can differ from one tape measure to another.
2. Use The Second Longest Line Markings For Half-Inches
Any two-inch line markers are always offset by a half-inch mark. There is one half-inch mark between two inch markers, but still, there are two ½” per 1”.
Keep in mind that not all lines may have a number labeled on them beginning with half-inch marks. The markings on either side must be used in this situation to direct you.
3. Use The Third Longest Line Markings For Quarter-Inches
Quarter-inch follows half-inch. These markings are less than half-inch in size and occasionally even thinner. Between each half-inch and inch mark, they are evenly spaced. An inch is divided into four quarter-inches.
4. Use The Fourth Longest Line Markings For One-Eighth-Inches
The one-eighth-inch markers are even smaller than the quarter-inch markings. These markers are situated halfway between the inch and quarter-inch marking, quarter-inch and half-inch marking, and so forth. There are eight of them in an inch.
5. Use The Shortest Line Markings For Sixteenth-Inches
It is the shortest line markings of a tape measure. There are four of these minuscule marks in each quarter-inch, or 16 of them every inch.
6. Add The Inch Segments To Calculate The Overall Length
Seeing where the tape lines up are all it takes to obtain an accurate length measurement. Mark the area where the measuring tape meets the edge of the object you measure first.
Before this point, locate the closest inch. Next, locate the preceding half-inch that is the closest, the subsequent quarter-inch, and so forth. Until you have an exact measurement, add up all of the inches and inch-fractions.
For Metric Units
1. Use The Longest Numbered Line Markings For Centimeters
For metric measuring tapes, centimeters are usually the most noticeable markings. They are typically indicated by long lines and a number. Like with inches, the line marks each centimeter rather than the actual number.
2. Use The Second Longest Line Markings For Half-Centimeters
Some metric measuring tapes, although not all, will have medium-sized marks uniformly spaced between each centimeter mark. These designate half-centimeters. Usually, no numbers are listed next to these marks.
3. Use The Shortest Line Markings For Millimeters
The tiny, confined lines between centimeter and half-centimeter markers correspond to millimeters or one-tenth-centimeters. A centimeter is made up of 10 millimeters, thus, one thousand in a meter.
4. Add The Centimeter Segments To Calculate The Overall Length
To measure with metric, locate the nearest centimeter and then the nearest millimeter before the distance you are measuring. If your measuring tape has these, you can use them as a point of reference. The millimeter marking will indicate the tenth place in the decimal.

In closing
Hopefully, this post helps you to better understand the marks on the tape measure, especially the triangle markings which function for the studs. Additionally, if you happen to know the location of one stud in a finished wall, you can use these stud marks to locate the other studs with great confidence.
Check out some articles we have below: