
A circular saw is a tool to cut wood that can be mounted to a machine or hand-held. If you need to know how to use it for your woodworking projects, we researched and provided a guide.
Here's how to use a Milwaukee circular saw:
- Crosscut
- Set the blade to 1/4 inch higher than the wood.
- Measure the outside of the guard to the outside of the blade, and transfer this length to the wood.
- Measure the wood you need, add the length in number 2, and mark.
- Place a square and clamp the wood.
- Line the blade guard with the square and cut the wood.
- Rip Cut
- Place the wood on the sacrificial wood that's on your working table.
- Clamp at the middle and one end.
- Set the blade a 1/5-inch higher than the wood.
- Mark the point that will guide you through cutting along the wood.
- Set the rip fence, and begin cutting.
- On reaching the middle clamp, turn off your saw, de-clamp, and re-clamp it from where you started.
- Again, on reaching the clamp at the end, de-clamp and re-clamp it in the middle.
- Cut through the wood.
- Bevel Cut
- Place the wood on the sacrificial board.
- Place the square, and mark the point to make the bevel cut.
- Measure from the base plate edge to the saw.
- Add the above length to the point you will make the bevel cut.
- Clamp the wood, set the saw to 45 degrees, and cut through.
Keep reading to learn how to use a circular saw to cut a crosscut, rip cut, and bevel cut. In addition, we'll also teach you how to use it safely and maintain it well. With that said, let's dive right in!
How To Use A Milwaukee Circular Saw

You don't have to be intimidated if this is your first attempt at using a circular saw.
Whether you'll be using a Milwaukee or any other brand, we shall guide you step-by-step on how to cut the most common cuts.
Crosscuts

Check out this Milwaukee circular saw on Amazon.
A crosscut is one of the most common cuts you will make in your projects. It is a type of cut made across the grain of the wood, thus making the wood shorter.
To cut using a circular saw, follow the steps below:
- Measure the thickness of the wood, and then adjust the depth of the saw blade. It should be 1/4 inch more than the height of your wood.
- Measure the outside of the blade to the outside of the guard and write it down. In this case, assume a 1.8-inch mark.
- Measure the length of wood you need and make a mark. From this mark, measure another 1.8 inches and draw a dot.
- Place a square, line it up with the last mark you drew, and clamp it to the wood.
- Line, the blade guard of the circular saw with the square.
- Start the saw before it meets the wood, and cut across it.
Check out this YouTube video to see the above steps in action:
Rip Cut

Check out these grip clamps on Amazon.
A rip cut refers to cutting along the grain of the wood. To cut it using a circular saw:
- Place the sacrificial sheet on your work table and place the wood you will be cutting on top. In this case, assume a 2 x 4-inches wood.
- Clamp the sacrificial sheet and piece of wood to the table. Clamping at the middle and one end.
- Set the blade height so it is slightly higher than 1.5 inches deep in the wood, and lock the blade in place.
- Measure and mark the point at which you want to cut. In this case, it is at the center, measuring 2 inches from either end.
- Set the rip fence so that the blade of your circular saw sits just outside the cut line.
- Lock the rip fence in place.
- With the rip fence firmly pressing against the side of the wood, turn on your circular saw and begin ripping.
- When the middle clamp is reached, turn off the circular saw.
- Remove the clamp and re-clamp from the end that you started ripping.
- When the end clamp is reached, switch off your circular saw, remove it, and re-clamp it in the middle.
- Continue ripping the wood to the end.
Check out the video below to see these steps in action:
Bevel Cuts
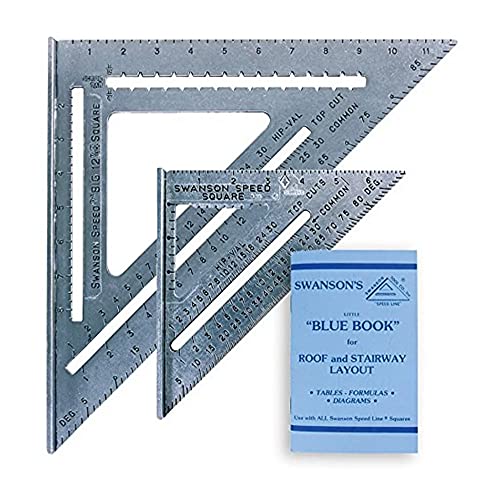
Check out these speed squares on Amazon.
A bevel-cut is a 45-degree angle cut on the wood, such that the top surface of the wood is not data right angle to the edge. The steps to cutting a bevel cut on the wood are:
- Place a sacrificial board on your woodwork table.
- Place the wood you will be cutting on top of the sacrificial board.
- Stick masking tape on the line you will be cutting on the wood.
- Place the speed square on the tape and mark the point you will be making the bevel cut.
- To cut at a 45-degree angle, measure the offset from the circular saw blade to the edge of the base plate.
- Transfer the offset distance from the point you make the bevel cut.
- Clamp the wood to your working table.
- Set the 45-degree angle on the circular saw by unlocking the bevel adjustment knob and set the angle to 45 degrees.
- Set to the required blade depth so that when cutting the bevel cut, the blade will only graze the sacrificial board.
- Place the saw against the straight edge and make the bevel cut.
Have a look at the video below on how to cut a bevel cut on wood:
Things To Remember When Using Circular Saw

You need to observe specific safety measures while using your circular saw, including:
- To achieve a clean cut, ensure the cutting blade is sharp. A dull blade will reduce your expectations by tearing out the wood. You might also feel resistance when cutting. It can also be challenging to follow the lines you have marked for cutting.
- Ensure the safety guards are in good working condition to prevent personal injury.
- Protect yourself from the flying splinters by wearing protective eyewear. Don't forget to wear earplugs and a mask to cover your nose and mouth.
- If you use a circular saw with a cord, ensure it is safely tucked away from the cutting surface.
- Clean your saw after use by dipping it in a cleaning solution and letting it soak for a while. Use a toothbrush or brass brush to remove debris and stuck particles. Rinse with water and pat dry with paper towels.

Check out this brass brush on Amazon.
How To Maintain Your Circular Saw

After investing in a circular saw, you most likely want it to last.
There are a few tips on how to keep it in tip-top shape, including:
Avoid Dropping It
Dropping your appliance can cause immense damage to it. You should try as much as possible to avoid it at all costs. Also, store it in a place it cannot easily drop.
Clean It Regularly

As mentioned, clean it often to remove debris stuck on the teeth. Also, scrub off any stuck particles on it.
Lubricate It Often

See this Milwaukee circular saw blade on Amazon.
Apply lubricant often to prevent the saw blade from rusting. You may also apply it to each side of the washer that securely holds the blade.
To Finish

A circular saw is one of the popular tools used in woodwork for making cuts. This post provides a step-by-step guide on how to cut a crosscut, rip cut, and bevel cut.
Also, for your protection, we have indicated safety measures you need to observe while using the appliance. Equally important is maintaining it in good condition, of which we have mentioned a few tips.
And while we have your attention, check out these related articles: