
If you've ever had the often tedious task of painting crown molding, you may have wondered if it wouldn't be easier to paint before installation. Couldn't all those pieces be painted on a sawhorse and installed once dry? It would certainly save time, but is it a good idea? We did the research to determine this exact answer!
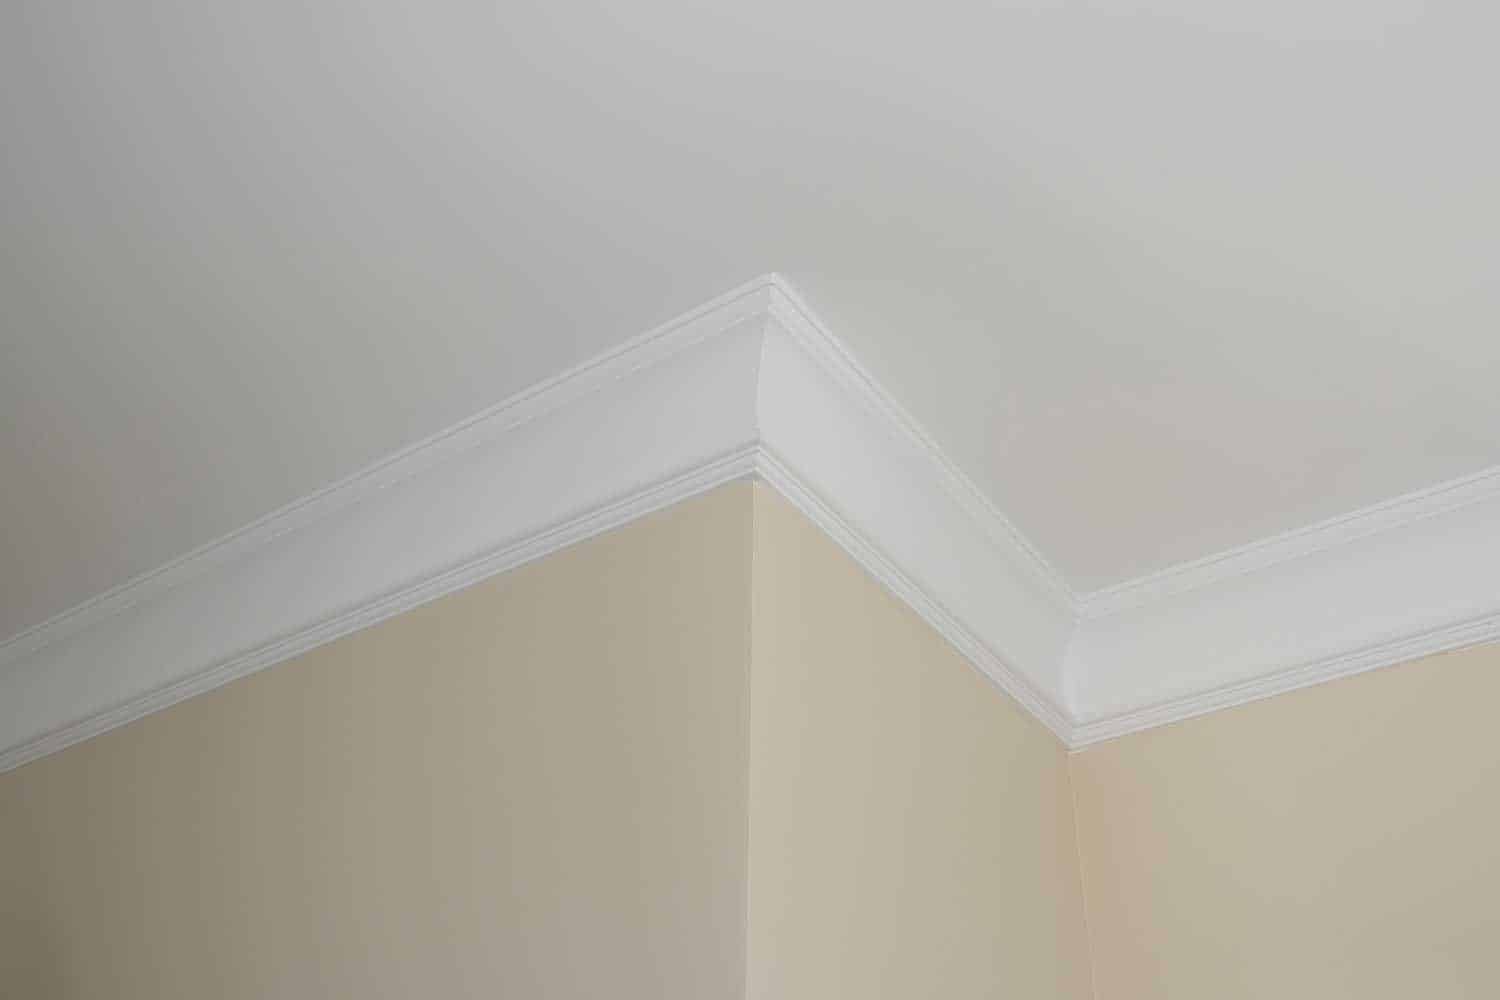
Crown molding should not be painted before installation. Though it seems like it would be faster, in most cases, it ends up needing so much correction after installation that it's like doing the work twice. Caulking, filling nails, uneven coats of paint, and scuffs from handling all create problems for crown molding painted before installation.
Now that the bad news is out of the way, keep reading to find out how to make painting crown molding after installation easy and fast and still get good results.

Painting Crown Molding After Installation
The problem with painting crown molding before installation centers on a few factors:
Nail holes
As soon as you install the crown molding, you'll be leaving nail holes in your pretty paint job. It may seem like no big deal to touch those spots up, except that crown molding is typically a light color, with a glossy shine. The moment you touch up those spots, you'll realize just how visible it is that certain areas have two coats of paint and the rest only has one.
Caulking
If re-touching the paint sounded bad, caulking is worse. In theory, installing the trim should leave everything flush and exactly where you want it. In reality, there are frequent gaps that require caulking to keep everything looking even. If you've already painted your molding, there's no way to hide the eyesore of caulk with paint.
Scuffs and other blemishes
Handling crown molding during installation is bound to lead to scuffs and markings.
The best way to apply paint to crown molding is to go from one corner to another, with straight flat strokes in one direction. There is no way to touch up any inevitable nail holes, caulk, or scuffs using this method, without just repainting the whole thing.
Should Crown Molding Be Painted Flat or Semi-Gloss?
Crown molding is painted with a semi-gloss or gloss finish. It can occasionally be a satin finish, but never flat. You want a finish that will distinguish the molding as separate from the walls. Crown molding is designed as a focal point, and if it's disguised to blend into the wall, there's no reason to have it at all.
- High gloss paints are the most durable and shiniest. They also reveal any imperfections and show everyday wear and tear soonest.
- Semi-gloss, though not quite as lustrous, does the best job of concealing any dings or scratches. A more amateur painter will want to err on the side of semi-gloss, which makes any flaws less obvious.
- Satin finish paint is gaining popularity in recent years (though still not used anywhere near as often as a glossy finish). It does not give the same 'pop' to crown molding that glossy finishes do, and is not as durable. It provides a more contemporary look and can work well in a more rustic design where a glossy finish may seem out of place.
What Is The Fastest Way to Paint Crown Molding?
Airless Sprayer
The fastest way to paint crown molding is to avoid a brush and use an airless sprayer. An airless sprayer pumps paint from a hose through a small tip, which then sprays out into tiny droplets on the surface to be painted. It can also be called a spray paint machine.
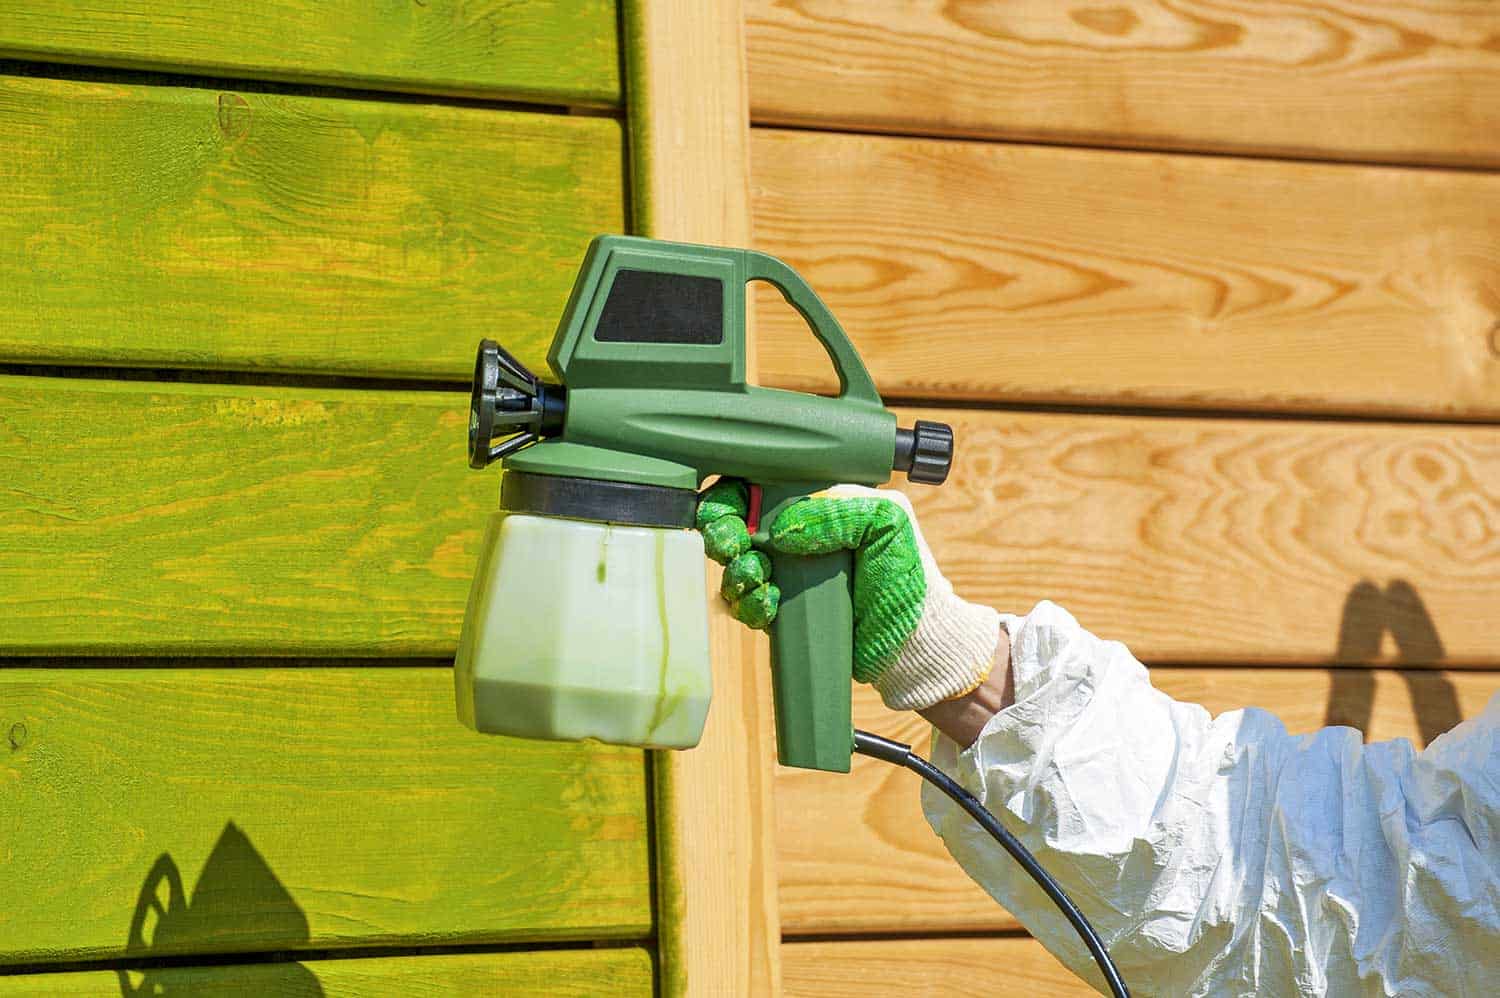
Pros of this method include:
- No brush strokes
- Smoother finish
- Faster application and dry time
Cons include:
- Required equipment is more expensive than a brush/roller
- Less efficient use of paint (some paint is lost in the air)
- More time spent covering/taping/masking surfaces that you want to keep paint off, as there is less precision than a brush.
- Clean up of the machine is more complicated than washing a brush.
Saving Time With a Paintbrush
If you're sticking with a paintbrush, use the Goose Neck Angular Paint Brush with Flexible Soft Grip Handle. It screws into an extension pole, to avoid multiple climbs up and down a ladder. The neck bends to make it easy to reach from below and cut into corners as needed.
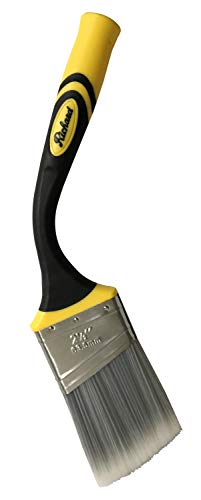
Click here to see the Goose Neck Angular Paint Brush with Flexible Soft Grip Handle on Amazon.
How Do You Prep Crown Molding For Painting?
Prepare the Surface
Get the surface ready by using a cleaner such as Dirtex Powder Cleaner. Use according to directions.

Click here to see Dirtex Powder Cleaner on Amazon.
Sand the surface of the wood.
You do not need to sand down to bare wood, dull the existing paint or varnish gloss, and even make the surface. Sand with paper with a grit of 220, or another sandpaper appropriate for your wood type.
Wipe clean
Wipe sawdust off with a damp cloth, and let the surface dry.
Fill the Joints
Caulk as needed to fill cracks and gaps between joints. Be sure to allow to dry thoroughly. Make sure you use a paintable acrylic caulk, such as DAP Alex Painter's Acrylic Latex Caulk.

Click here to see DAP Alex Painter's Acrylic Latex Caulk on Amazon.
Fill nail holes with putty.
The easiest is Crawford's Painter's Putty, which is easy to use; you may not even need sand after. Use a putty knife to push the putty into the holes and level off with the knife.

Click here to see Crawford's Painter's Putty at Amazon.
Smooth the surface
Sand again, if needed. If you did an excellent job of leveling, it might not be necessary.
Great! You're ready to begin priming and painting!
How Do You Paint Crown Molding Without Brush Marks?
The only guaranteed way to avoid brush marks is to consider an airless sprayer. When using a brush, some of the best ways to prevent marks are:
- Pick the right brush for the job. A cheap brush does a cheap job. You want an angled trim brush (also called a sash brush or varnish brush) such as the Wooster Double Angle Sash Brush.

Click here to see the Wooster Double Angle Sash Brush at Amazon.
- Pick the right paint. You don't want something that dries too fast. Brushstrokes tend to even out in slow-drying paint, and brushing over paint that's already begun to dry leaves a tacky texture behind. Words like "leveling enamel" or "self-leveling" indicate that this is the right product.
- Apply a thin coat, in one direction, no more than 10 inches or so at a time. Trying to stretch the paint too far leaves an uneven coat.
- Don't go back to touch up or adjust any areas that have begun drying- even a small spot. It just muddles the now tacky paint. Let it dry thoroughly and do a second coat to fix any problem areas.
Summary
Crown molding should be painted in a gloss or semi-gloss finish after installation, to leave the smoothest coat of paint over nail holes and caulking. The smoothest paint cover without brush strokes will come from an airless sprayer; when using a brush, painting with a self-leveling acrylic enamel will provide the best results.