
You may have developed a love for woodworking and purchased a DeWalt planer. If you are looking for simple instructions on how to operate it, this post is for you. We've done our research to develop a straightforward guide for you.
A DeWalt planer is not difficult to operate. Just follow these easy steps:
- Observe safety warnings
- Prepare safety gear
- Adjust the depth crank
- Adjust the gauge
- Switch the machine on
- Feed the wood to the machine
- Select the speed rate
- Turn the machine off
This step-by-step guide is trouble-free. In this post, we will detail each part of the process. We'll also discuss the safety precautions you should keep in mind while operating the machine. Keep reading for more information on these topics.
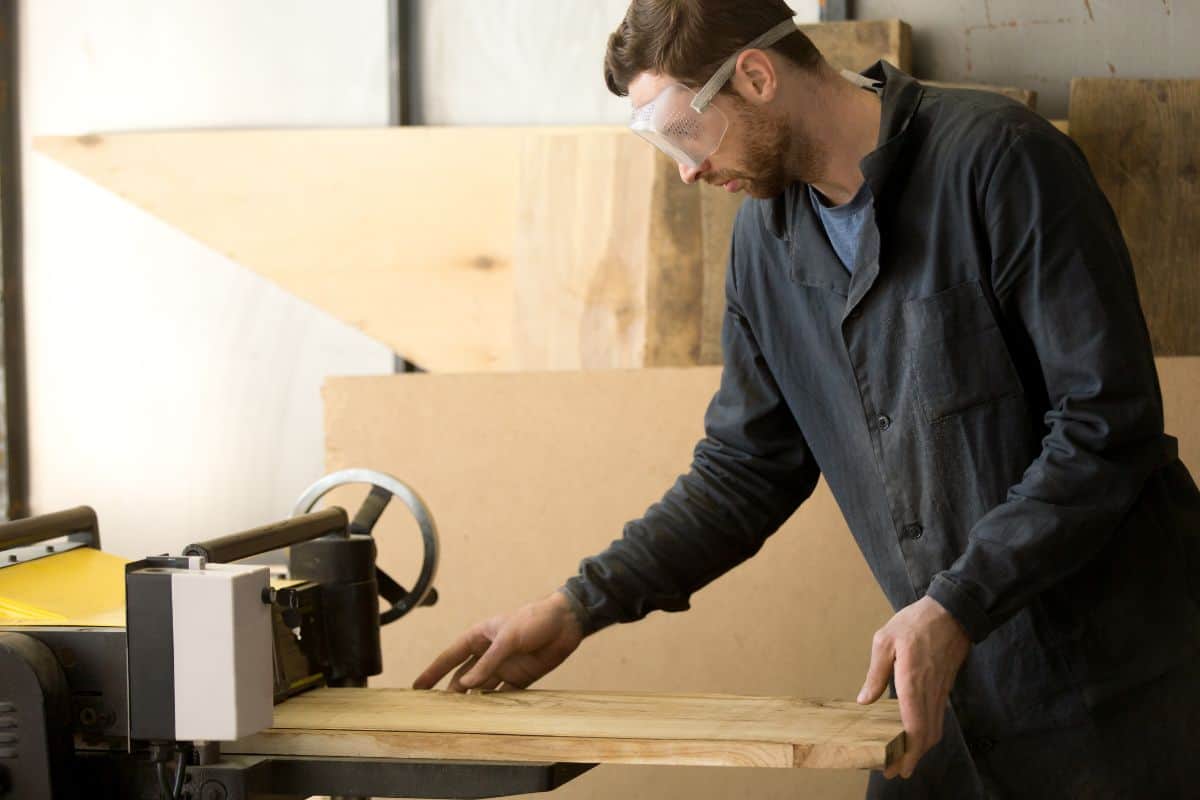
![Joiner, Man scouring a wooden board on a thickness machine in garden. Carpenter working with electric planer on wooden beam, plank. - How To Use A DeWalt Planer [Step By Step Guide]](https://uooz.com/wp-content/uploads/2023/01/Joiner-Man-scouring-a-wooden-board-on-a-thickness-machine-in-garden.-Carpenter-working-with-electric-planer-on-wooden-beam-plank.-How-To-Use-A-DeWalt-Pl.png)
How To Operate A DeWalt Planer

Surfacing rough lumber can be easy with a planer. This tool is beneficial for both professional woodworkers and DIYers. There are different DeWalt planer models. This section illustrates how to use a DeWalt DW735 Portable Thickness Planer.
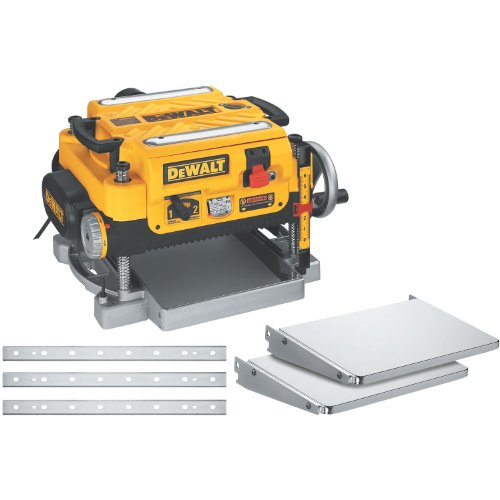
Click here to see this planer on Amazon.
1. Observe Safety Warnings
Be careful when operating any machine, especially if it is your first time doing so. Consider hazardous situations that could result in serious injury.
- Work in a clean, well-lit area. Don't use this tool in a damp place.
- Keep children out of the workshop area.
- Make sure that you remove the adjusting keys before turning the machine on.
- Ensure the machine is turned off before plugging it into the outlet to avoid unintentional starting.
- Use a heavy-duty extension cord whenever you need one. An undersized extension cord could have a drop in line voltage, resulting in overheating.
- Do not leave the tool unattended.
- Secure the machine to a sturdy surface to prevent it from tipping over.
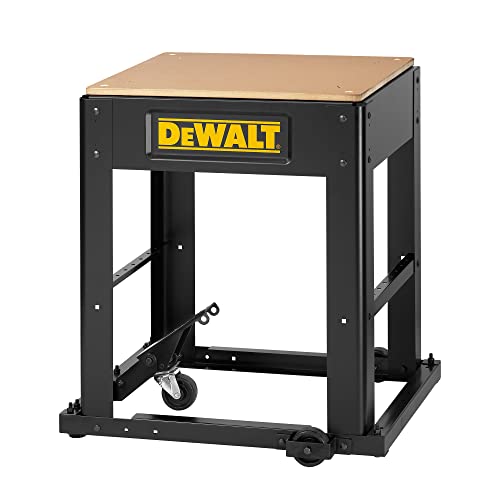
Click here to see this planer stand on Amazon.
2. Prepare Safety Gear

Do not operate the machine without wearing safety glasses. You never know when scrap wood will fly and get into your eyes. Do not substitute everyday eyeglasses for safety goggles since glasses are not impact-resistant.

Click here to see these safety goggles on Amazon.
In addition, wear multi-purpose gloves when working with wood or other materials to keep your hands safe.

Click here to see these gloves on Amazon.
Once it's turned on, the planer can get loud, so you should wear earplugs.
Wear proper work apparel. Avoid loose clothing, and do not wear jewelry. If you have long hair, you should tie it back so that it doesn't get caught in the machine.
3. Adjust The Depth Crank
On the right front of the planer, you'll see the scale adjustor. This part adjusts the depth between the base and the blades of the planer. If you want to lower the cutter head, turn the crank clockwise. Turning it the other way around will raise the cutter head.

4. Adjust The Gauge
The material removal gauge indicates the amount of wood you need to remove in one pass. It is important to note that you should not exceed the recommended depth of cut on the material removal gauge.
To use, slide a 3-inch thick workpiece under the middle of the carriage. Be sure that it is lying flat on the surface. Adjust the carriage downward on the workpiece until the removal bar engages the workpiece.
The red arrow, as shown in the picture above, will move. It shows the amount of material to be removed with the carriage at a particular height. Next, adjust the carriage height until you get your desired depth. Once set, remove the wood from under the carriage.
5. Switch The Machine On
The switch is located on one side of the machine. In the DeWalt DW735 Portable Thickness Planer, it is the red lever right above the warning label that reads "keep hands away from the cutter head."
You have to lift this to turn the machine on.
6. Feed The Wood To The Machine
Now that everything is set, you can feed the wood or your workpiece into the machine for planing. To properly plane the wood, do not turn the device on when material is inserted under the carriage.
The cutter head and roller should be at full speed before you feed the wood. You should feed the workpiece according to the direction of the feed arrows on top of the unit.
When the machine is turned on, lower the carriage to the desired thickness for the first pass. Next, feed the wood into the rollers. Remember not to reach into the cutter head area while the machine is running, as your hands can be drawn into the blades.
Check the first pass and repeat the process. Remember that it will take several passes before you get the smoothness you want.
Things To Consider When Feeding Materials To The Machine
Take note that when planing, you should go with the direction of the wood grain. Never plane wood that has foreign objects such as staples or nails attached to it.
If you are planing a long piece of wood, ensure that you are supporting it adequately to avoid a snipe. A snipe is made when an unsupported workpiece end drops toward the floor, causing the other end to lift the cutter head.
If you must plane narrow materials, group some pieces together and then plane them as one wide workpiece. Do not plane wood that is less than 3/4 inches wide.
It is important to note that twisted wood may jam your planer. Additionally, if your wood has rough surfaces on both sides, you may not get your desired results. You'll get better results if the workpiece has gone through a jointer.
To clarify, you can still plane slightly twisted wood, but be sure to plane both sides alternately until you get your desired thickness.
If the workpiece does not feed properly, the blades may have become dull. Moreover, there may be excess clogging in the dust shroud. You will need to look into these issues.
A broken drive belt may also result in the material not feeding correctly.
7. Select The Speed Rate
This particular model has two speed rates. This is for planing efficiency. If you choose 2, your planing speed will be 96 cuts per inch. If you want a smoother finish, select 1, as it has a slower speed at 179 cuts per inch.
8. Turn The Machine Off
You should turn the machine off when you're done planing. More importantly, do not leave it unattended. Ensure the plug is disconnected from the power source when the machine is not in use.
Finally, lock the switch in position to prevent unauthorized people from using it. There is a hole under the switch where you can insert a padlock to lock it.
How To Maintain A DeWalt Planer
Proper maintenance is necessary to keep your machine in top shape.
- Make it a habit to check the machine before and after use to ensure that everything is in good shape. Do not use the machine if you find any damage.
- After planing, make sure that you dust off the machine. You should also clean the infeed and outfeed rollers.
- Ensure that the base table is clean. It'll help if you lightly wax or oil it so that that wood or workpiece can easily pass through.
- Check for blunt blades. The planer will lose its efficiency if the blades are not sharp. You may need to replace those as time goes by.
- You should also check the gauge and turret stop calibration.
- Replace the brushes when they're worn out.
Final Thoughts
Investing in a planer is a good choice, especially if you are serious about your DIY woodwork. Using a DeWalt planer is not that difficult, although you have to ensure that the settings are correct so you can maximize the tool.
In this post, we discussed the step-by-step instructions for using a DeWalt DW735 Portable Thickness Planer and addressed precautions for keeping you and your family safe.
Now that you have this guide and know the safety measures, you should be more comfortable using this machine.
If this post has helped you, please check out these other articles:
How To Load A DeWalt Staple Gun [Quickly & Easily]
How To Change The Bit On A DeWalt Drill [Quickly And Easily]