
Hollow-core doors are currently the most widely used internal doors. And it is very frustrating when this kind of door doesn't fit perfectly onto your door frame. This is why door adjustments are inevitable. Want to know how to trim this type of door? Well, we have done extensive research on this to assist you.
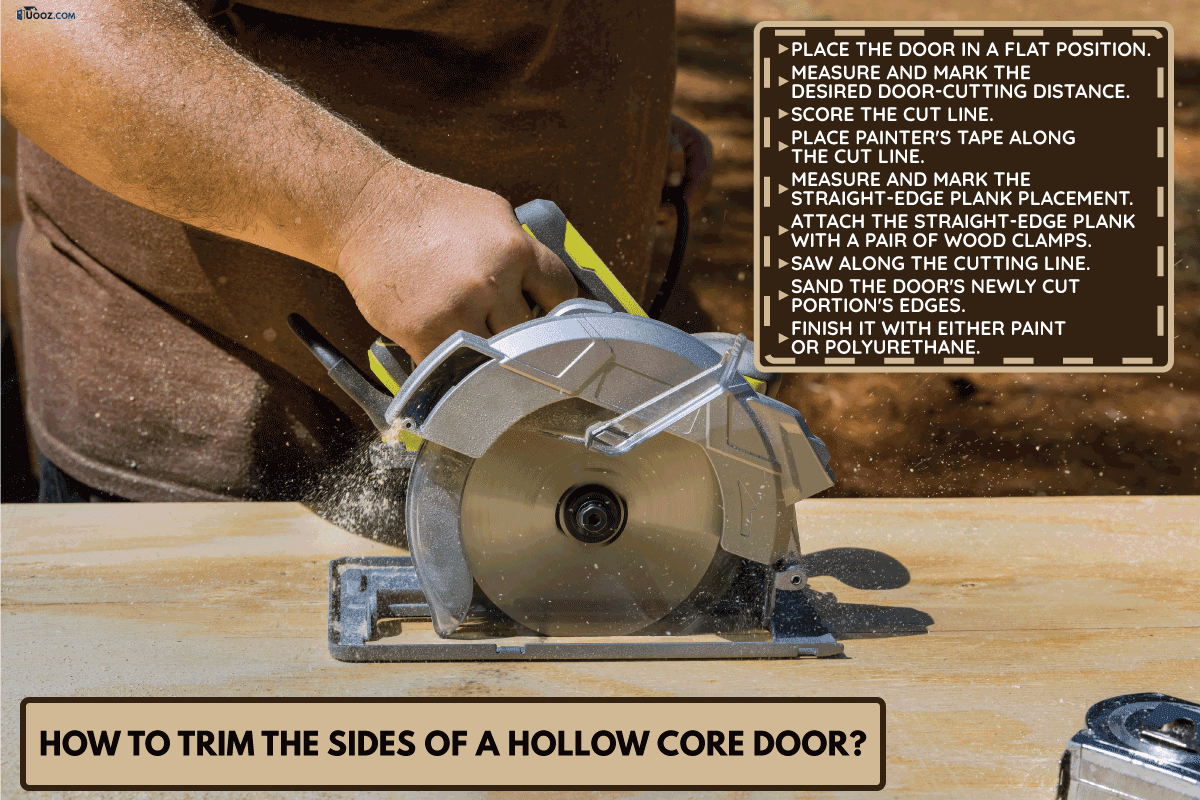
Here are the steps for trimming the sides of a hollow-core door:
- Place the door in a flat position.
- Measure and mark the desired door-cutting distance.
- Score the cut line.
- Place painter's tape along the cut line.
- Measure and mark the straight-edge plank placement.
- Attach the straight-edge plank with a pair of wood clamps.
- Saw along the cutting line.
- Sand the door's newly cut portion's edges.
- Finish it with either paint or polyurethane.
In this article, we'll go into more detail about the aforementioned steps as well as a few ideas for blocking the exposed hollow door when cutting too much. So keep on reading for more information.
How Much Can You Trim Off The Side Of A Door?
Hollow-core doors are made in various ways by various door manufacturers. This implies that the amount of solid wood on each hollow-core door's borders will vary. Before you make the first cut, be sure to research the door's specifications.
A hollow-core door will typically have a solid wood border of at least one inch. You should be able to safely cut off up to ¼ of an inch of the solid wood block once it is one inch thick without risking injury or raising any concerns.
To precisely calculate how much of a hollow door you can cut without going too far, a stud finder is a great instrument. You can use it to determine how thick the solid core is at the door’s edges.

Click here to see this stud finder on Amazon.
You only have to activate the stud finder first and point it in the door's center. Next, approach the edge you want to cut with the stud finder slowly. Then, mark the spot as soon as the stud finder lights up.
To confirm that the entire length has a solid interior, you only have to move the stud finder along the entire length of the intended cut region. Below is a YouTube video that provides a more comprehensive visual demonstration of how to use a stud finder:
Some situations call for trimming the door's sides, while others call for trimming the door's top or bottom. The tools you need are the same even though the technique varies depending on what part of the door you want to trim.
How To Trim The Sides Of A Hollow Core Door?
You must cut the door to fit in either situation. But unlike with a solid door, you can't merely measure and cut. The finish will chip off due to the saw. Uneven sizing is possible. Not to mention all the scuffs and dings you could leave on the door when attempting to cut it.
The good news is that you can make the precise cut fast and efficiently with the appropriate planning and a few carpentry skills. Here are the steps:
1. Place The Door In A Flat Position
Place the door on a flat tabletop or a pair of sawhorses.

Click here to see these sawhorses on Amazon.
2. Measure And Mark The Desired Door-Cutting Distance
Draw the cut line where you want the new edge to be using a straight-edge ruler and a pencil. Make sure to take three measurements of the door frame: the two sides and the center. This minimizes the possibility of errors and gives you the most accurate reading available.

Click here to see this straight-edge ruler on Amazon.
Keep in mind that the average hollow-core door only gives you approximately an inch, so you only have up to ¼ of an inch of space to cut. Because if you cut too much of it, you need to add a new block to add structure and stop moisture damage to the door.
3. Score The Cut Line
Hollow-core doors' faces have a propensity to splinter easily. Before sawing off the door, score the cut line with a utility knife and straight-edge tool or plank along the cutting line to prevent splinters.

Click here to see this utility knife on Amazon.
4. Place Painter's Tape Along The Cut Line
To prevent chipping, tape the score mark you previously made all the way around the door. The direction of the blade makes it less likely to chip the underside of the door, but it's wise to be cautious.

Click here to see this painter's tape on Amazon.
5. Measure And Mark The Straight-Edge Plank Placement
Use a straight-edge plank as a saw guide. Make sure to measure the width of your saw to ensure that the plank is properly positioned.
To emphasize the straight-edge plank placement, position the saw blade just below the score line and mark the area close to the saw base's edge. Once you have reached this point, measure the distance and mark it at the same distance on the opposite side of the door.
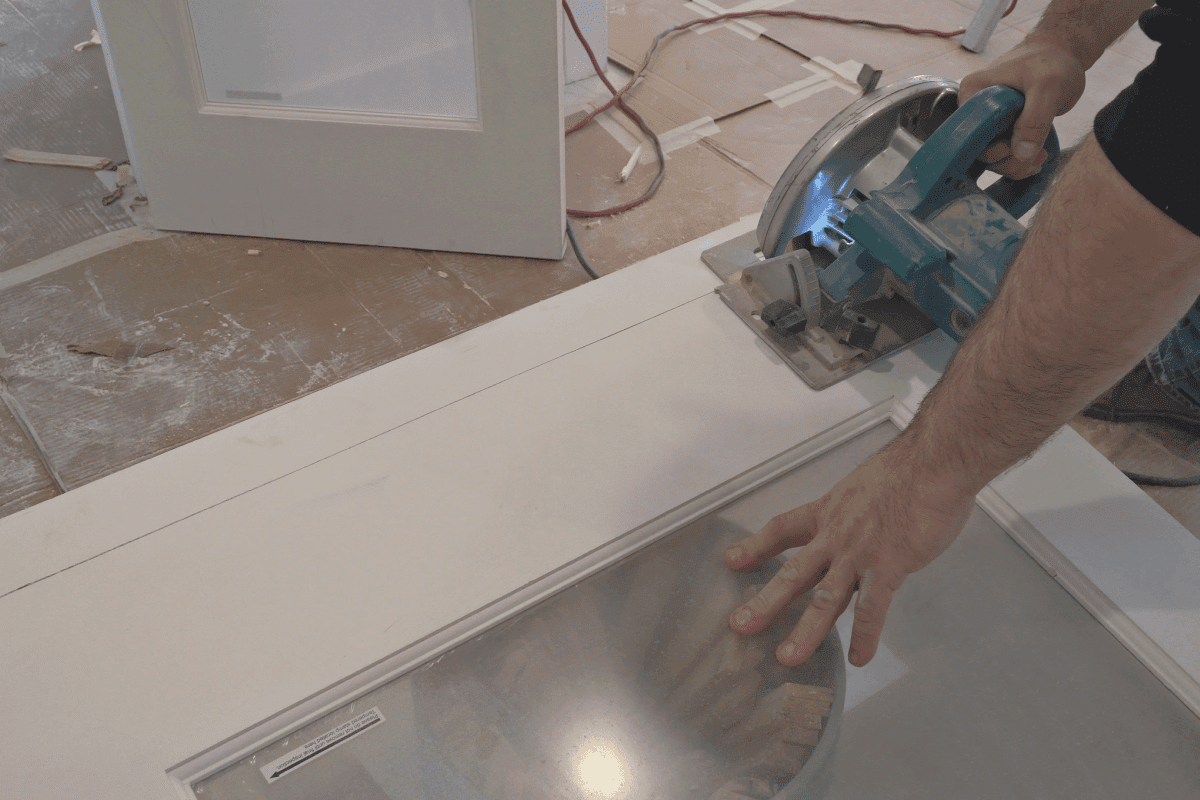
6. Attach The Straight-Edge Plank With A Pair Of Wood Clamps
After that, secure the straight-edge plank to the door with clamps on both sides so that it keeps the saw straight while you are cutting.
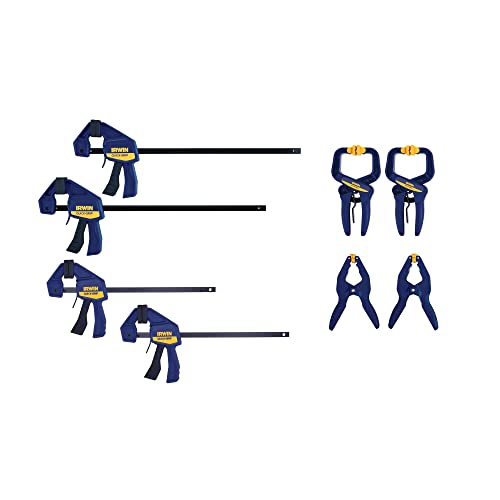
Click here to see these clamps on Amazon.
7. Saw Along the Cutting Line
You may now begin cutting. To get a nice cut free of chips or markings, slowly run the saw along your straight-edge plank. Cutting a hollow core door is best done using a circular saw.

Click here to see this circular saw on Amazon.
8. Sand The Door's Newly Cut Portion Edges
If the cut edge has any rough areas, smooth them off using fine-grit paper. Naturally, a hand sander will speed up and simplify this task, but use caution and light pressure, otherwise you risk further reducing the door's height or width.

Click here to see this assorted grit sandpaper on Amazon.
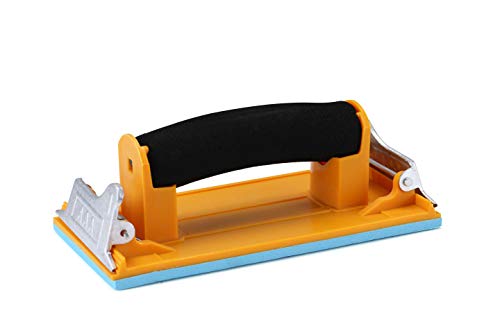
Click here to see this hand sander on Amazon.
9. Finish It With Either Paint Or Polyurethane
You can apply paint or polyurethane to the freshly cut door edge. This will aid in sealing the door and stop any early warping or damage. Whatever finishing method you choose, make sure they are totally dry before rehanging the door.
Below is a YouTube video that demonstrates how the trimming of the hollow core door is performed:
What To Do If You Cut Too Much Off A Door?
To avoid overcutting the door, it is essential to use precise measurements and cutting techniques. In the event that you accidentally trimmed too much of the door and the hollow interior is now visible, you can still salvage the door. Just reseal the exposed hollow door with the following methods:
Filling Expanding Foam Insulation
- Place the planks at the door's edge where it was overly cut and reveal the hollow interior.
- Hold the wooden planks on either side of the door with two clamps.
- Fill the exposed hollow interior door with expanding foam insulation.
- Let the foam dry. The drying times for the insulation may differ depending on the product used, so read the label of the product carefully.
- Cut off the excess foam once it has fully dried and solidified.
- Use polyurethane or another similar sealant to seal it.
- Sand the new edge of the door.
Click here to see this expanding spray foam on Amazon.

Click here to see this polyurethane sealant on Amazon.
The procedure for filling the hole in the hollow door, which will be shown on YouTube below, is essentially the same as the one described above:
Inserting A Piece of Cut Wood
1. Do not dispose of the solid core you've cut. Instead, use it to shove it back into the hollow. You only have to trim the solid core till it slides right into the door's hollow. To maintain a straight cut, you may use a table saw on this job. But still, you can use any piece of wood you have if you want.

Click here to see this table saw on Amazon.
2. You can see that the door is filled with foam or some cardboard. To make place for the additional blocking, you must now remove part of it. The use of a broad chisel is the simplest method. You can get rid of it if it's tight by gently squeezing the door's inside edge.

Click here to see this chisel tool set on Amazon.
3. Put a generous amount of glue around the side of the wood that you will insert.
Click here to see this wood glue on Amazon.
4. Slide the wood into the exposed hollow. Hammer or drive it in if necessary.

Click here to see this rubber mallet hammer on Amazon.
5. Wipe the squeeze-out glue using any towel or cloth you have.
6. Drive a couple of nails around it using a nail gun to secure it properly. Then, use caulk to fill nail holes. However, if you don't have a nail gun or don't want to nail it, you may clamp it down and sit it for a few hours.

Click here to see this nail gun on Amazon.
To show how to remedy those exposed hollow parts of your door, a video on YouTube is shown below:
Wrapping Things Up

Though not usually simple, trimming hollow core doors is doable. If you're trying to reduce a lot of width or height, it may require experience in woodworking. Also, it is difficult if you don’t have the necessary tools. Hopefully, this article has prepared you to take on the task at hand.
Before leaving, check out some of the other interesting door topics we have below: