
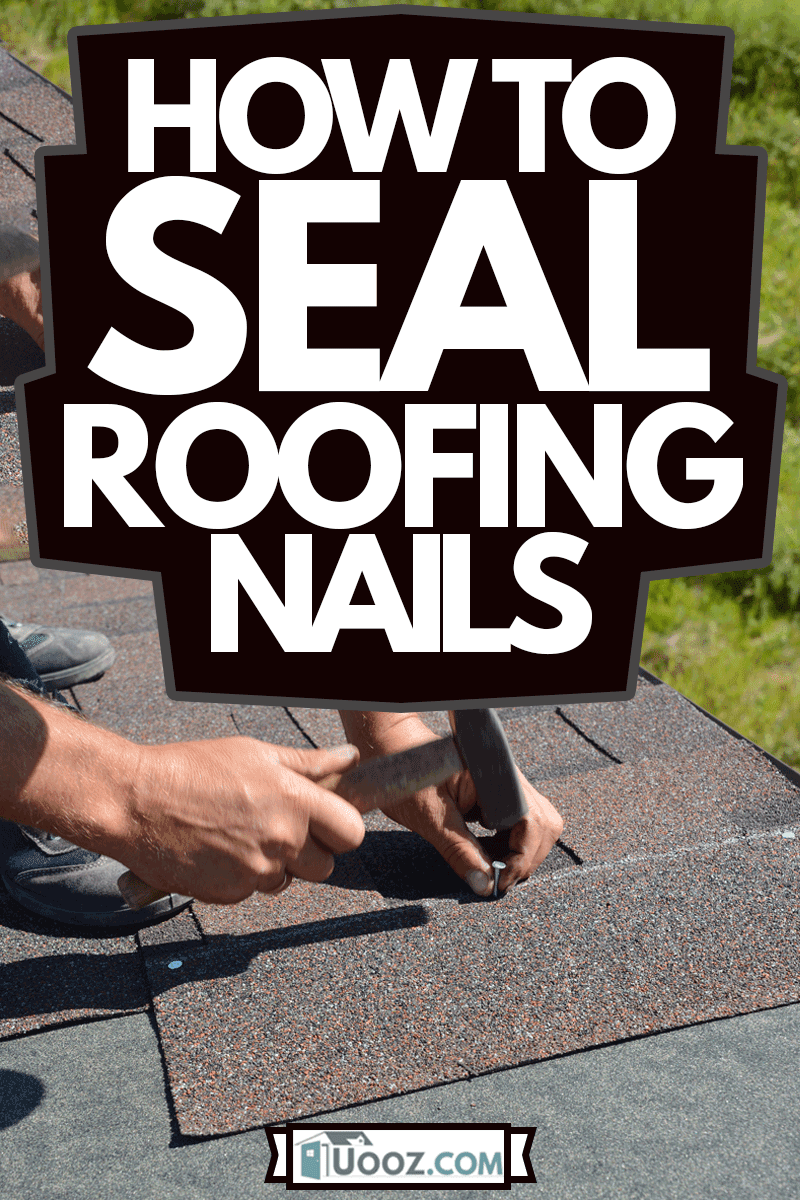
A leaking roof can cause water damage to your property and your personal stuff. Exposed roofing nails could be the root cause of the problem. Now, you have to get those roofing nails sealed. If you're still wondering how to go about the process, you're in the right place! We have done the research to give you a helpful guide for your convenience.
To seal roofing nails, follow these basic steps:
- Hammer down the nail if the head pops up above the roof surface.
- Apply roofing tar over the exposed nailhead.
- Spread evenly over the nailhead and the surrounding roof surface.
- Leave it to dry.
Simple and easy as it may seem, there are further steps to take if the exposed nails are under asphalt shingles. Bear in mind, though, that sealing your roofing nails is not a permanent solution to your leaking roof problem. Stay on this page as we discuss in detail the importance of sealing roofing nails, the best material to be used, and the step-by-step guide to adhere to.
What Kind of Roof Sealer Is Used to Seal Roof Nails?
Roofing tar is considered the best material for sealing nail holes. Basically, the reasons for choosing a roofing tar are its durability, ease of application, and waterproof quality.
It is durable because it functions as a sealant. It can withstand the expansion and contraction of the roof through temperature fluctuations of winter and summer.
It is easy to apply. You can buy it in cartridge packaging and fits a standard caulking gun. The caulking gun is an accessory and is bought separately. A caulking gun is a helpful tool that aids in an easy application for any liquid or solvent packaged in tubes.
It is waterproof. Since it is applied on the roof, it can resist harsh weather elements including rainwater, snow, and frost.

Check out this sealant on Amazon.
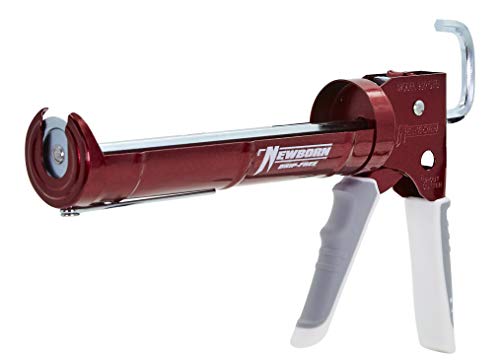
Check out this caulking gun on Amazon.
Silicone and Polyurethane Sealants
While roofing tar has always been associated with caulking and is recommended for use by DIYers, it is cheaper and efficiently seals exposed nail heads. It can be applied to tin roofs and asphalt shingle roofs.
For more extensive sealing, patching, and roof coating, sealants are used. These are more expensive and used by professional roofers. Sealants are more durable and flexible to sustain the expansion and contraction of the roofing materials. The two widely used sealants are silicone and polyurethane.
Silicone sealants are widely used in roofing construction. Silicone has the advantage of being translucent and can easily blend with various colored building materials. They can also be tinted and pigmented to match with other colors.
Many variants of silicone have a fast curing time just by exposure to moisture. They are perfect for fairly deep curing.
Polyurethane sealants are the more expensive category. These are extensively used in single-ply roofing details such as flashing, termination bars, and pitch pans.
Whatever nail sealant you will use, they all have the same life expectancy as with all other roof components. What would significantly differ is how they are applied. Whether caulking or extensive sealing, they will still undergo normal wear and tear and should need regular replacement.
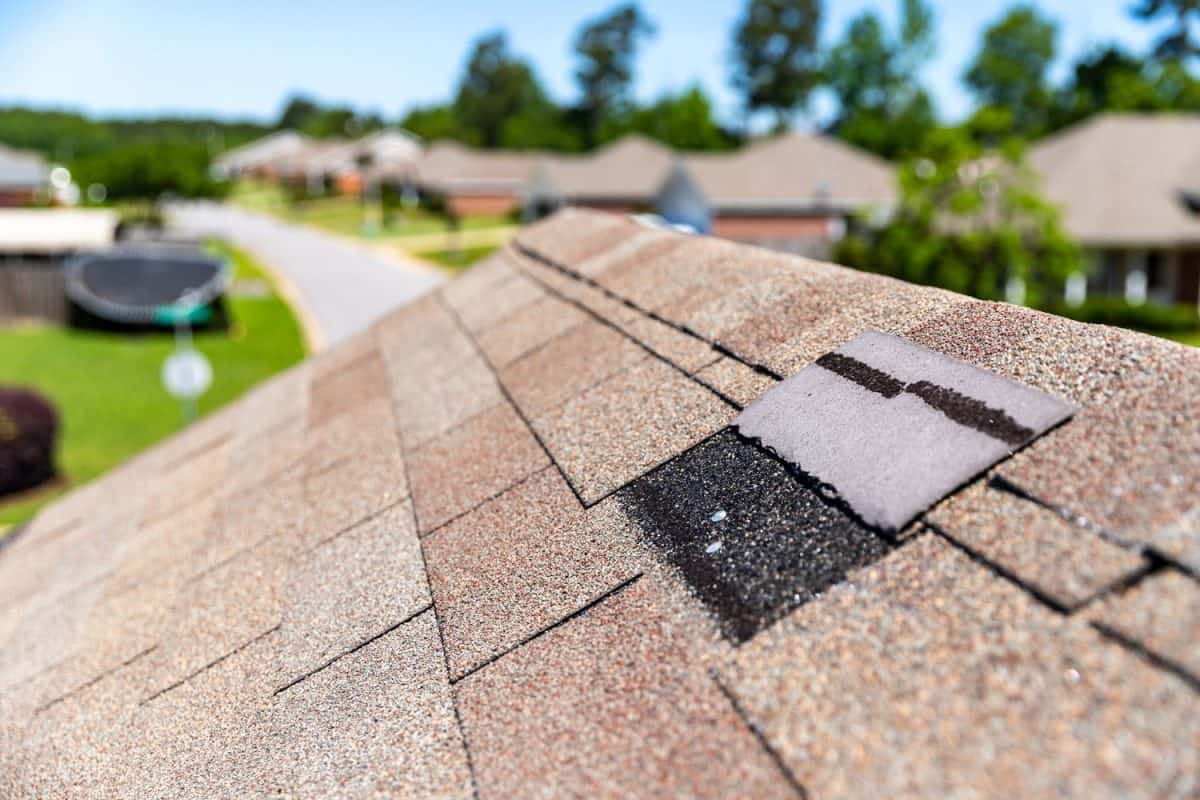
How To Seal Exposed Roof Nails
First and foremost, as seen in the video below, you should climb on top of the roof to work on sealing the exposed nail heads. It is best to work on this job when the roof is dry to avoid slippage and accidents.
Pry on exposed nail heads at the roof ridge and the flashing. It could also be as a result of an improper roof repair, or simply a nail pop. Here are the steps to seal the roof nails:
- If it is a nail pop, hammer down the nail head until it is on the same level as the roof surface.
- Position the tip of the roofing tar tube into the hole, then squeeze it and make sure you are applying underneath as well as on top of the nail head. Also, apply a bit more tar on the surrounding area at the roof surface.
- In order to make the black spots of roofing tar look more orderly, flatten it out with a putty knife or a stick to level it.
- If you are working on a shingle roof, gather a cup of shingle granules which are normally found at the gutter.
- Sprinkle the granules over the roofing tar. This will hasten the drying process and prolong its life.
What Are Nail Pops?
Nail pops are another form of exposed nail heads.
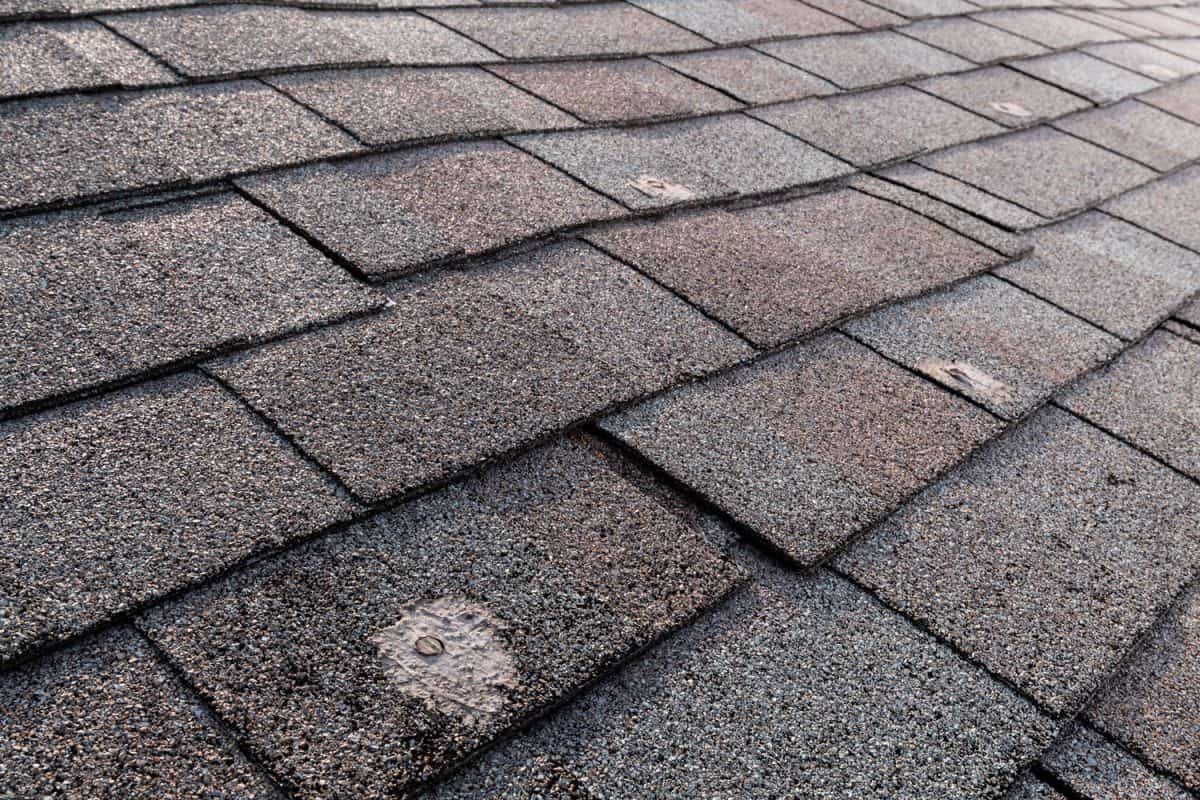
Nail pops are one of the most common causes of roof leaks in shingle roofs. This means a nail protrudes through an asphalt shingle. It forms a hole that will break or damage the shingle and eventually will lead to water seeping into your ceiling. In the photo below, a nail pop causes the damaged shingle to rise.
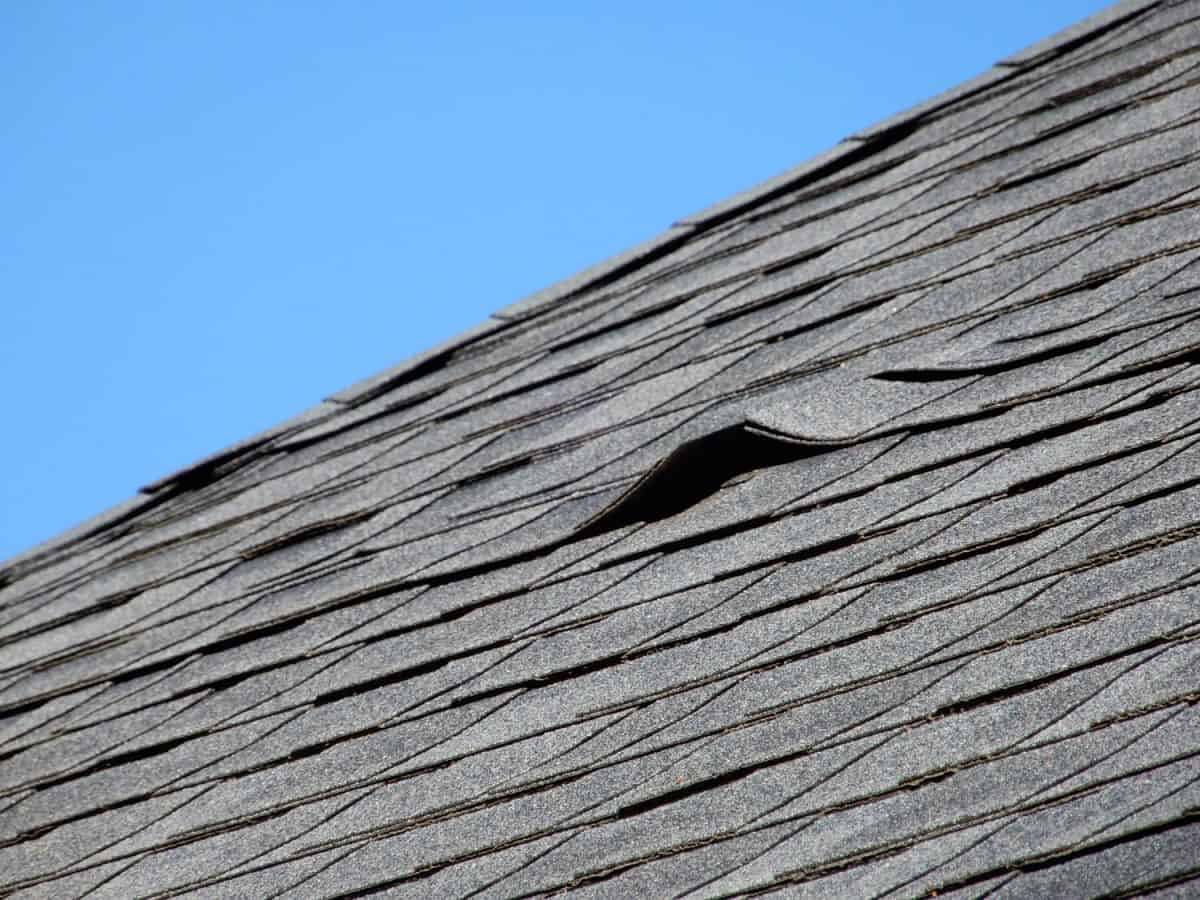
Damaged shingles can be detected even if you are on the ground. You can readily identify them due to their discoloration or displacement. The shingle is raised slightly, as in the photo above, which can easily catch attention. You should fix these loose shingles because they can be easily torn or blown away by strong winds, which would then complicate your roof leaks problem.
The common causes of exposed roofing nails or popping up include:
- Too short nails
- Nails between seams, grooves, knots, and joints
- Improperly driven or wrongly angled nailing
- A sealant that has deteriorated, decayed, or rotten
- Fluctuations in temperature and humidity that cause nails to “work out” from wood
How To Fix and Seal Nail Pops
Fixing nail pops are handled differently. It is not just caulking over the exposed nail. Let's get started!
- Get a ladder and wear boots with traction to avoid slipping and accidents.
- Go climb the roof.
- Remove the exposed nail by using the hammer claw.
- Lift the damaged shingle. Use a flat bar if needed.
- About 1 inch from the vacated nail hole, hammer a new nail. Make sure you position the new nail in a spot with no wood cracks, knots, joints, or splinters.
- With a trowel or caulk gun, apply asphalt cement to the vacated nail hole.
- Replace the shingle back into place, and apply asphalt cement to the hole in the shingle. Alternatively, you can opt to replace it with a new shingle and discard the damaged one.
- Spread a layer of the asphalt cement over the new nail, thus sealing the nail heads.
Additionally, there are instances of loose nails that have yet to push through the shingles. You can retain the nail by simply hammering it down. Make sure to seal the nail heads after hammering back into place.
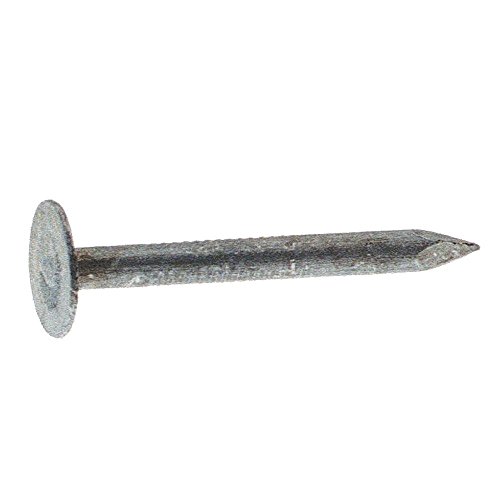
See this galvanized roof nail on Amazon.

See this asphalt cement on Amazon.
Why Should Roofing Nails Be Sealed?
Exposed nail heads at the roof are quite a common sight. Typically, you can detect them at the ridge, the flashing, as a result of an improper roof repair, or just a nail pop. The biggest problem with these exposed nails is that they are prone to rust.
When rust begins to develop, the diameter of the nail shrinks, but the original hole remains the same. The result? It is a venue for water to seep in by passing through the nail stem. It is a leak that may go unnoticed for some time until it makes unsightly stains on your ceiling.
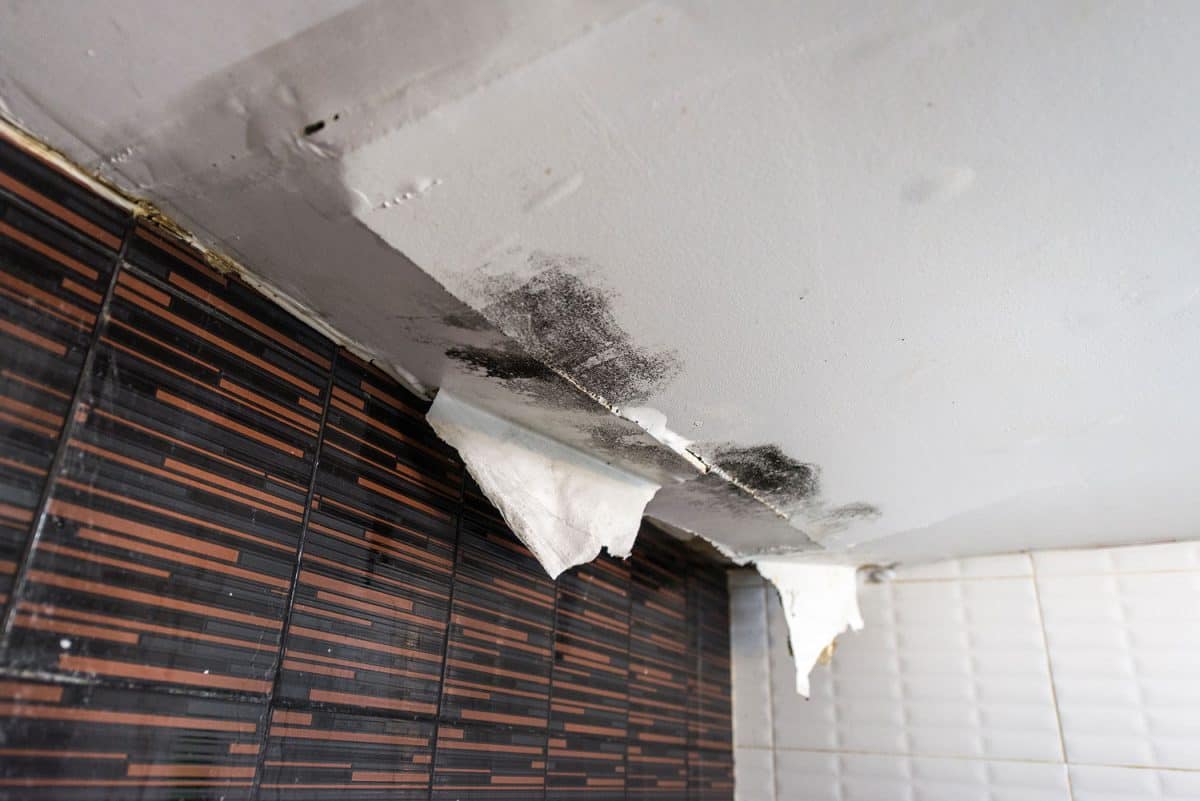
The ceiling stains should alert you that there is water seepage. This may indicate some wood gets rotten and molds develop. You must never let go of this situation before they cause considerable damage to your property. You must act on it immediately by finding the root cause of the problem.
All exposed nails should be properly sealed because they are a potential cause of roofing leaks. This means that a sealant or a flashing material that is compatible with the roofing should be applied to the nail head.
However, this may not be a permanent solution. The sealant is subject to wear and tear and should be consistently replaced. This is made possible by regular maintenance of your roofing, or better still, getting professional help from roofing contractors. Deteriorating sealants and nail pops will be detected before they cause further and costly damage to your home.
In Summary

Roofing nails are exposed to harsh environmental elements, hence, they are prone to rust and get deformed but not the nail holes they are attached to. This condition paves the way for roof leaks. Sealing the nail heads is essential to resolve this problem.
Roofing tar is perfect for sealing exposed nail heads. It is highly durable and easy to apply. For shingle roofs, you may need to repair or replace damaged shingles caused by nail pops. Then, you need to fill in the nail holes, secure the new shingles, and seal the nail heads with asphalt cement.
The roof is the crown of your home. It protects your home while giving value to your property. Sealing the roofing nails is one way to protect your roof from more costly damage and repairs of water leaks in the future.
Check out these posts to learn more about roofing nails and roofing systems: