
When installing interior wood surfaces such as trim, shelving, and thresholds, brad nails are a popular nail choice. However, one of the biggest issues with these nails is the small holes that they leave behind once they are installed. In some cases, the holes may be too small to notice. In other cases, they'll be noticeable enough to cover. We've researched the best ways to hide brad nail holes. In this post, we will discuss it.
Here are the basic steps to hide brad nail holes:
- Sand down the hole's perimeter.
- Select and apply your filler compound.
- Sand down the compound.
- Apply paint or stain.
If you find that you have too many brad nail holes in your trim, don't fret. You can fill these nail holes in about 15-30 minutes using the right method. Continue reading to learn more about how to get it done.
![Brad nails on white background, How To Hide Brad Nail Holes [4 Basic Steps To Follow]](https://uooz.com/wp-content/uploads/2021/08/Young-father-uses-generic-nail-gun-to-fasten-white-trim-to-wall.png)
Steps to Fill Brad Nail Holes
When painting interior walls or trim, it's best to fill any nail holes beforehand. The dimples left by brad nails or a bad spackling job can make the entire wall look shoddy and unprofessional.
Remember, brad nails are not to be used on drywall; finishing nails are recommended for this application because surfaces that won't hold a lot of weight or require a ton of support. Below are a few tools that you can use to easily fill the holes.
Things you'll need:
- Spackler or wood filler
- 220-grit sanding paper or block
- 2-inch putty knife
- Damp rag
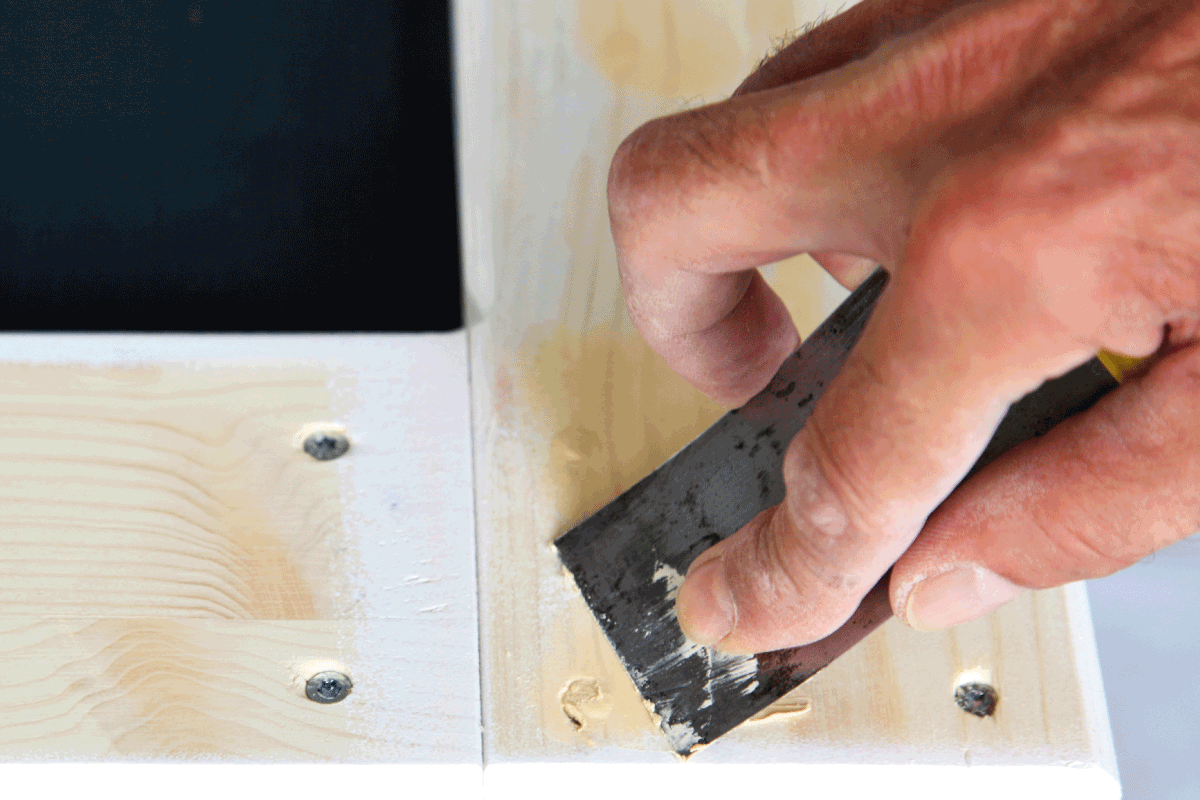
1. Sand down the hole's perimeter
Start by preparing the area with your sandpaper. Typically, when you nail into wood, the edge of the nail hole is a bit ragged, which can cause issues when you apply paint or stain. To prevent the hole from showing through completely, take your sanding block and go over it a few times.

Find this sandpaper set on Amazon.
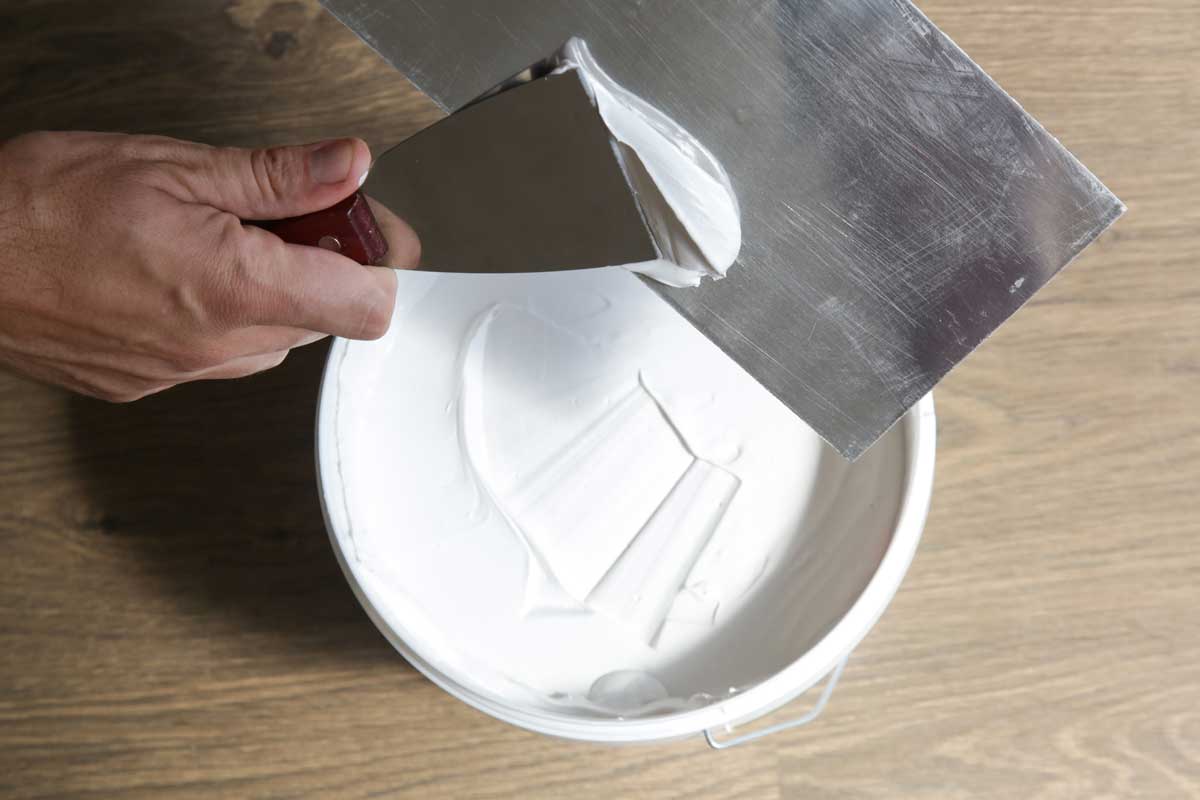
2. Select and apply your filler compound
Depending on the surface on which the nail is installed, you may want to use spackle or a wood filler for the task. For this application, you'll want to place the compound on the bottom edge of your putty knife. Next, apply the compound to the surface, using about a tablespoon at a time. Then, glide your putty knife over the surface to swipe and smooth out the compound so that it lays as flush as possible to the surrounding area.
You can use either vertical or horizontal motions to apply the compound. After applying the compound, apply another layer to account for shrinkage.

Read more details about the spackling compound on Amazon.
3. Sand down the compound
Wait the recommended time for the spackle or filler to dry completely. This time will vary by the compound that you choose and the brand that you go with; always use the manufacturer's recommended drying times.
Take your sanding block and go over the compound gently to smooth it down and make it flush with the rest of the wall or trim. This should only take a few seconds to do, as you want to flatten the compound as much as possible with your putty knife before you move to the next step--be careful not to over-sand the area.
4. Apply paint or stain
After the second coat of filler compound has dried, break out your paint or wood stain and go over the surface. If painting the wood, you may want to apply a primer first, depending on the size of the surface that you're painting.
It's always a good idea to closely inspect the first coat of stain or paint to ensure that the filler job is adequate. If you notice any bumps on the surface, wait for the paint or stain to dry and then sand them down until they are flush. And afterward, repaint the area as needed.

Check out this wood stain on Amazon.
Need a visual? Check out this video:
Should I fill nail holes before painting?
Yes. When you apply finishing nails to a wood or drywall surface, they may appear very small initially, but these small holes will create noticeable dents in the surface of the wall or wood after you apply a layer of paint. If you don't want them to stand out, it's best to cover them using a wood filler, spackle, or epoxy.
What do professional painters use to fill nail holes?
Home improvement professionals typically use drywall spackle, wood filler, putty, or a joint compound to fill nail holes. The specific filler that they use will depend on the surface and their personal preference. Let's take a look at each type of filler.
Wood filler
The main purpose of wood filler is to fill cracks and holes in wood surfaces. It works great for small, large gouges, small crevices, and finishing nail holes. There are also different types of wood filler, including water-based, epoxy base, and oil-based. The perfect type of filler to use depends on the size of the area that you need to cover and whether or not you plan to paint it afterward.
Epoxy-based fillers work best for larger jobs where structural integrity is important. For example, if you have damaged joists beneath a subfloor and need to fill it in a pinch, an epoxy wood filler will work best for the task.

Have a look at this wood filler on Amazon.
Spackle
Spackle is typically used on drywall, though you may hear the term used to refer to wood filler as well. However, spackle is best for filling nail holes, repairing dents and gouges, and repairing masonry, metal, and plaster. There are different types of spackle. However, it's typically a paste-like material mixed with several different binders, such as gypsum powder and sand.
The great thing about spackle is that it's pretty much a hassle-free compound, and it doesn't require much effort to apply. Spackle also doesn't shrink once it dries, and it's easy to sand it down for paint and stain applications.

Find more details about this spackle formula on Amazon.
Joint Compound
Joint compound is typically used to repair larger and deeper holes in drywall and other surfaces. It's a water-based filler that is easy to apply and sand down for paint and stain applications. It also comes in different consistencies, with thicker compounds being used for bigger holes or larger areas. Keep in mind this is for professional or big repair applications. If you need to fill a nail hole or repair a small area of wood or drywall, you may not want to use a compound.
These solutions will typically need to be mixed before they are applied. Also, the only setback of joint compound is its drying time. Joint compound sets fairly quickly. So if you're not used to applying fillers, you may want to stay away from this product as it can cause you to redo the work if you don't apply and sand it down fast enough.
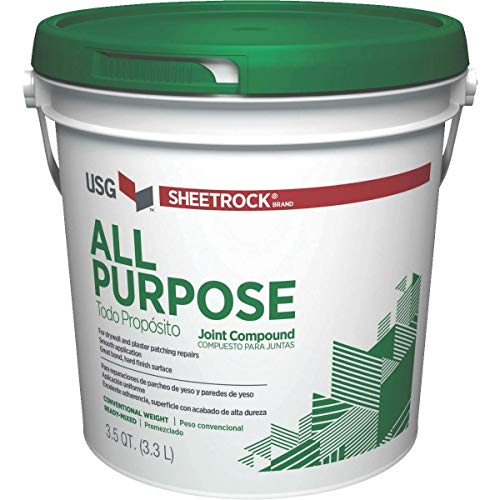
Learn more about this joint compound on Amazon.
Epoxy
Epoxy-based fillers are typically used on surfaces that require sturdy and durable components. You'll often see epoxy-based fillers used for metal, porcelain, and large wood surfaces. Epoxies contain synthetic resins that, when combined, ultimately cure to form a hard solid base. This base can typically be planed, sanded, cut, and painted once it's completely dried.

Find epoxy-based wood filler on Amazon.
How do you fill nail holes without sanding?
If you have small nail holes, such as those from brad nails or other finishing nails, you can simply apply a spackle or filler product to the hole and then smooth it out with a putty knife to make the area as flush as possible. It may take some expertise to get this right, which is why professional painters are experts at this. However, when you do, you should be able to apply the filler in a way that leaves the surface completely flat.
How to fill nail holes in trim without painting
The answer to this question depends on the surface that you're repairing. If you're filling nail holes on wood, you can typically fill them with a wood sealer that matches the color of the wood. You can use a 1-inch putty knife to apply it to the wood and smooth it over.
However, if you're repairing holes in drywall, the best way is to fill the hole is with a spackle. Next, you'll need to sand it down. Finally, take a damp rag and wipe the area around the repair. The paint from the surrounding areas will rub off on the trim and cover the nail holes.
Wrapping Things Up
We hope this post has been helpful in illustrating how to hide brad nails. Remember, if you're going to paint the surface afterward, be sure to flatten out the repair area to make it as smooth as possible. Otherwise, you may find yourself with a lackluster paint finish. Good luck!