
You are doing your tiling job, and you get to the point where you have an outside corner. Grouting the corners could be challenging. You may wonder how to properly grout these areas. Don’t fret! We have researched helpful tips and grouting techniques for your convenience.
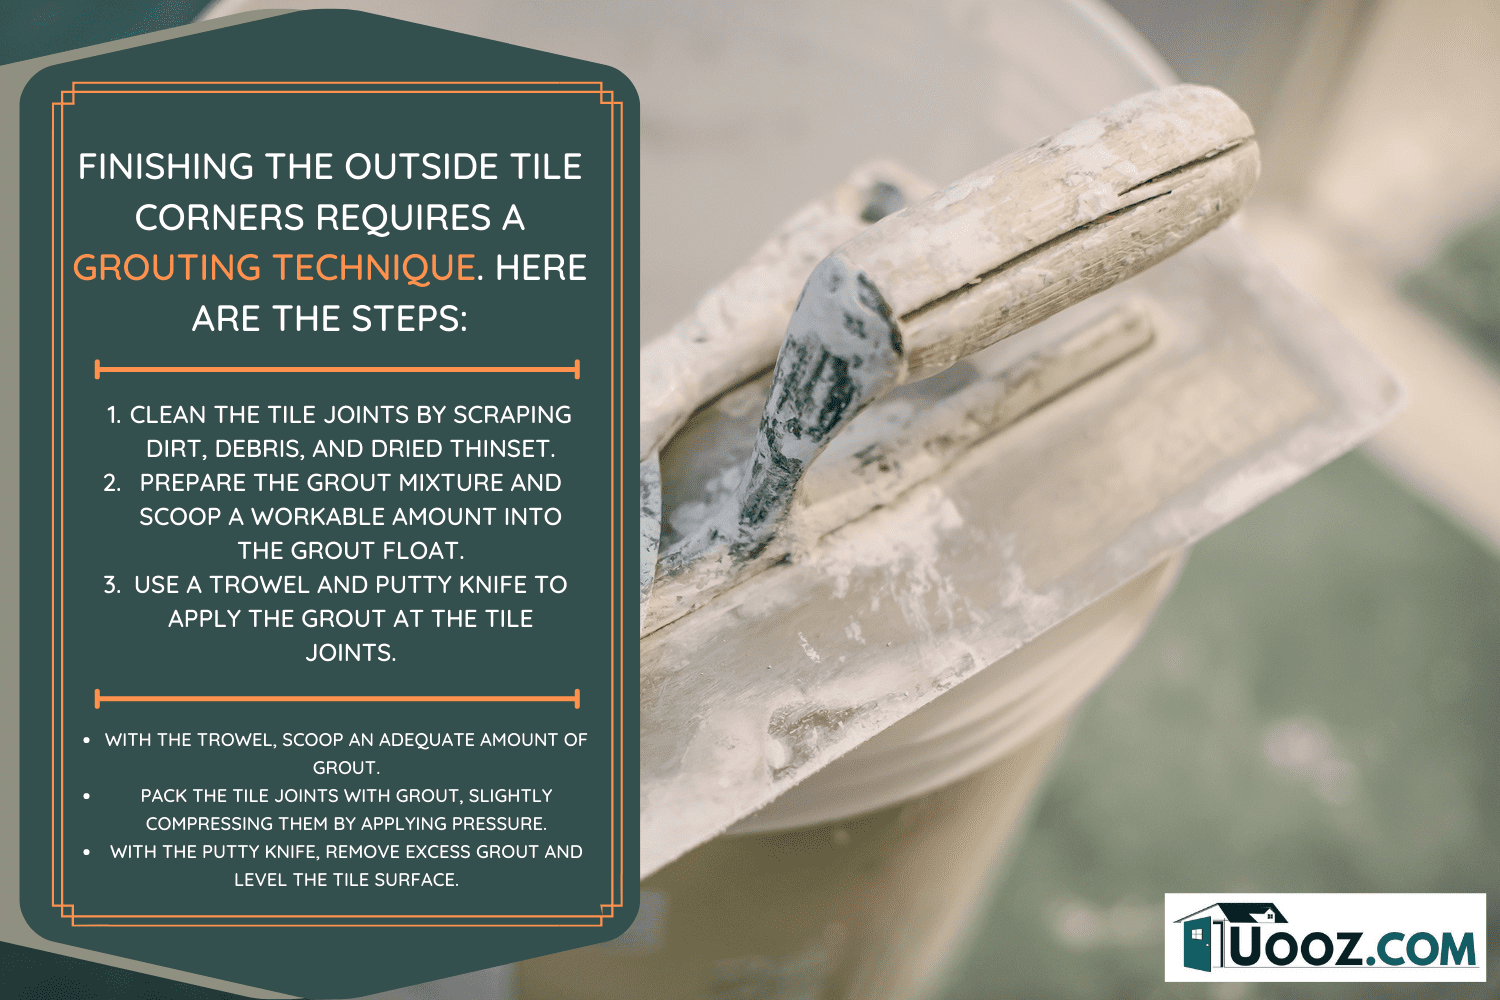
Finishing the outside tile corners requires a grouting technique. Here are the steps:
- Clean the tile joints by scraping dirt, debris, and dried thin-set.
- Prepare the grout mixture and scoop a workable amount into the grout float.
- Use a trowel and putty knife to apply the grout at the tile joints.
- With the trowel, scoop an adequate amount of grout.
- Pack the tile joints with grout, slightly compressing them by applying pressure.
- With the putty knife, remove excess grout and level the tile surface.
With the sturdy and straight edge of the putty knife, you should be able to shape sleek and clean grout tile corners.
Grout can ruin an otherwise great tiling project. Finishing the corners and edges can spell the difference. It requires a grouting technique. Stay on this page as we discuss the relevance of tile outside corners and how to properly grout these areas to help you achieve a professional-grade look.
Why Grout The Outside Corners?
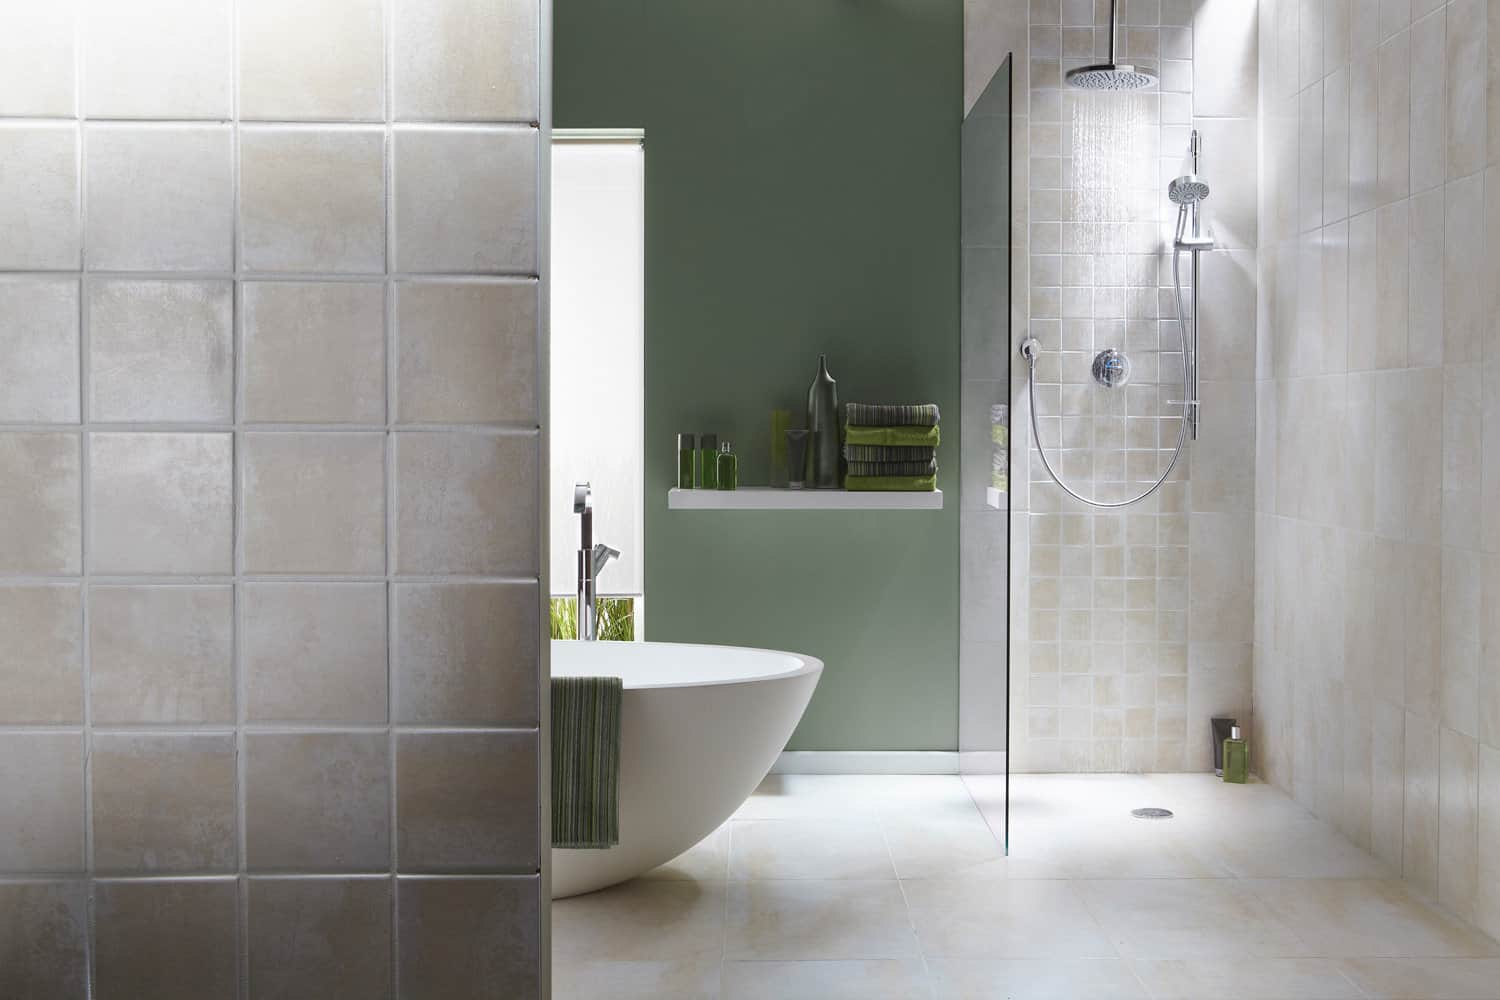
An outside corner is when you have two tiles joined together in different planes. In this setup, the bare edges of the tiles are exposed. This is not what you want to have as the final look of your project. Thus, this requires grouting to finish the tile edges.
Unlike a flat surface, grout at the outside corners is not surrounded by tiles on all sides. So, applying the grout requires some technique. The application is the same when working on a flat surface, only that the grout at the corners requires extra care and attention.
Grout at the corners should be packed, airtight, and compressed due to the following reasons:
- The exterior corners are areas where tiles meet in different directions. There is a possibility that the tiles will move or get displaced. Grout can help prevent this from happening.
- The corner tiles are prone to chipping and cracking after some time, and packing with grout can avert the damage.
- Especially in high-traffic areas where tile corners are exposed to frequent contact with people and things passing by, grout can cushion the impact on the corner tiles.
- In areas frequently wet, such as the shower curb, grout can protect the tiles from water seepage that could otherwise enter through the tile joints.
- Corners disrupt an otherwise flat surface; hence, grout protects the tiles to absorb the change of surface tension.
- Since corner tiles have more exposed edges that could serve as entryways for insects, ants, and environmental elements such as frost, mildew, and mold, grout is a permanent and secured blockage that could otherwise damage the tiles.
Above all, on how grouting the corner tiles helps, aesthetics is always foremost that comes to mind for every homeowner. Who would not want sleek, smooth, clean, distinct corners and edges of the tiled wall and floor?
You might be interested to read a related topic on grout problems, we have this post for you: Floor Grout Cracking And Crumbling - What To Do?
How To Apply Grout To Tile Outside Corners
Applying grout is the last step in every tiling job. Finishing the outside corners can make or break the tiles you have installed on the flat surface. The steps outlined below simplify the process to give you perfect-looking outside corners.
Preparation
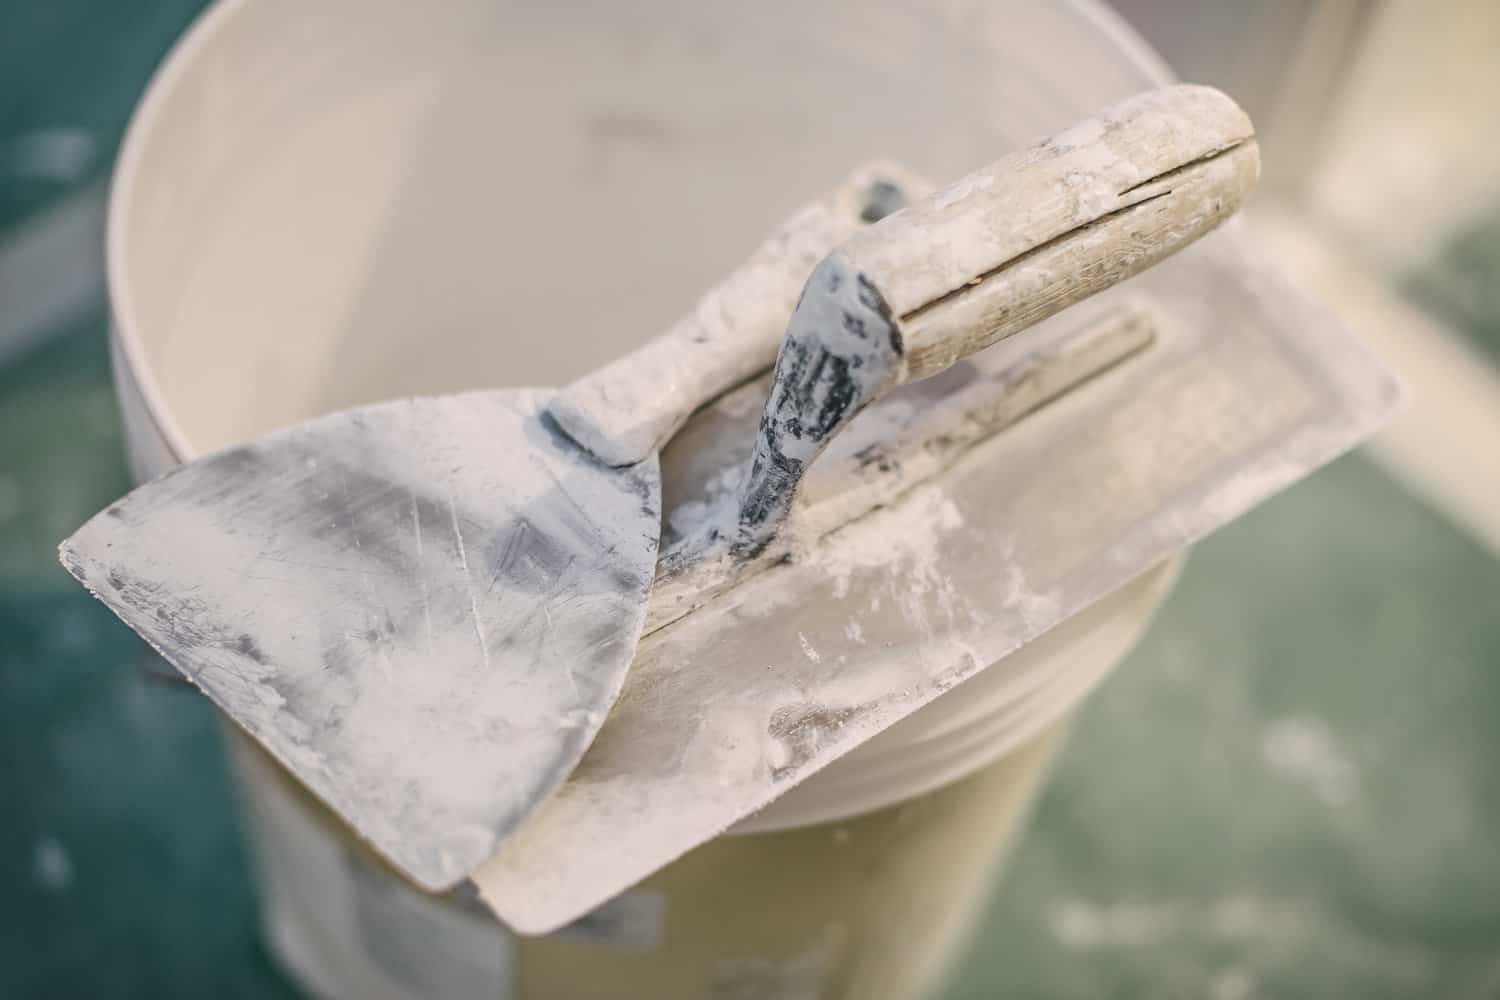
Clean the exposed tile edges. With a putty knife, scrape or vacuum any loose dirt, debris, or chips of dried thin-set that may have settled in the joints.
There may also be grout that has settled at the joints when you have installed the tiles. Exercise extra caution by not scraping too hard as you may damage or chip the tiles.
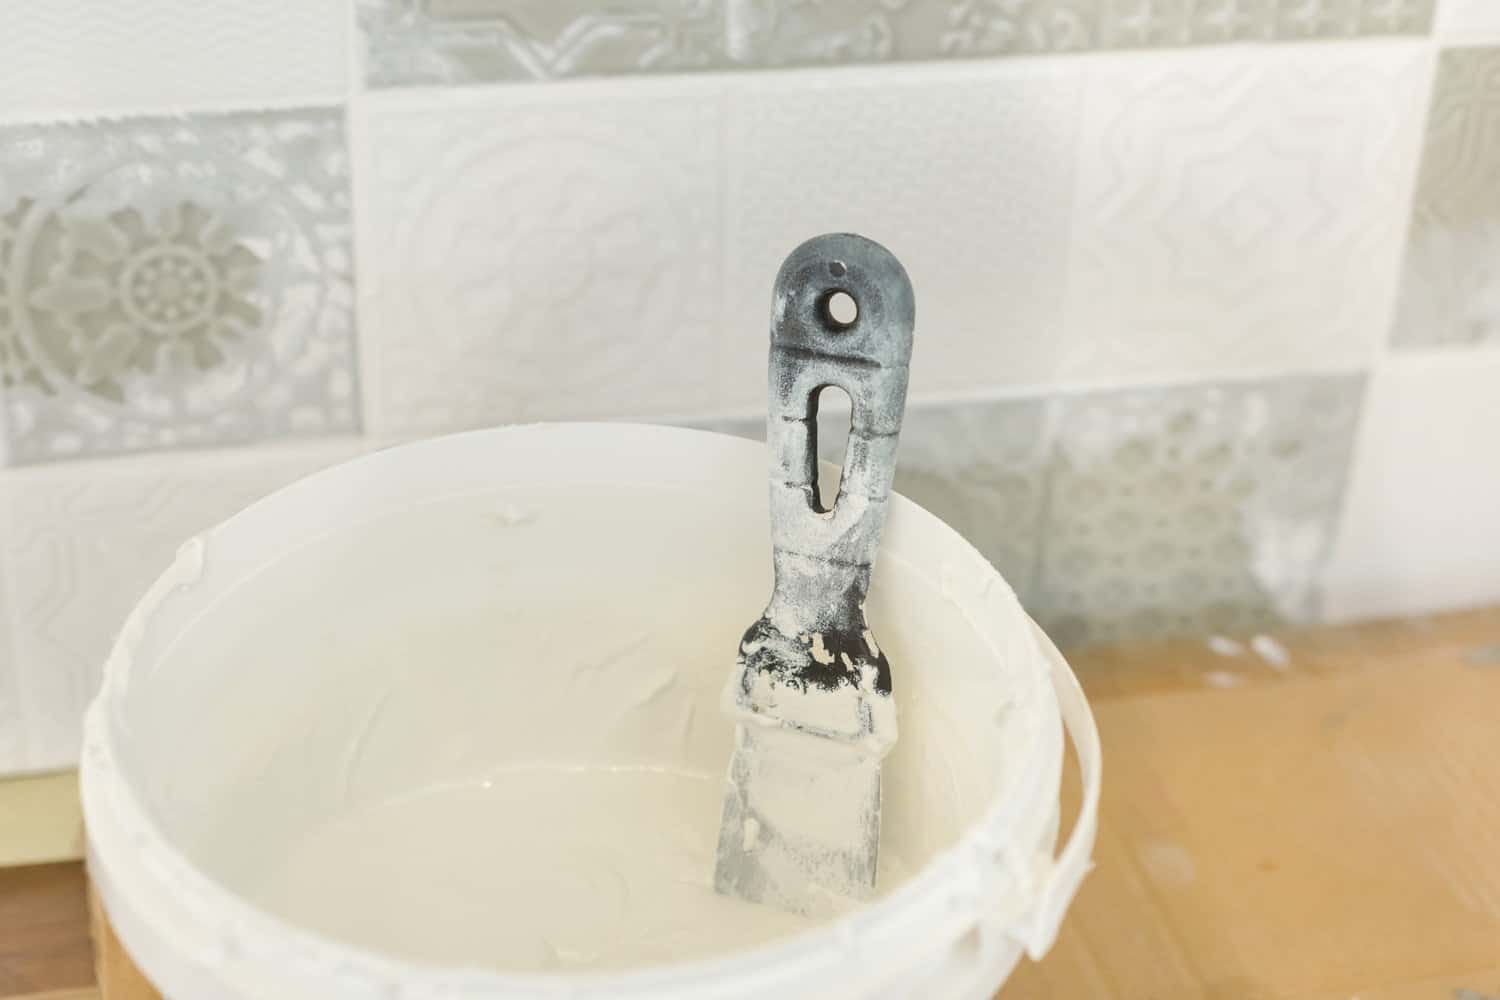
A putty knife is recommended for removing dried and oozed-out thin-set. It has sturdy edges perfect for scraping.
Prepare The Grout
With a trowel and a bucket, mix the grout powder until it is completely dissolved and has achieved the required consistency. Pour water gradually and mix it manually. Don’t mix with a drill or paddle since it absorbs air into the mix, which could result in a weak cured strength of the grout.
You might be interested to read a related topic on grout preparation. This post has some helpful insight: Grout Looks Wet Long After Shower - Is This Okay?
After thorough mixing, let the grout rest for 10 minutes. This enables the grout chemicals to work on their strength, resulting in crack-free tile joints and corners. Afterwhich, it will harden and repeat mixing by hand to loosen, and it is ready for application.
The margin trowel is every tiler's best friend. It has wide applications in every tiling project. Its hardened steel surface makes it easy to scoop mortar and grout. It comes with a bucket hook for added convenience of properly storing while you are in the middle of your project.

Check out this margin trowel on Amazon.
Apply The Grout
Load the grout mixture to the grout float by scooping out an adequate amount. Remember that you are working on touch-ups of the corners, so this is less grout than when you are working on a wall or floor.
Apply grout at the tile joints by depressing the edge of the grout float at every spot. Slightly pushing the float edge enables you to pack and compress the grout while applying.
In working at the tile edges and corners, use the trowel for better control and maneuvering. Use the trowel as a spatula in which you can scoop an adequate amount from the float and apply it smoothly at the corner edges.
With minimal pressure, compress the grout while applying. This ensures there will be no air spaces when it hardens and cures.
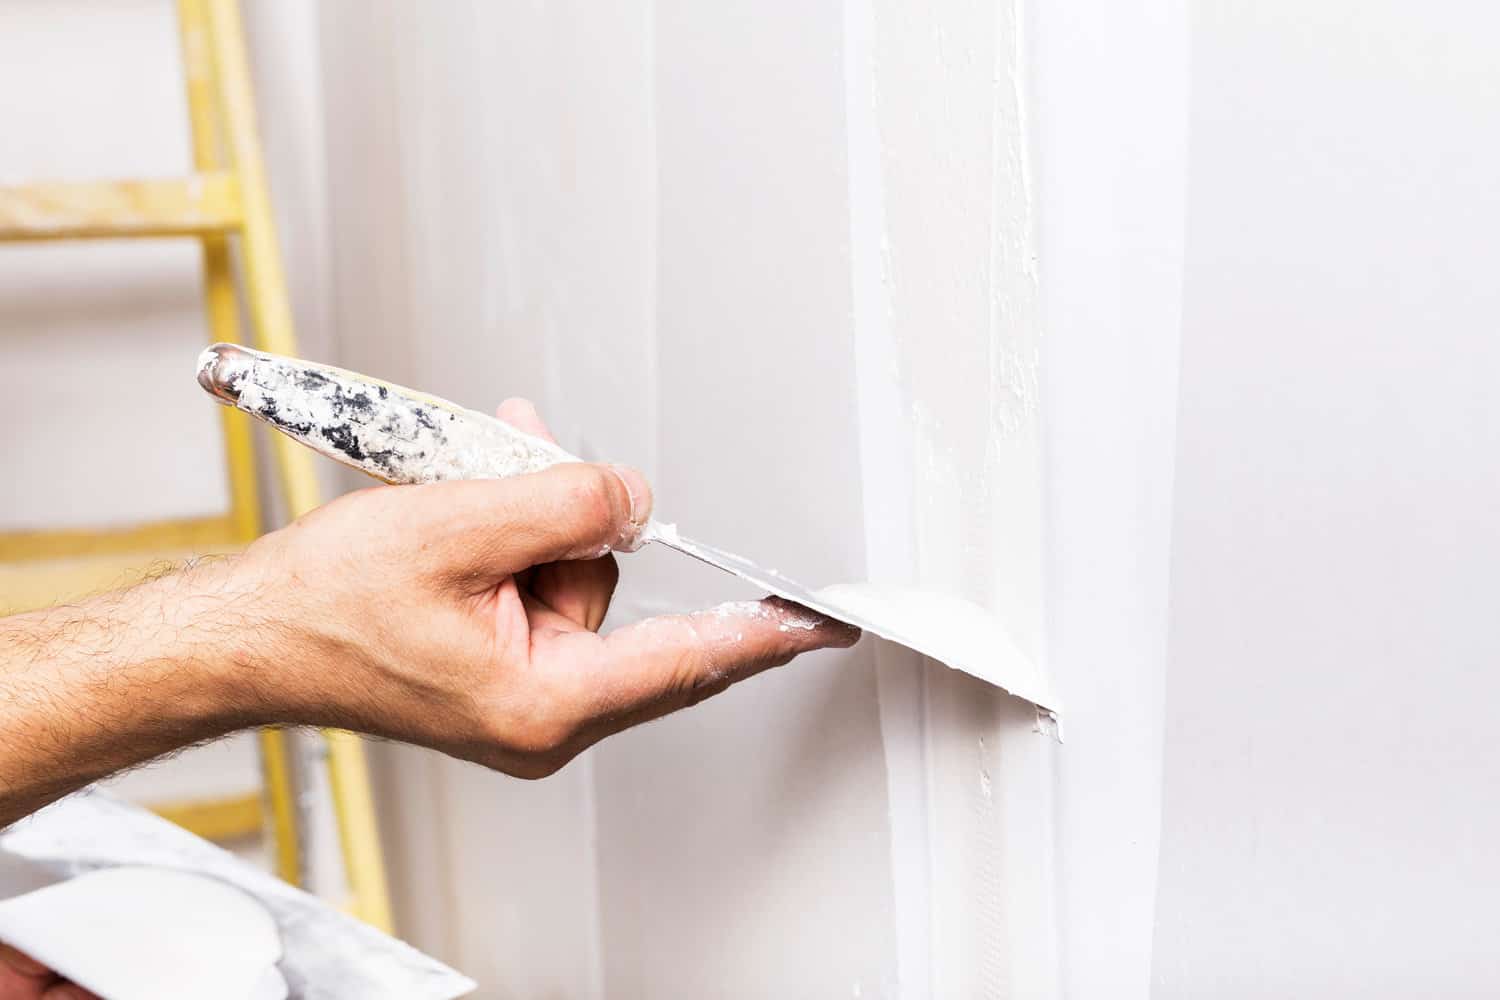
With the aid of the putty knife, wipe excess grout at the edges and corners. Ensure that you flatten uneven grout depth and, more importantly, shape the 90-degree angle of the corners. The sturdy and straight edge of the putty knife can visually help to produce clean and sleek edges and corners.
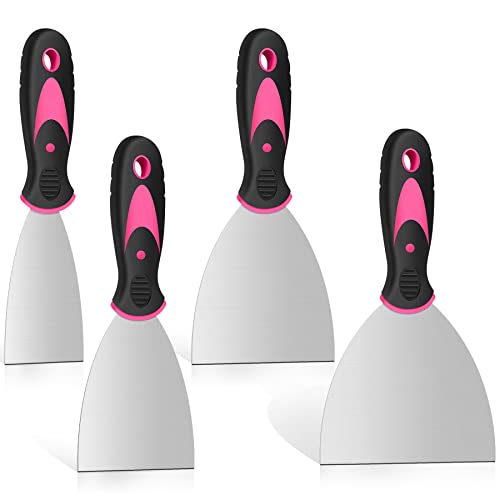
Check out this putty knife set on Amazon.
Aside from shaping the corners, this set of spackling knives fits many purposes for your DIY tiling project. As mentioned, use it as a scraper for cleaning the tile edges to prepare for grouting.
You can also use it as a spatula to apply patches and small amounts of grout to the tile joints. And lastly, you can also use it to scrape excess grout from the tile surfaces during cleaning.
Cleaning, Tooling, And Buffing
Work with your empty groat float as a squeegee. With its rubber surface, initial cleaning involves removing the bulk of the excess grout over the tiles. This further helps to evenly distribute the grout, avoiding unnecessary pressure over the grout lines and corners.
The applied grout gets hard after 20 to 30 minutes. Afterwhich, damp a sponge and wipe across the surfaces. Rinse the sponge and continue until you have completely cleaned all the surfaces.
You can smoothen and level uneven grout lines and corner edges by depressing your forefinger to apply pressure on the damp sponge. You don’t need to depress the sponge too much since you aim to have grout lines and corner edges with uniform depth and shape throughout.
Wait 30 minutes to dry the tile surfaces while they form a grout film or haze. This can be removed by buffing them with a microfiber towel. The fibers effectively remove the grout haze quicker and cleaner, resulting in a clean and polished tiling job.
It is recommended to set aside a small quantity of unused grout for later repairs and touch-ups. Since grout readily absorbs ambient moisture, it should be stored in airtight containers such as resealable plastic bags.
To help you visualize the above steps, take a look at this video:
Tips On Grouting Tile Outside Corners
Here are some helpful tips from experienced DIYers. These can help you lessen the waste of material and the grouting mess in the work area while still producing a well-finished look for your tiling project.
- If you are working on vertical wall corners, always apply grout upward.
- If you will grout both wall and floor corners, work on the walls before the floor corners. Otherwise, the floor will just get messed up with falling excess grout if you work on the walls after.
To read more on this topic, we have this post for you: Should You Tile The Floor Or Walls First In A Shower?
- You can work with less grout at a time. This should be a workable amount you can easily apply to the corners before the grout hardens. Take care to ensure that the excess grout will fall into the bucket and not on the tiles or the floor.
Yes, you can mix a small amount of grout. Check out this post to learn more: How To Mix A Small Amount Of Grout
Final Thoughts
Grouting makes a statement in your tiling project. Much more if you are finishing your tiles at the outside corners. This post discussed the grouting techniques to finish your project with a striking look.