
Proper thinset application is important when installing beautiful and durable tiles. Like glue, it holds the tiles to the floor. However, the process can be quite daunting at first, especially when getting the right thickness of the thinset. We've put together the information you need to know for thinset success.
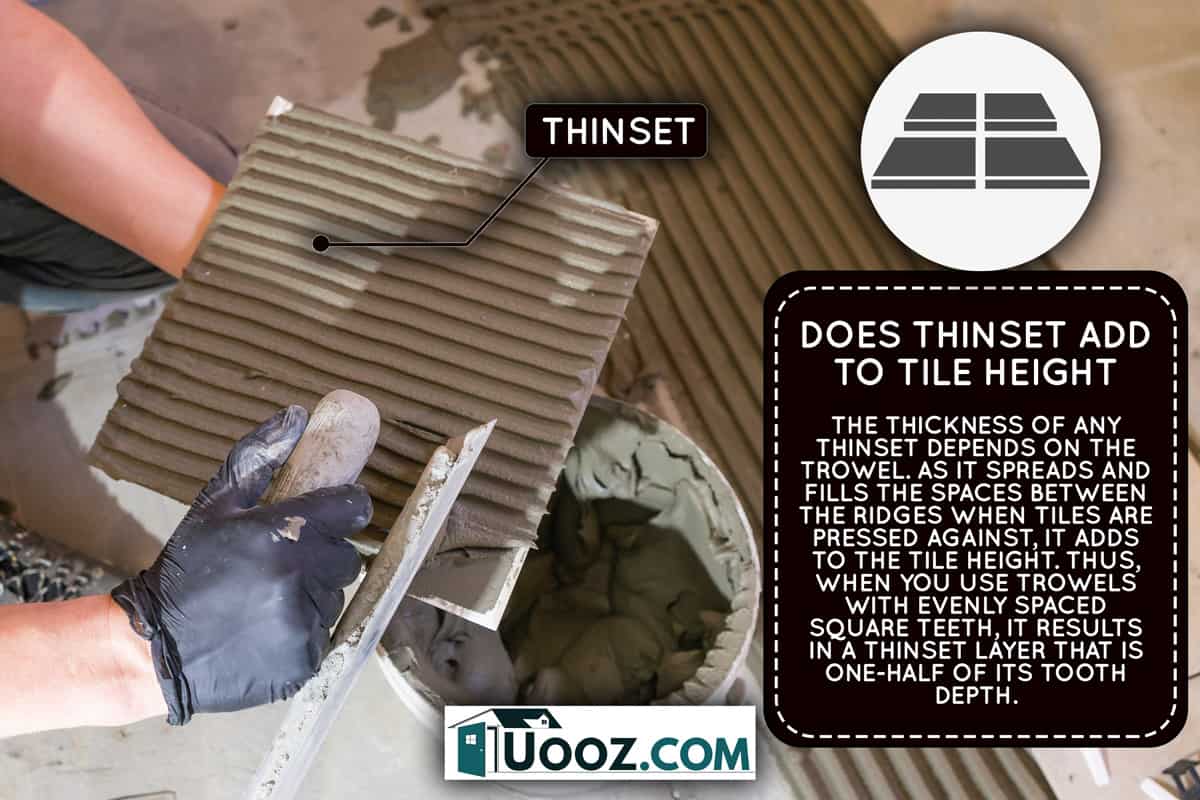
The thickness of any thinset depends on the trowel. As it spreads and fills the spaces between the ridges when tiles are pressed against, it adds to the tile height. Thus, when you use trowels with evenly spaced square teeth, it results in a thinset layer that is one-half of its tooth depth.
On the other hand, U-shaped trowels create thinset layers that are one-third of the tooth depth. For example, using a 1/4” X 1/4” square notch trowel adds a thinset thickness of 1/8” to the tile height while trowels with 3/8” U-shaped teeth will add 1/8”.
Now that you have an idea of the thickness that the thinset layer adds to the tile height, let’s learn more about thinsets and techniques for installing tiles. This will help you in your future projects and avoid unnecessary mistakes.
What Is A Thinset?
Although often confused with mortars and grout, thinsets are completely different types of adhesive and should not be interchanged with others. It is a type of mixture designed to adhere tiles to the floors and walls. As the name implies, it is comparatively thinner which makes it easier to apply and spread evenly.
A wide range of thinsets is available in the market. They may come as a dry mix that you add in water to produce a slurry or a pre-mixed one that you can spread right away. Regardless, there are two main types that you need to look out for - unmodified and modified.
Modified vs Unmodified Thinsets
Modified thinsets provide a stronger hold since they have acrylic, liquid latex, or sometimes even chemical-resistant agents mixed in. With their advanced formulation, it is recommended for almost all tile installations. Its increased performance forms a stronger bond that reduces the formation of cracks in the tile. This way, tiles adhere better to the floor and absorbs less moisture.

Check out this modified thinset from Schluter on Amazon.
In contrast, unmodified thinsets are made of simple materials such as sand, cement, and water-retaining agents. They are a preferred choice when working with impermeable membranes such as waterproofing membranes or radiant floor heating. Unlike modified thinsets, they do not rely on air to cure properly. When sandwiched between impervious layers, they can properly hydrate and create interlocking crystals with denser bonds.
How To Apply Thinset
Thinsets are essential to ensure that the tiles stick durably to the floor. To achieve this, here are the steps to apply thinset.
- Prepare the wall or floor you will be working on. Clean any dirt or debris that may compromise thinset adhesion. You can use an all-purpose cleaner, water with dish soap, or a mixture of warm water and trisodium phosphate. Make sure to have a clean and smooth surface before starting the project.

Click here to find this product on Amazon.
- Select the type of thinset suited for the project you are working on. If you have a dry mix, add up water as guided by the manufacturer's manual. You can use a drill to mix the thinset at low speed until you achieve a consistency similar to that of peanut butter. Let it rest for at least 5 minutes before using.
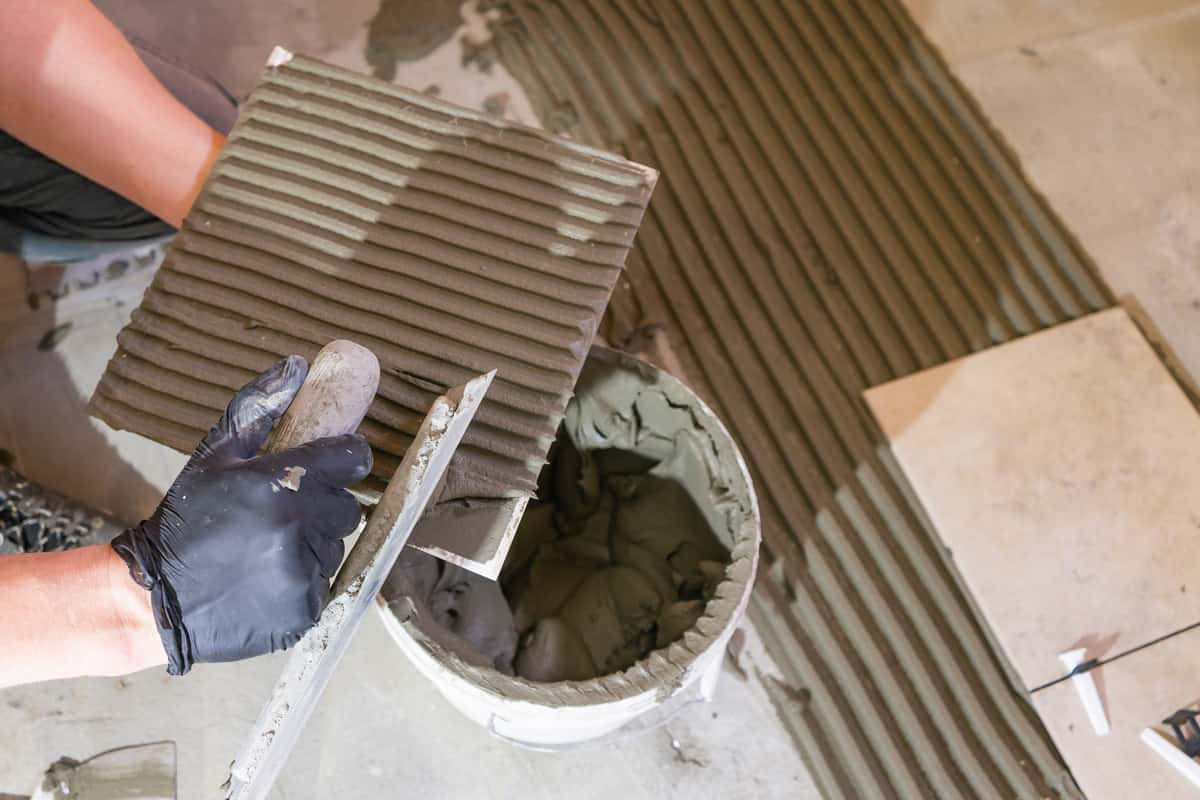
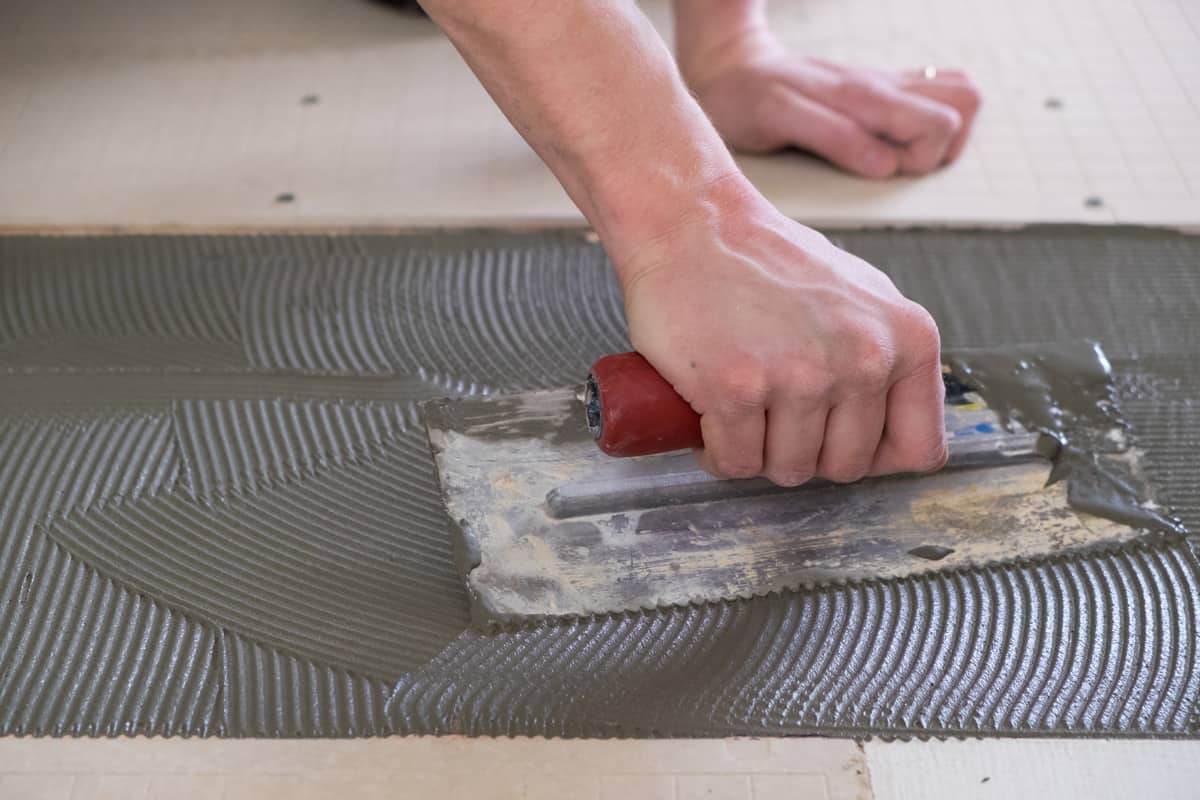
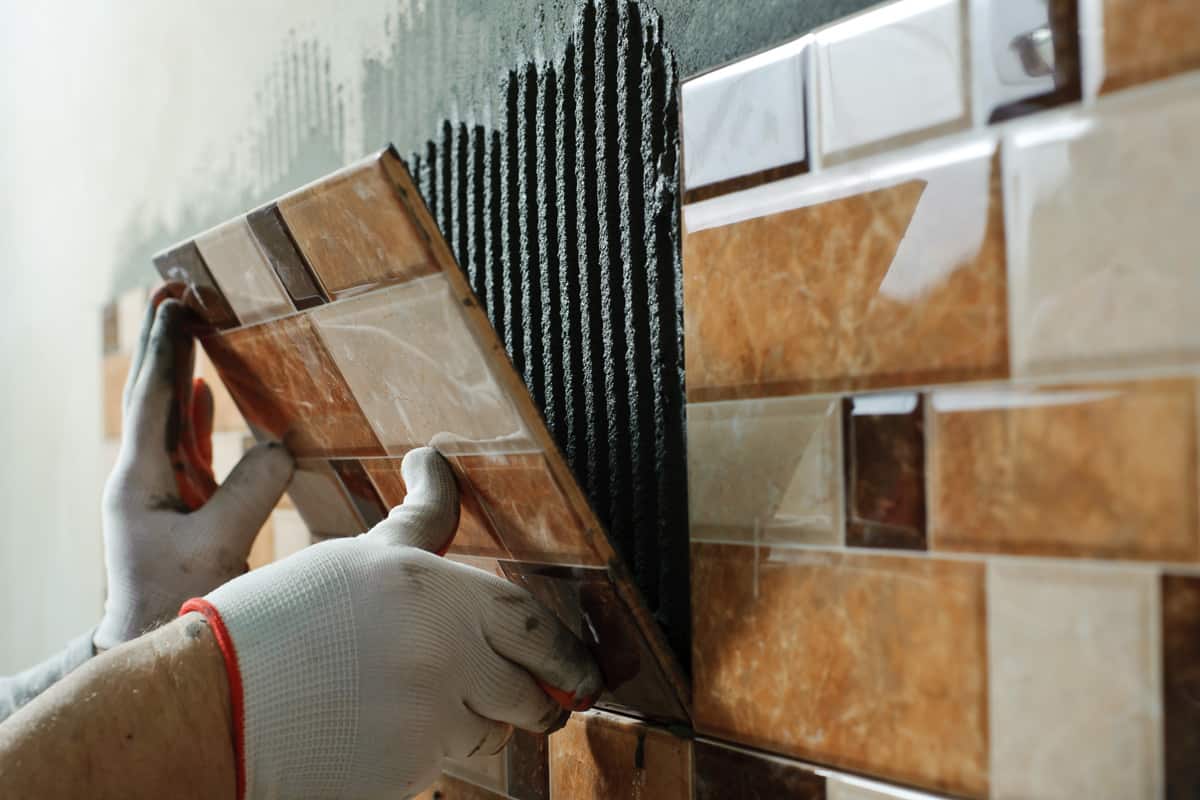
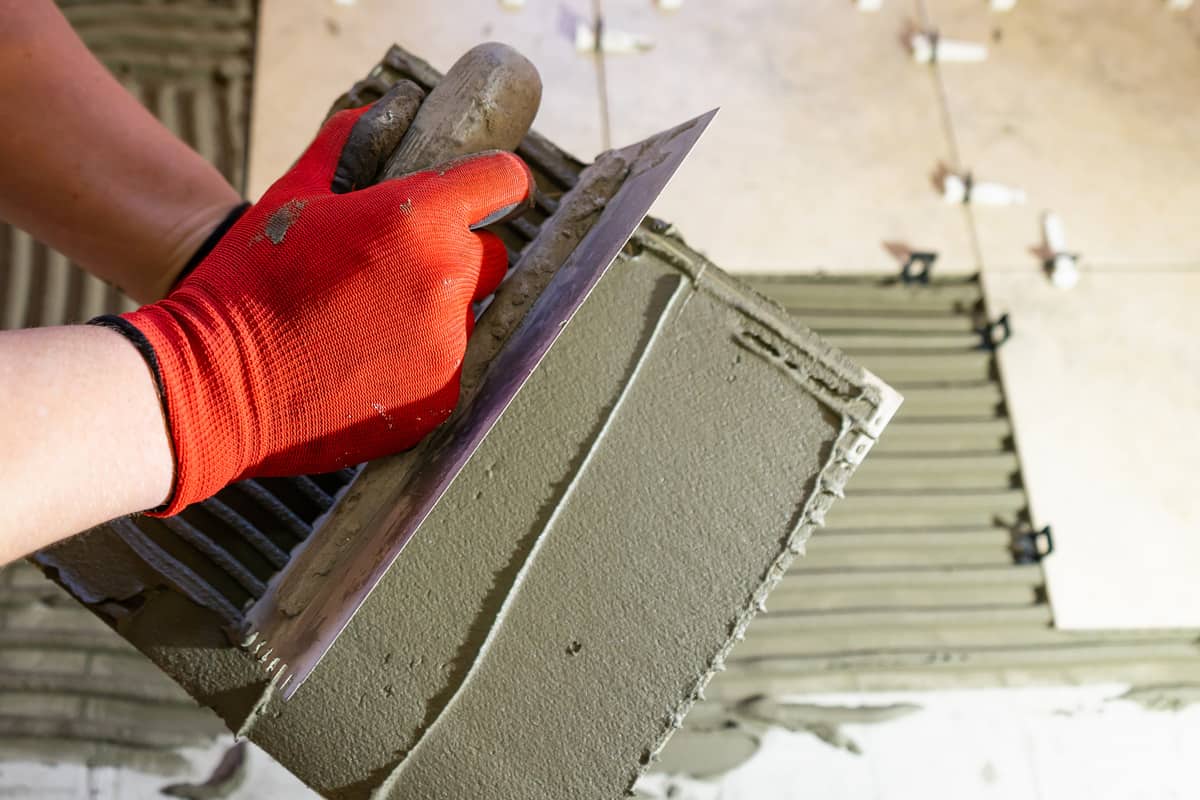
- Scoop a portion of the thinset and spread it on the surface like butter on bread using the flat side of a trowel. Then, with the notched edge down, evenly apply a second layer of thinset. The trowel notch depth will limit your mortar depth.
- Rake and comb across the surface heavy enough to create a scraping sound. Don’t mind the grooves as they allow air to escape when placing your tile.
- Spread a skim coat before placing the tile. Position the tile over the mortar bed and twist it slightly while pressing it in place. This will help create a stronger bond between the thinset and the tile.
For a better understanding, check out this video.
Different Types Of Trowel
Trowels are essential tools in applying thinsets during tile installations. As mentioned before, they determine the thinset thickness. Similar to other trowels used in masonry, they have a handle and a flat side. However, tile trowels have an added feature- notches. Generally, tile trowels come in two types- square notch and V (sometimes called U) notch.
Square Notch Tile Trowels
These trowels have square or rectangular notches that create flat spaces between the mortar rows. Compared to V-notch tile trowels, they typically dispense more mortar while the spaces create more room for the mortar to smush down. As a rule, tiles over two square inches use square trowels.
Square notch tile trowels have three numbers that indicate the size and spacing between the notches. The numbers refer to the width of each tooth, spacing between the teeth, and tooth depth respectively. If there are only two numbers indicated, the first number indicates the width and spacing then the second number is the depth.
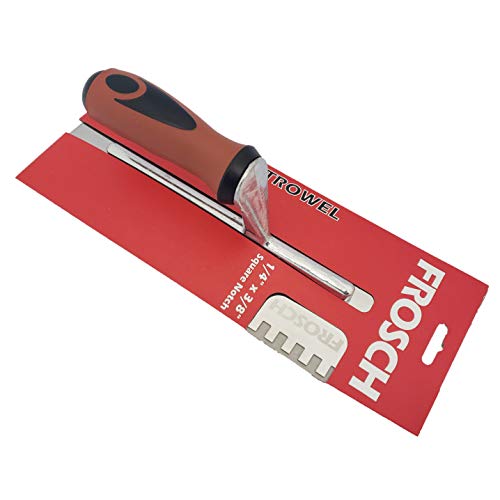
Click here to see this trowel on Amazon.
V Notch Tile Trowels
For tiles smaller than a 2inch square, it is best to use a v-notch trowel. They have zigzag teeth patterns that dispense less mortar and are suitable for wall and ceiling applications. Since they dispense less mortar, they are easier to handle.
To read the size notch sizing, check out the numbers indicated in the V notch tile trowel. Unlike square notches, they only have two numbers. The first refers to the width while the second indicates the depth.

This high-quality Goldblatt V-Notch Trowel is available on Amazon, check it out.
Choosing The Correct Notch Size
The trowel size should match the tile size. As a general rule, larger tiles require a larger trowel vis-a-vis. Given that, below is a guide on choosing the right notch size for you.
Tile Size
- 16" or larger
- 8" to 16"
- 4" to 8"
- Mosaic tiles up to 4-1/4"
Notch Size
- 1/2" x 1/2"
- 1/4" x 3/8"
- 1/4" x 3/8"
- 3/16" x 1/4"
How Thick Should Thinset Be
Before installing any tiles, you must already have an idea of your target thinset thickness. This way, you can purchase the appropriate tools for the job. Take note that it will depend on the materials you’re using, the type of tile, and the surface where you will install the tile.
Tile Characteristic
- Ceramic and porcelain tiles require 3/16" to 1/8" of thinset. Anything thicker will compromise proper bonding between the floor and tile.
- Glass tile thinset thickness is at least 1/16" to prevent air space from forming. As a result, it helps the tile bond quickly to the surface.
- For marble tiles, the perfect thickness would be 1/2" inch. A minimum of 3/32" inches is required for complete granite tiles and below 3/4" inches for other natural stone tiles.
Type Of Surface
Just as different areas around your home call for a different type of tile, different parts vary in thinset thickness as well. Shower floors and ceilings require the relatively thin application of thinset at 3/16”. Be generous with thinset application for areas around the tub and apply a 1/2" layer. Typically, tile installations on walls have a 1/4” layer of thinset.
Tips On Using Thinsets
- Cleaning the surface is one of the most critical steps in tile installations. If you fail to do this properly, then the adhesive won't bond to the wall.
- If you are using a dry mix thinset, always add them first to the water, never the other way around.
- Mix a thinset just enough for you to use in 20-30 minutes. If you mix too much, it may harden before you can apply it.
- Select the correct trowel type and size depending on the tile and surface you will be working with.
- Spread the thinset completely and evenly throughout the surface. They work best when applied in thin layers across a smooth substrate. As a reminder, never apply too thick thinsets as this will result in a poor tile installation. Thinset will squeeze out from under the tile causing problems with grouting.
- If uncertain, there is a thinset calculator online that helps you determine the amount of thinset you will be needing for your project as well as the amount it will cost you.
Wrapping Things Up
Tile installation can be a very difficult job. But with the right preparation, anyone can do it. It is important to select the type of thinset that is suited for your project. Then, consider your tile characteristics, the substrate you’ll be working on, and personal height preference when calculating thinset thickness.
Spread thinsets evenly for proper bonding. Keep in mind that applying too much will ruin grouting and you may have to start all over again.
Need more advice on your tile installation projects? Check out our other post that may help!